Have you ever discovered a population of rare native plants gorgeously in bloom and think to yourself “I must come back and collect seed from these plants to restore their population elsewhere”? Summer rolls on, life gets busy, and one fateful autumn day you suddenly remember the wonderfully healthy population of plants you were interested in collecting seed from. So, you gear up, head out into the field with marvelous vigor, but are soon sorely disappointed. You are too late, and the seed has fallen.
Has this ever happened to you? Have you ever wished there was a guide readily available that could help you understand when the seeds of native species are ripe? Now, there is. For northern Illinois at least. Welcome to the Northern Illinois Native Seed Phenophases Guide.
The native species listed in this guide are local to what is generally known as “Northern Illinois”, specifically, the counties of McHenry, Cook, DuPage, Lake, and Lee. The data was generously donated from volunteer groups, not-for-profit organizations, and municipal agencies. Some of the seed collection data sources utilized in this guide date back to 2005 and it is assumed seeds were collected during their prime ripening stage in any given year and are specifically local. It is also assumed seeds were collected from wild sources (i.e. not collected in a formal manicured garden setting). Yearly differences in climate/weather patterns, annual/monthly precipitation data, and average monthly temperatures were not taken into consideration.
Finally, major variances and anomalies were removed from any data that was used. Examples include seeds from species that were collected during the winter and prior to the next growing season (e.g., seed that ripened in September 2018 and was collected in February 2019). Native brome and rye grasses are not recommended to be collected after late October because their seeds often disarticulate from the glumes quite early during the seeding phase.
If you are interested in helping add data to this project, please submit individual observations to the respective Facebook group within your county. Organizations or groups that perform large-scale seed collection operations can submit their data at the end of the season. If this guide works out well, it could be a model for other natural areas conservationists throughout the country to use.
The more data collected the more refined this list will become. Phenological shifts, which are likely happening due to climate change, can be tracked over time as well.
Here is a link to our website that has the chart available for viewing and download. This is where I will keep the most up-to-date documents. woodstowetlands.com/seedcollectionchart/
Our survey last week suggested that September 10-12 were better for more people, but plenty said these dates were not their top choice. The top topics people chose were habitat restoration lessons learned, weed management strategies and science and monitoring. Most respondents were resource managers.
Our planning team has met a few times already and we will update you during the winter.
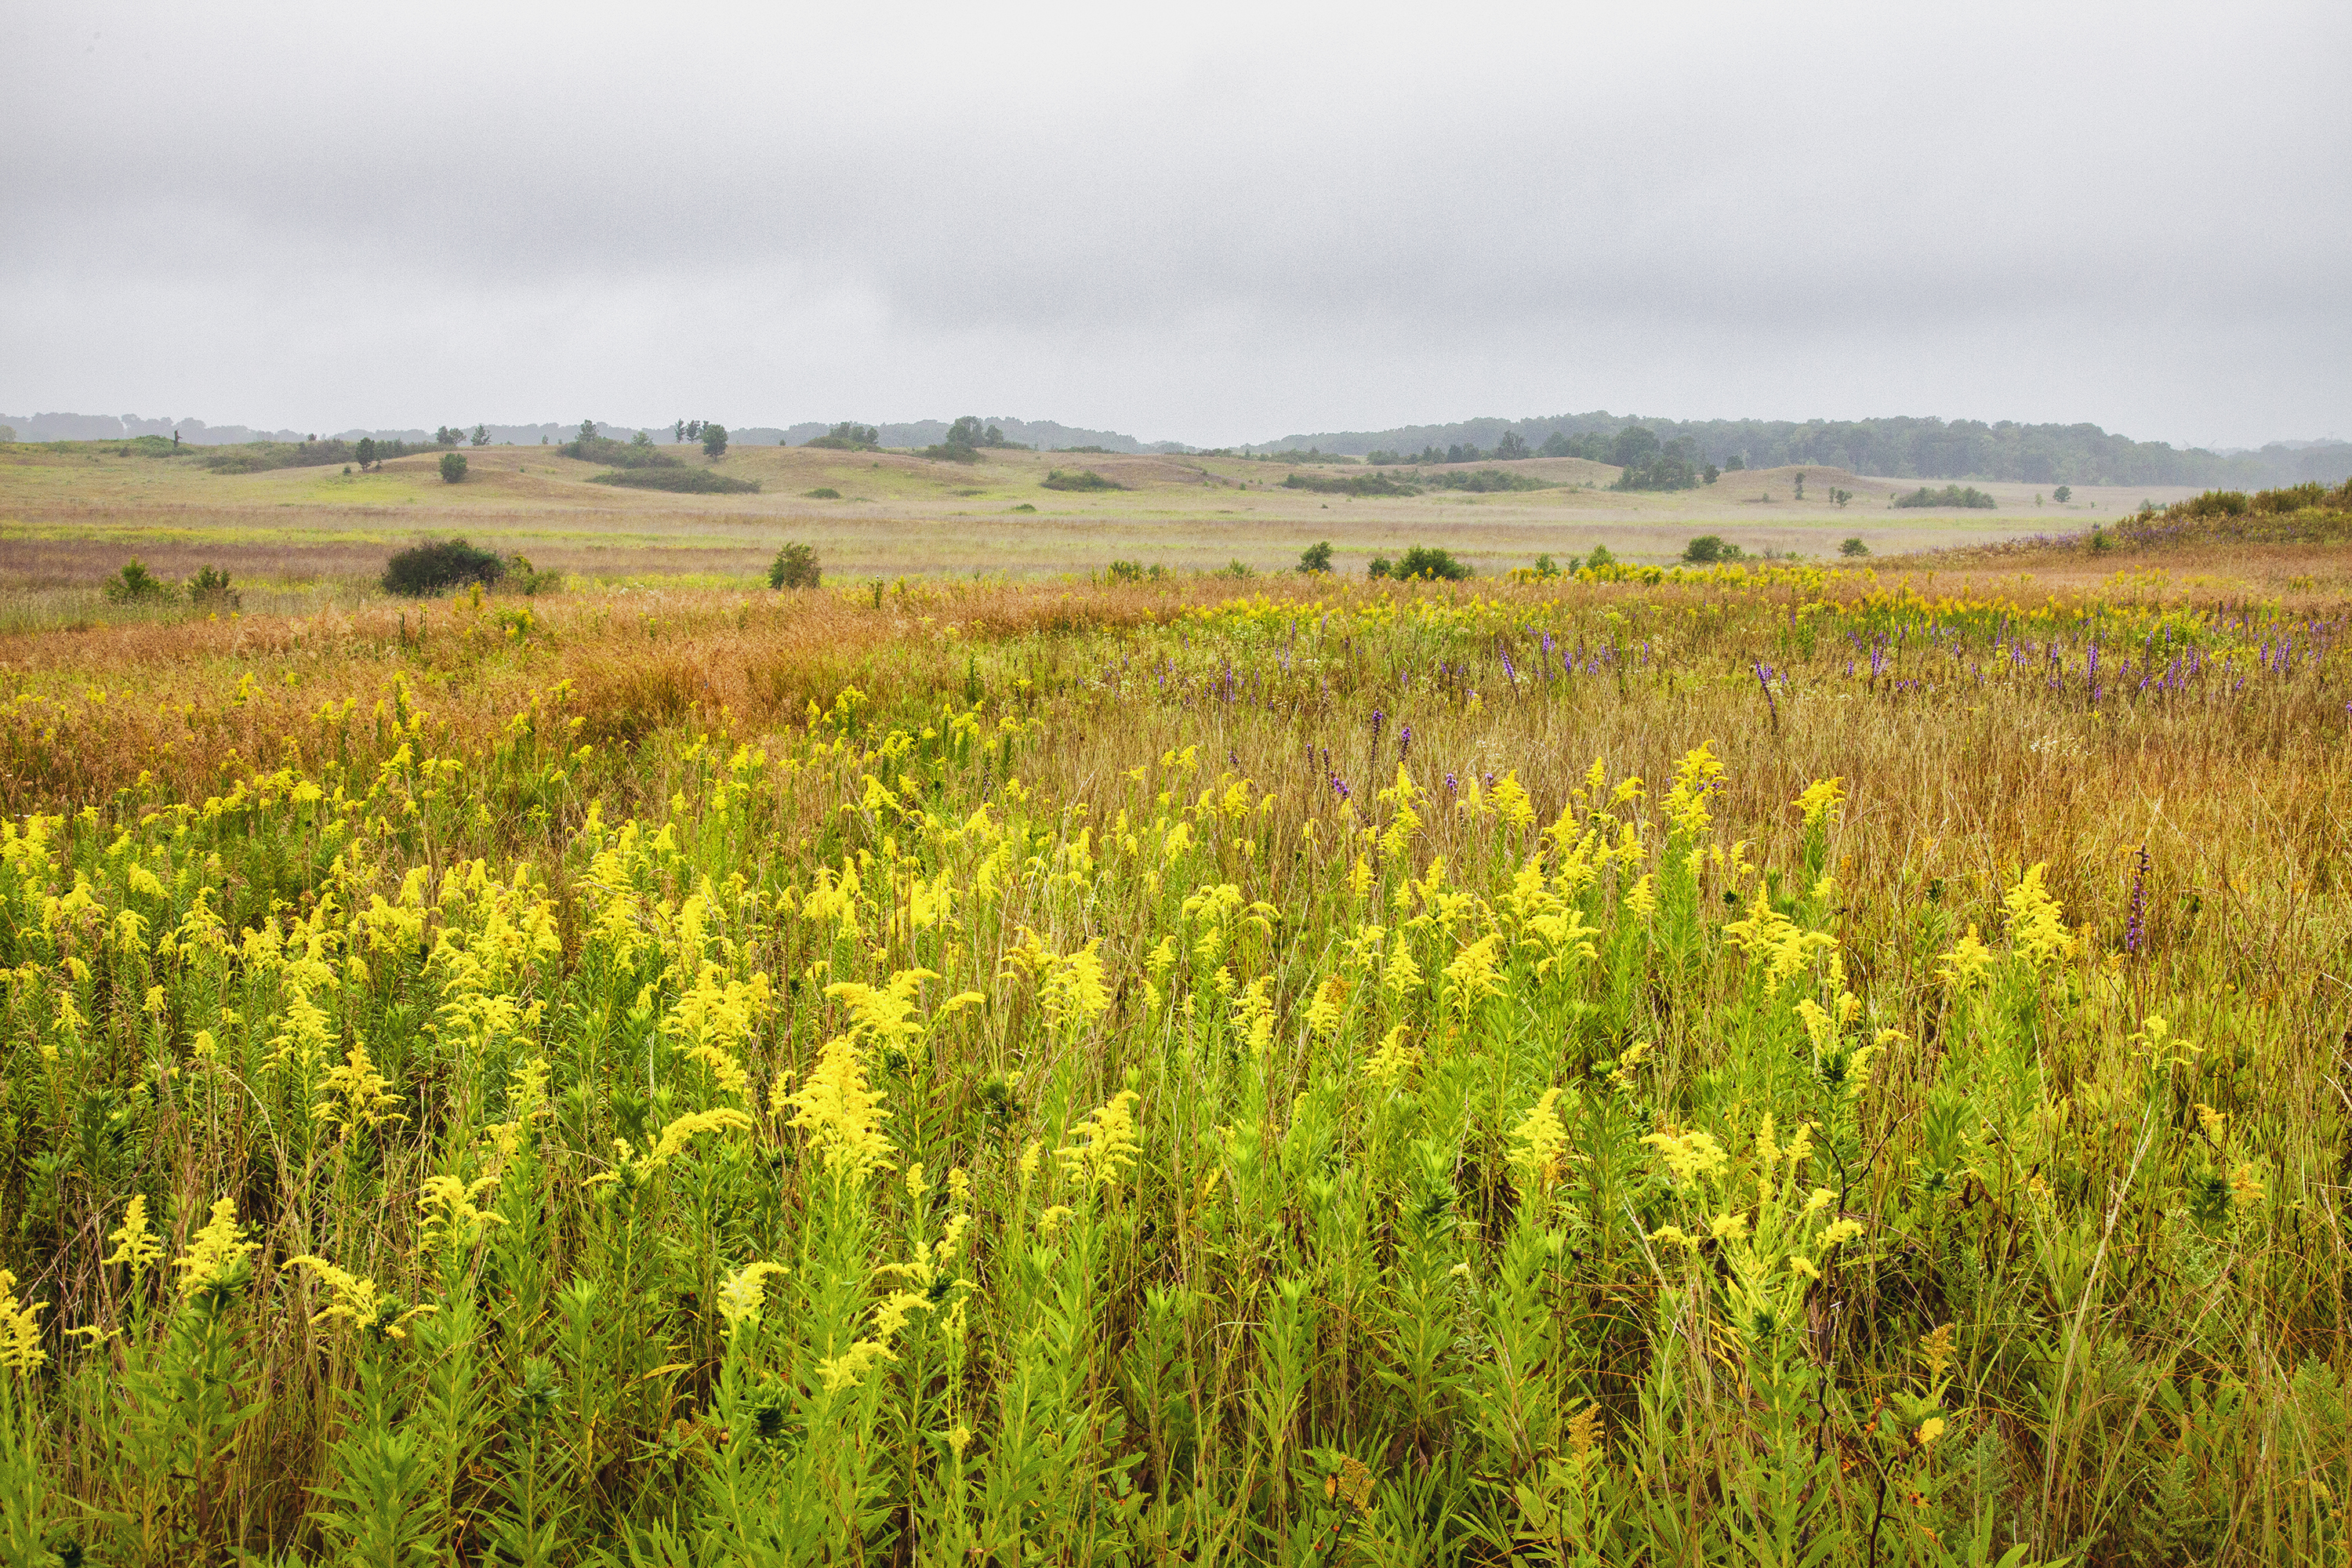
Photo by Charles Larry Main unit prairie. Looks like weedy Canada goldenrod to me. Not all that glitters is gold.
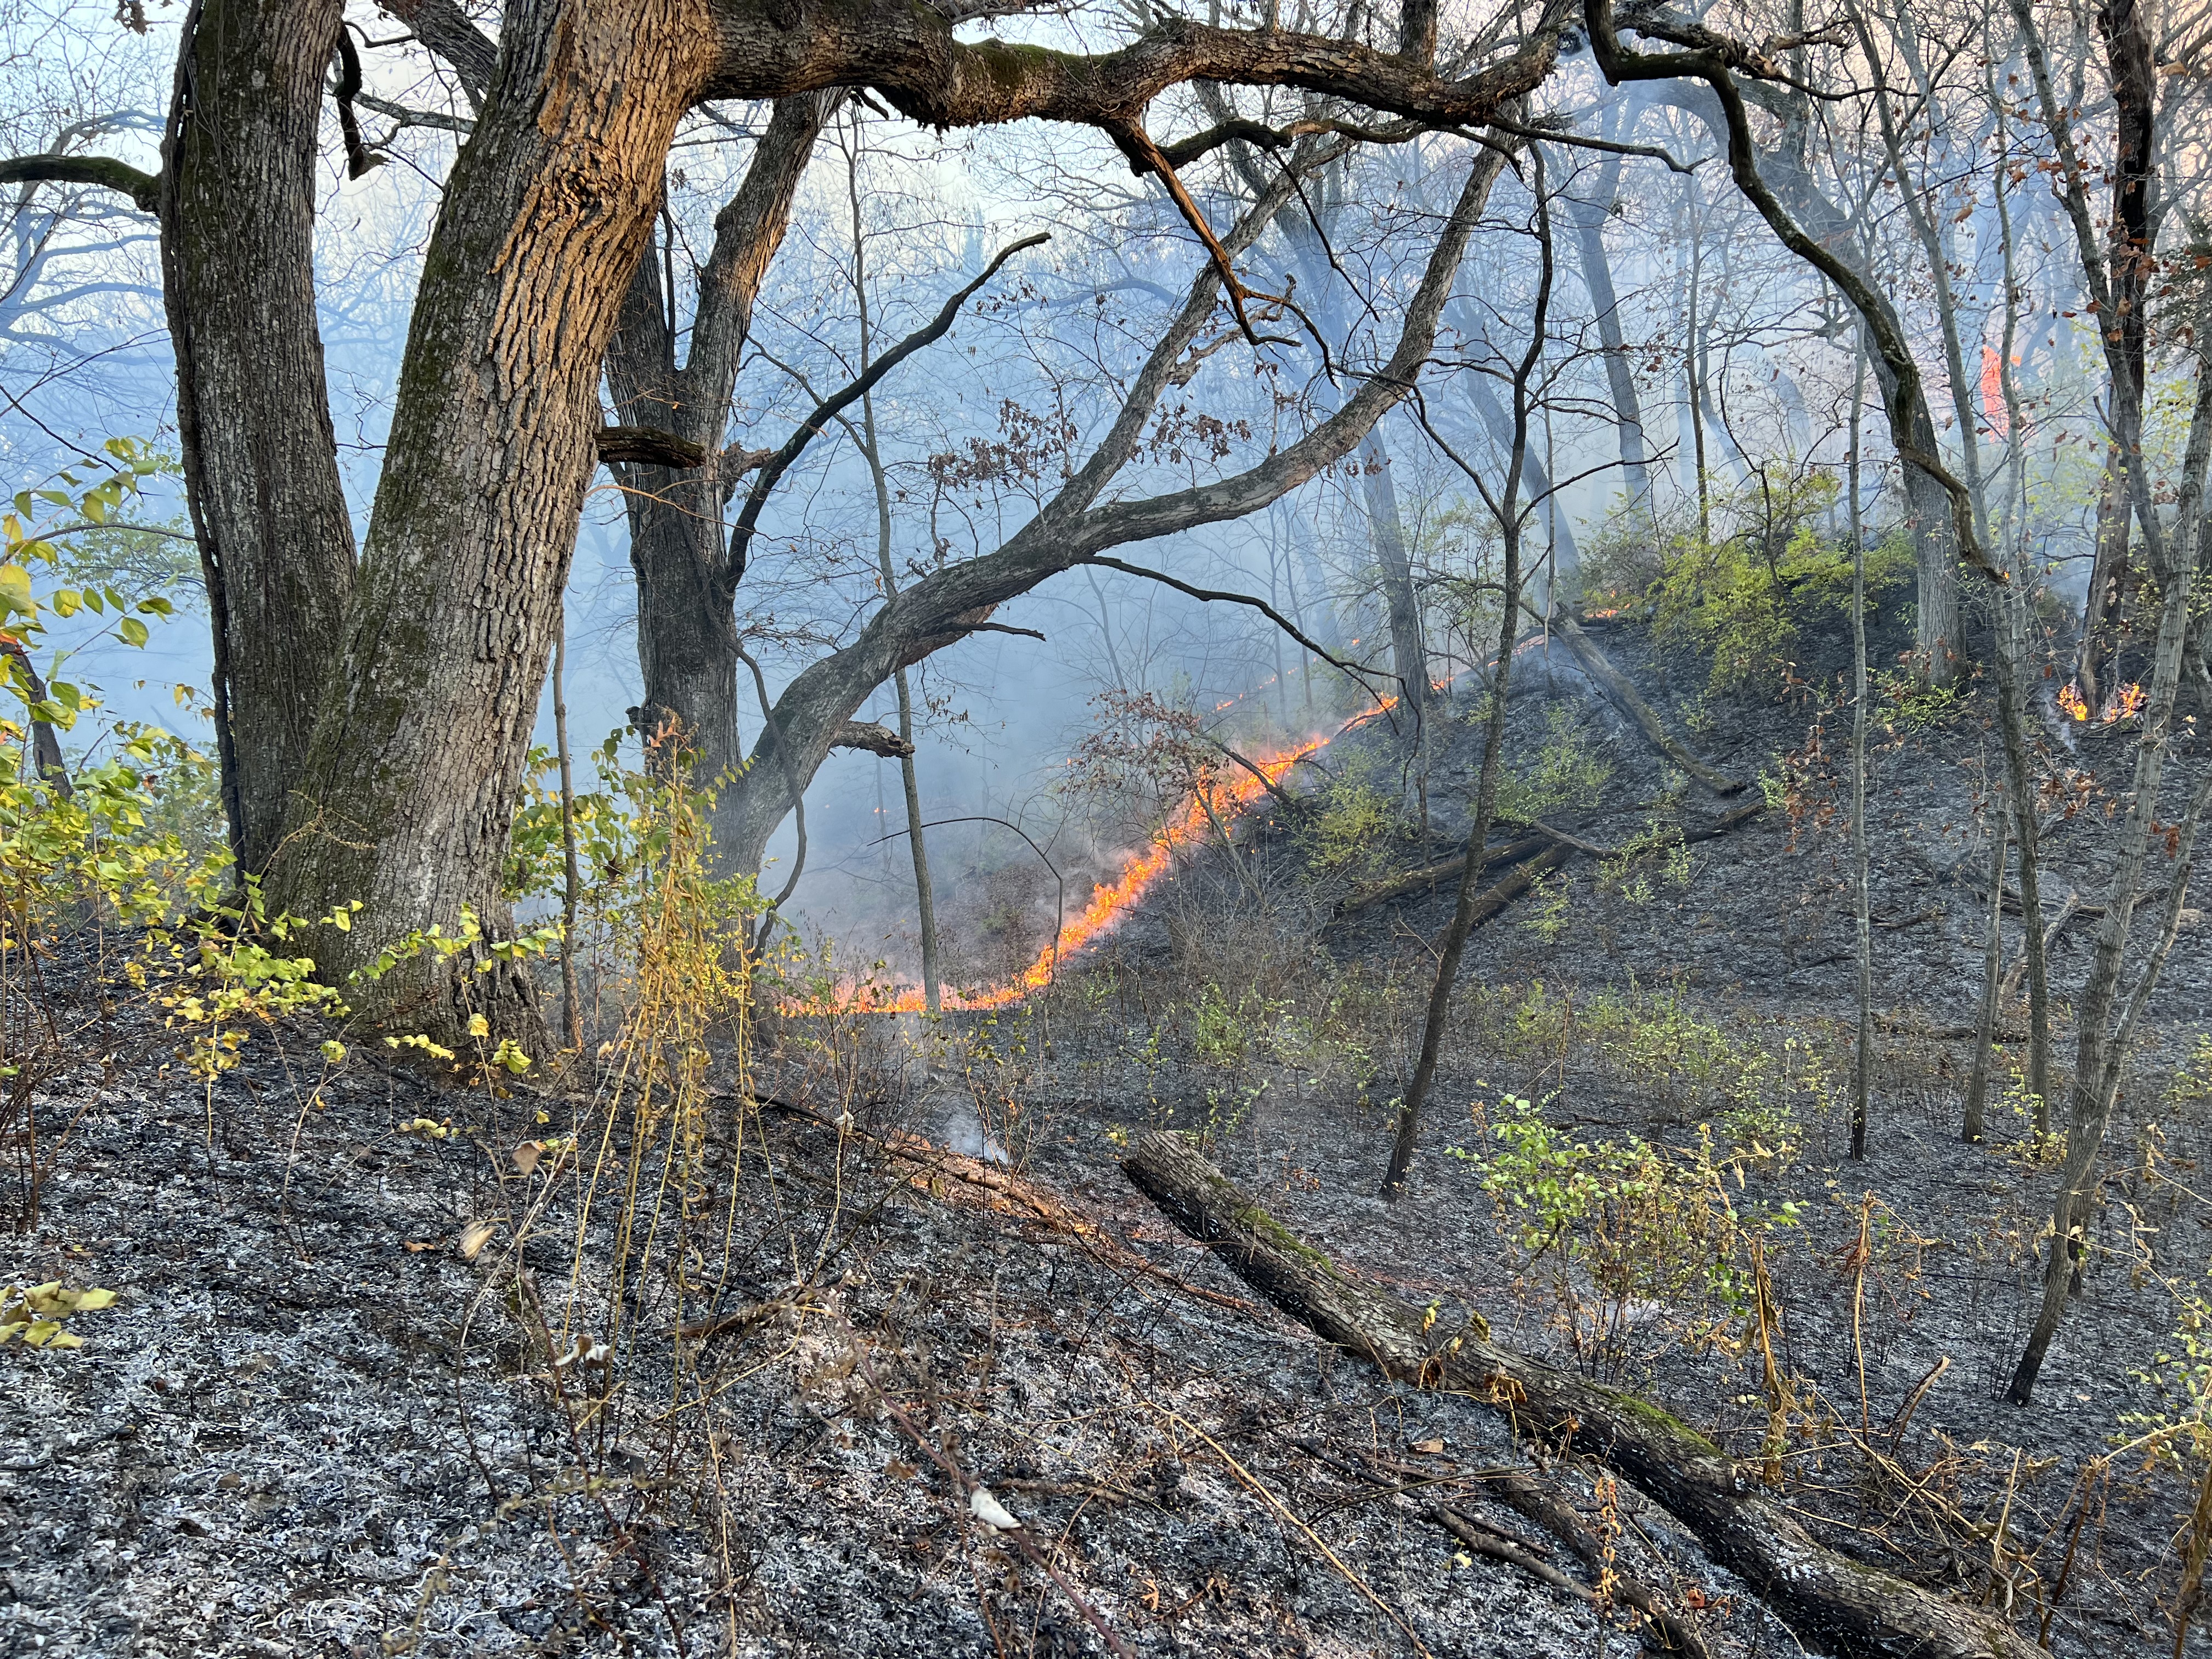
On November 17, 2023 Middle Rock Conservation Partners burned their Samuel and Edna Hill Site. This photo shows good ecological fire, with a slow backburn consuming oak leaf litter and some dried plants from the previous few years. The shrubs there are all invasive honeysuckle. The heat of the fire will top kill most of those shrubs. The shrubs will re-sprout from the roots and after several years be big enough to produce flowers and then seeds. In those intervening years the increased sunlight supports the growth of flowers, grasses, and sedges. Hopefully, the crew returns in a few years to burn this woods again.
The thick bark of this bur oak is not effected by the modest heat of this fire. Although a really old oak with a rotted center can sometimes get a chimney fire going and damage the tree. Bur oak regeneration requires sunlight which comes with repeated use of fire, and in a restoration phase selective thinning of non-oak trees and shrubs.
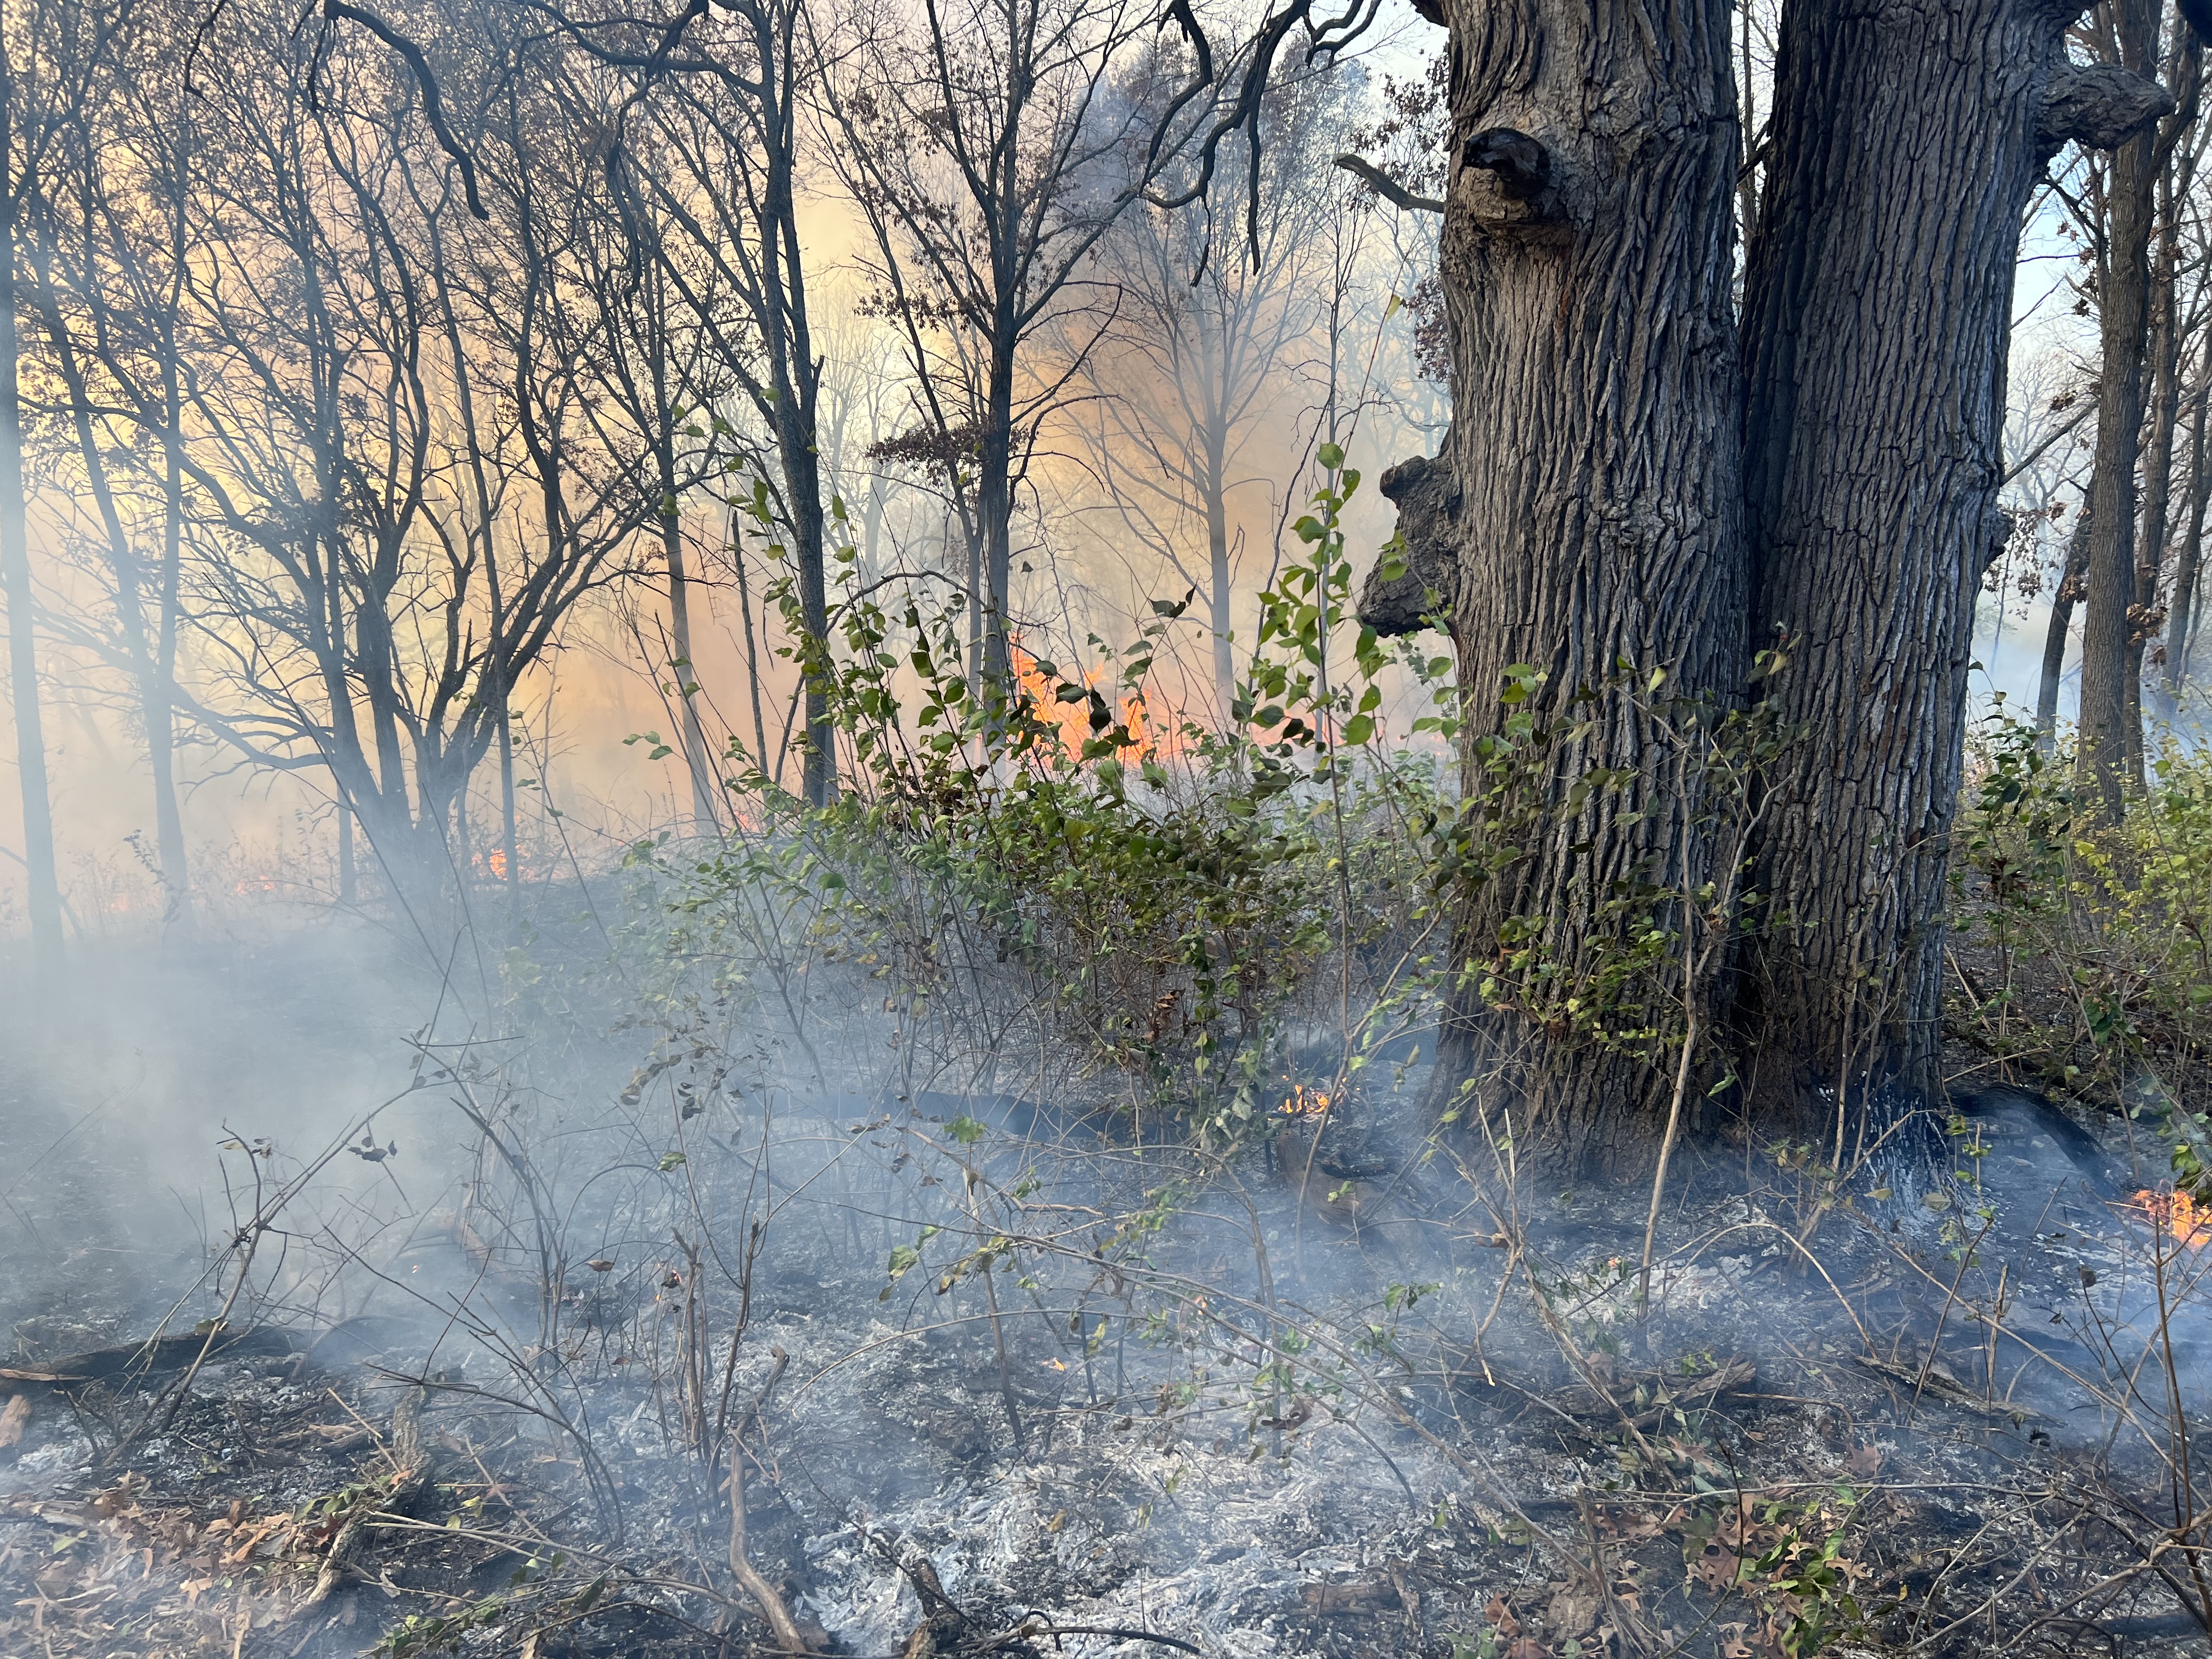
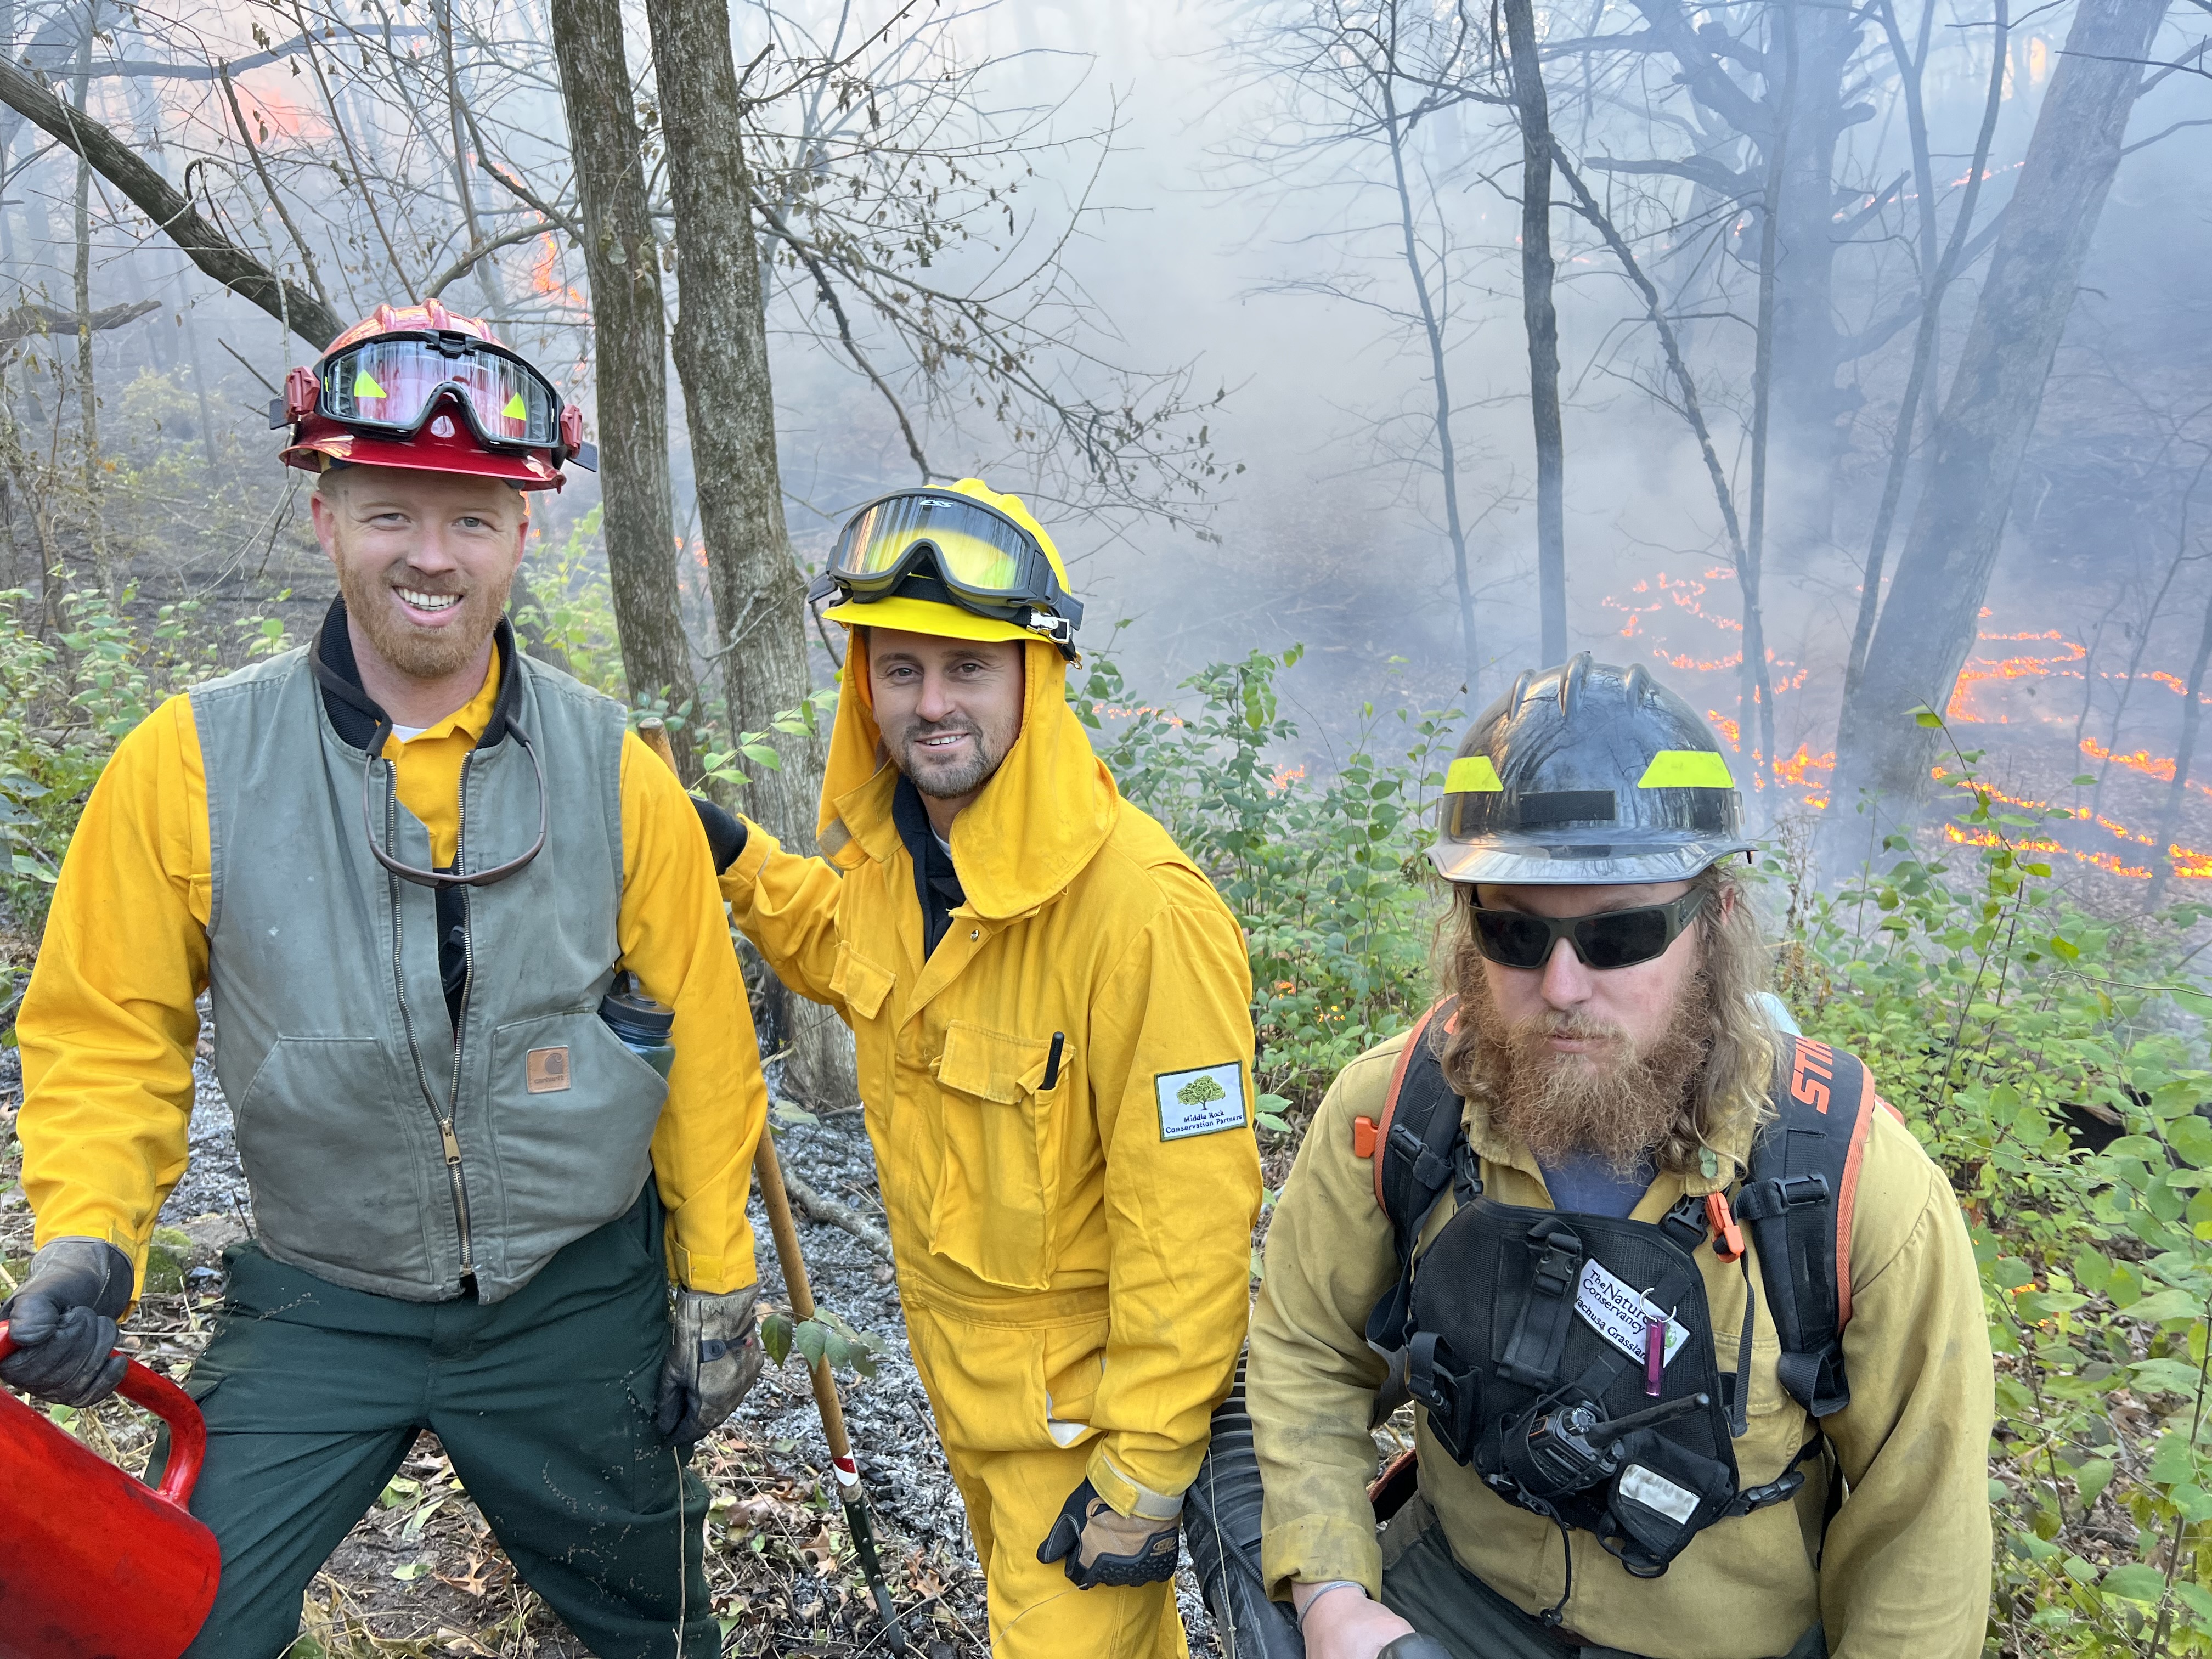
Kaleb Baker, Pete Oliver with crew boss Phil Nagorny. Behind them at the bottom I can see how Kaleb walked in a wandering circle with the drip torch to get that bottom burning. Behind Kaleb the fire is moving more vigorously up a north facing slope. The winds were northwest.
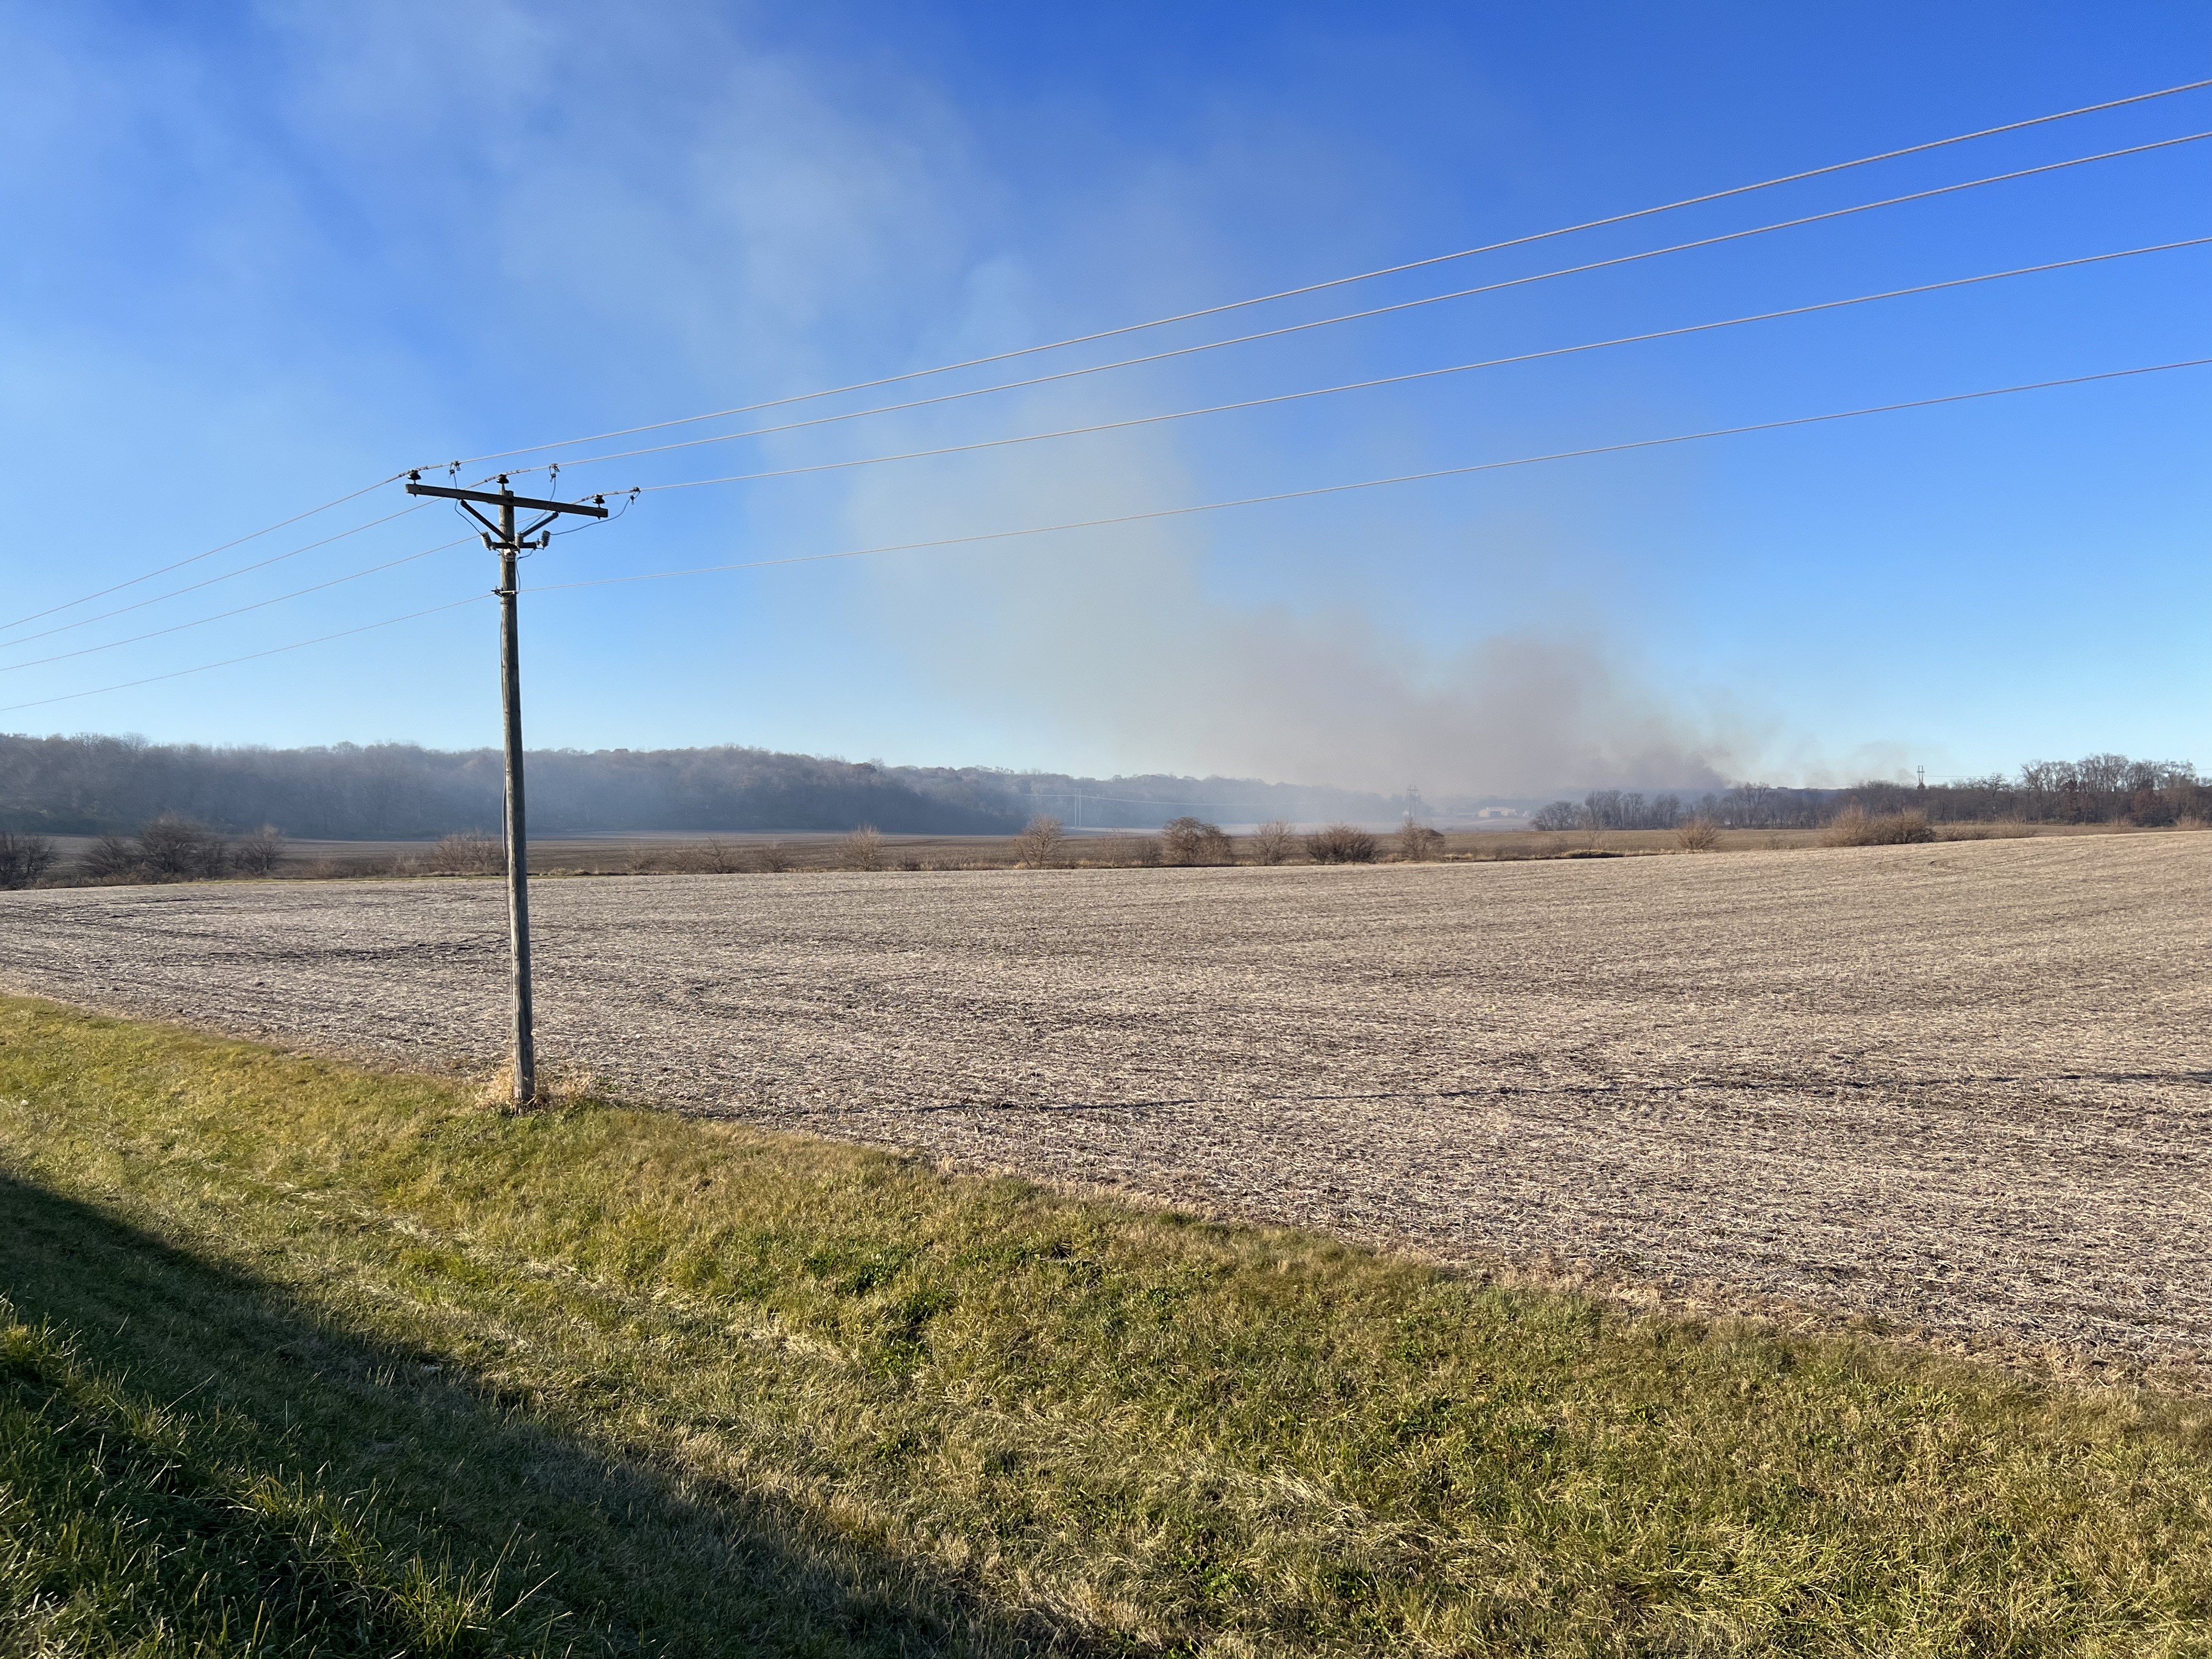
The down wind smoke column rose slowly as the fire reached peak burning. The wind direction was chosen to be away from the adjacent highway.
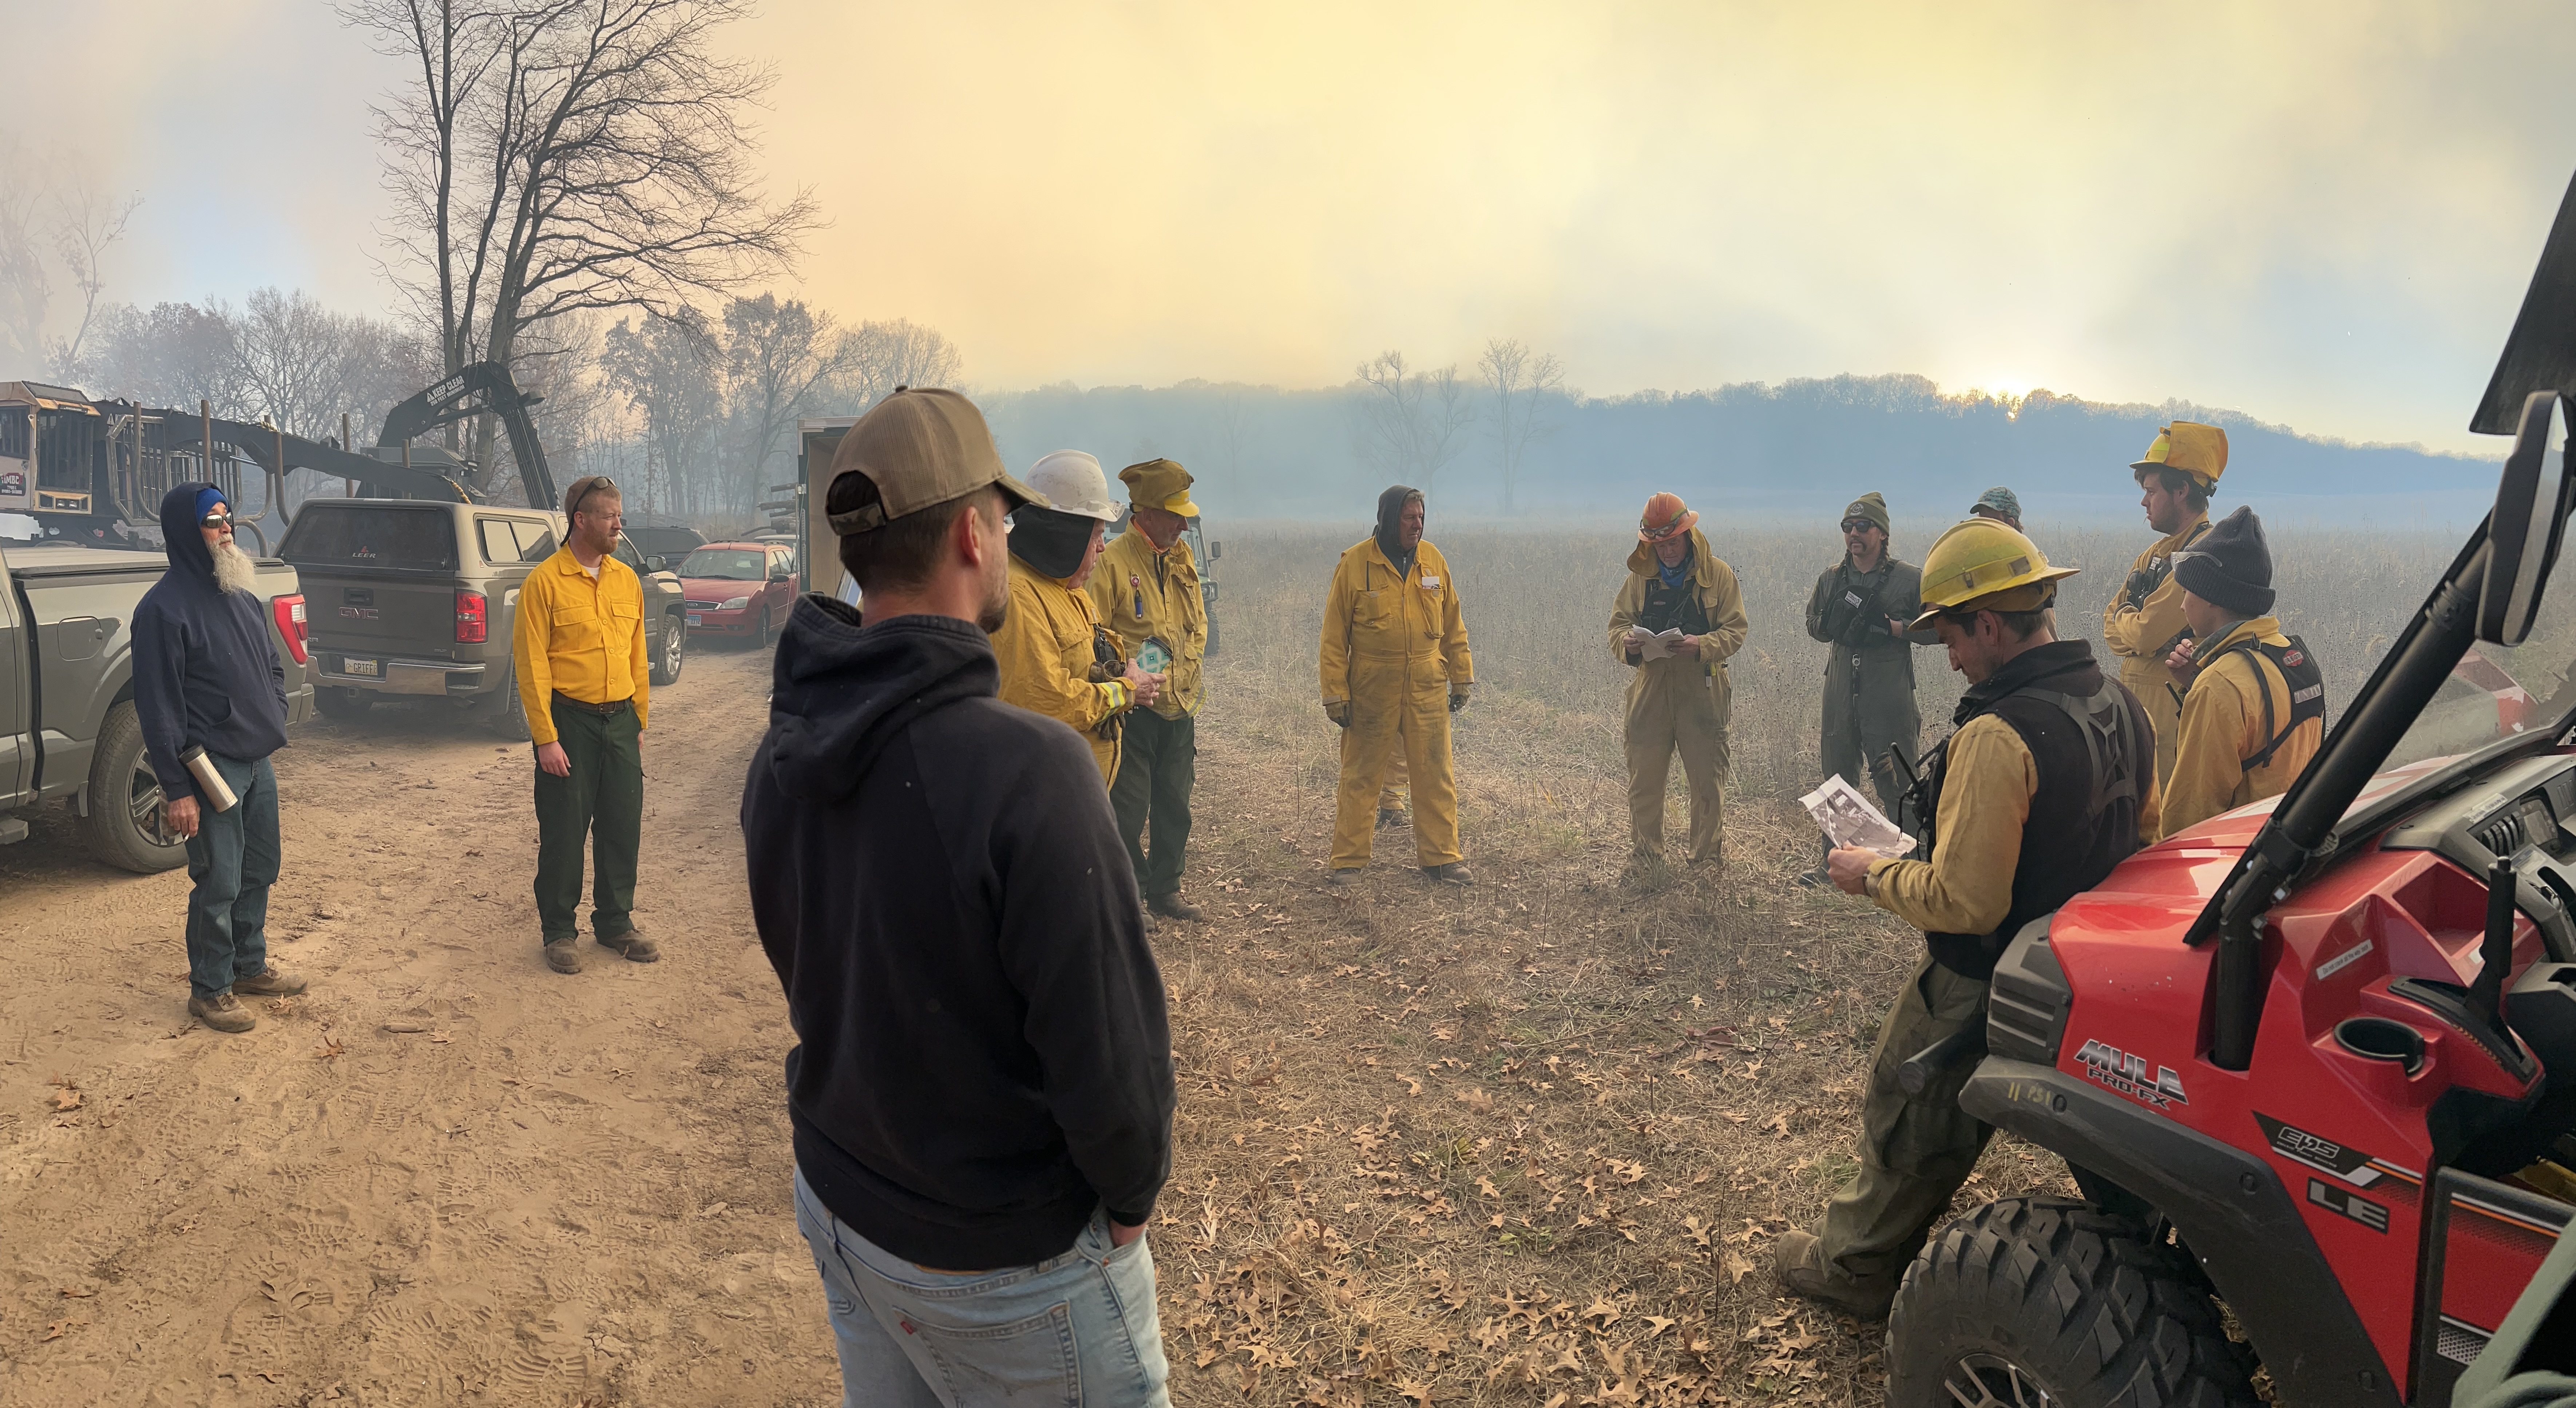
Near the end of the day, burn boss Damian Considine leads an after action review to share lessons learned and discuss tasks for the end of the day. Some logging equipment of Grover Tree is seen on the left. Grover has helped thin some of the trees that were crowding the oak and hickory on this site, mostly cedar, cherry, box elder and elm.
This is the second prescribed fire at this site, which the group purchased four years ago. You can find other posts about this site:
We are working to plan the 2024 GRN workshop at Nachusa. We were wondering what time of year you might want the workshop, and what things you want to talk about? I made a very short survey to get your feedback.
By: Julianne Mason, Restoration Program Coordinator
It’s an understatement to say that woody invasives are a major threat to our natural areas. They can displace native plant communities, alter wildlife habitat, and impact nutrient cycling and other ecosystem processes. Here in northeastern Illinois, they have become nearly ubiquitous. I’m hard pressed to think of any protected upland areas in my county that are not threatened by some kind of woody invasive species. The scale of where woody invasives need to be treated = basically, everywhere we want to maintain or restore highly diverse natural communities!
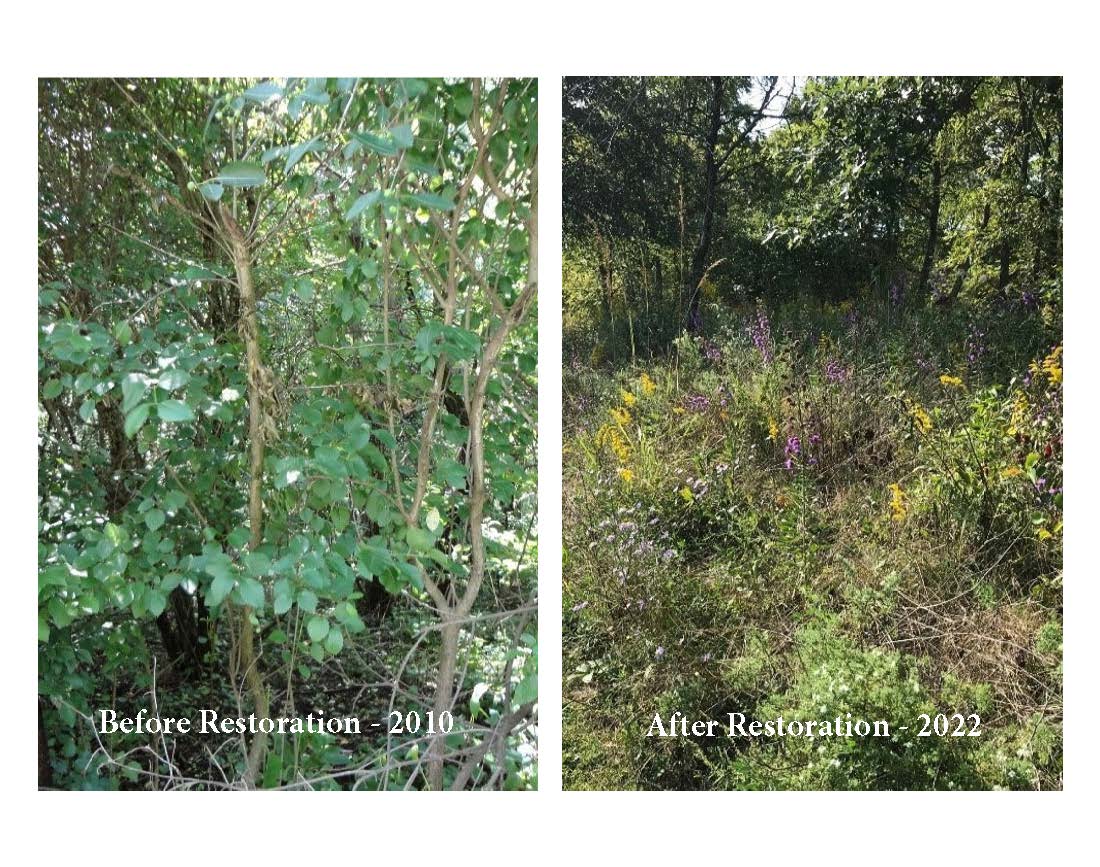
Dense brush before restoration (left) and more diverse savanna community after invasive shrubs are managed (right).
Previous posts in this blog have documented how basal bark treatments are an effective and efficient method to kill invasive woodies. Bill Kleiman’s original posts on the topic were published in five parts in 2016. Part 1, Part 2, Part 3, Part 4, Part 5. If you haven’t read them yet, I highly recommend doing so. Based on his recommendation and data, we did our own trials which were also highly successful. JM post. After that, we started using basal bark treatments fairly extensively to combat invasive woodies. Even so, we still use cut stump treatments in many situations too. I analyzed the past six years of treatment data to compare the time and resources needed for the two different treatment methods to control woody invasives.
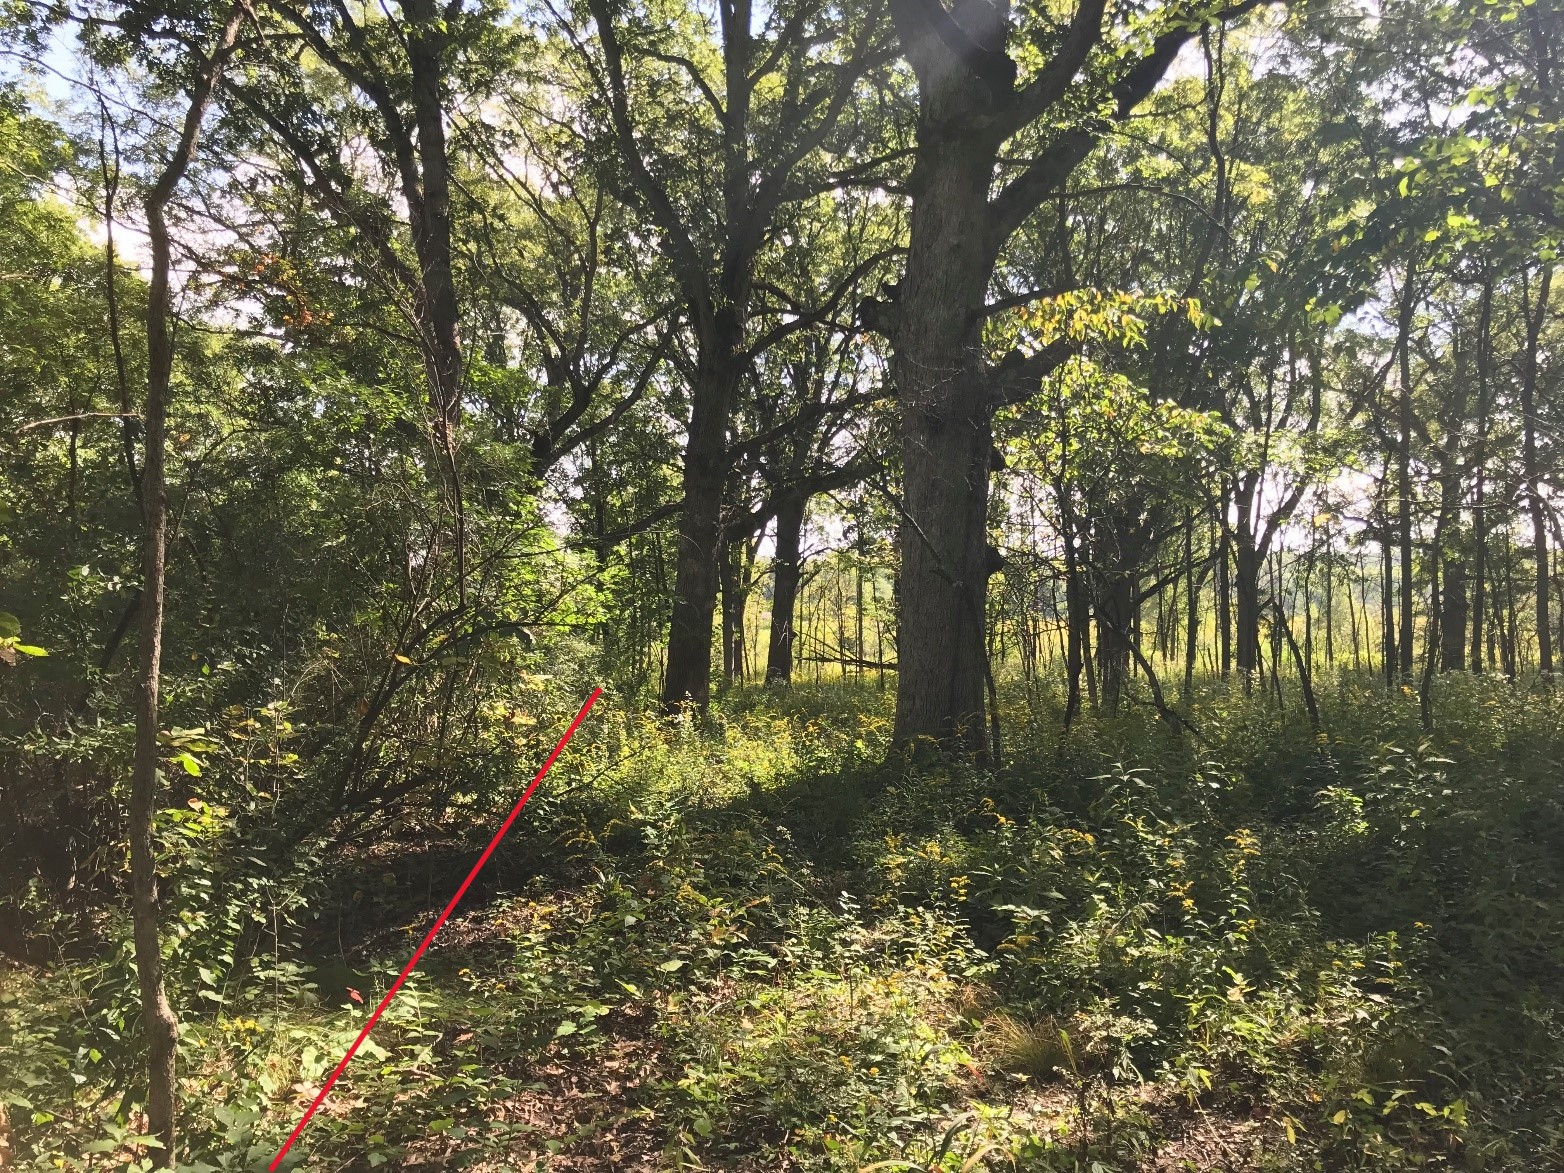
Woodland where invasive shrubs have not been controlled (left) and where woodland has been managed with prescribed burning and basal bark treatment to invasive shrubs (right).
Here’s a summary of the past six years of treatment data for my organization (the Forest Preserve District of Will County in Illinois). For scale, we own ~22,000 acres in 80 preserves scattered across the county, and we perform a moderate level of ecological management in ~6,000 acres.
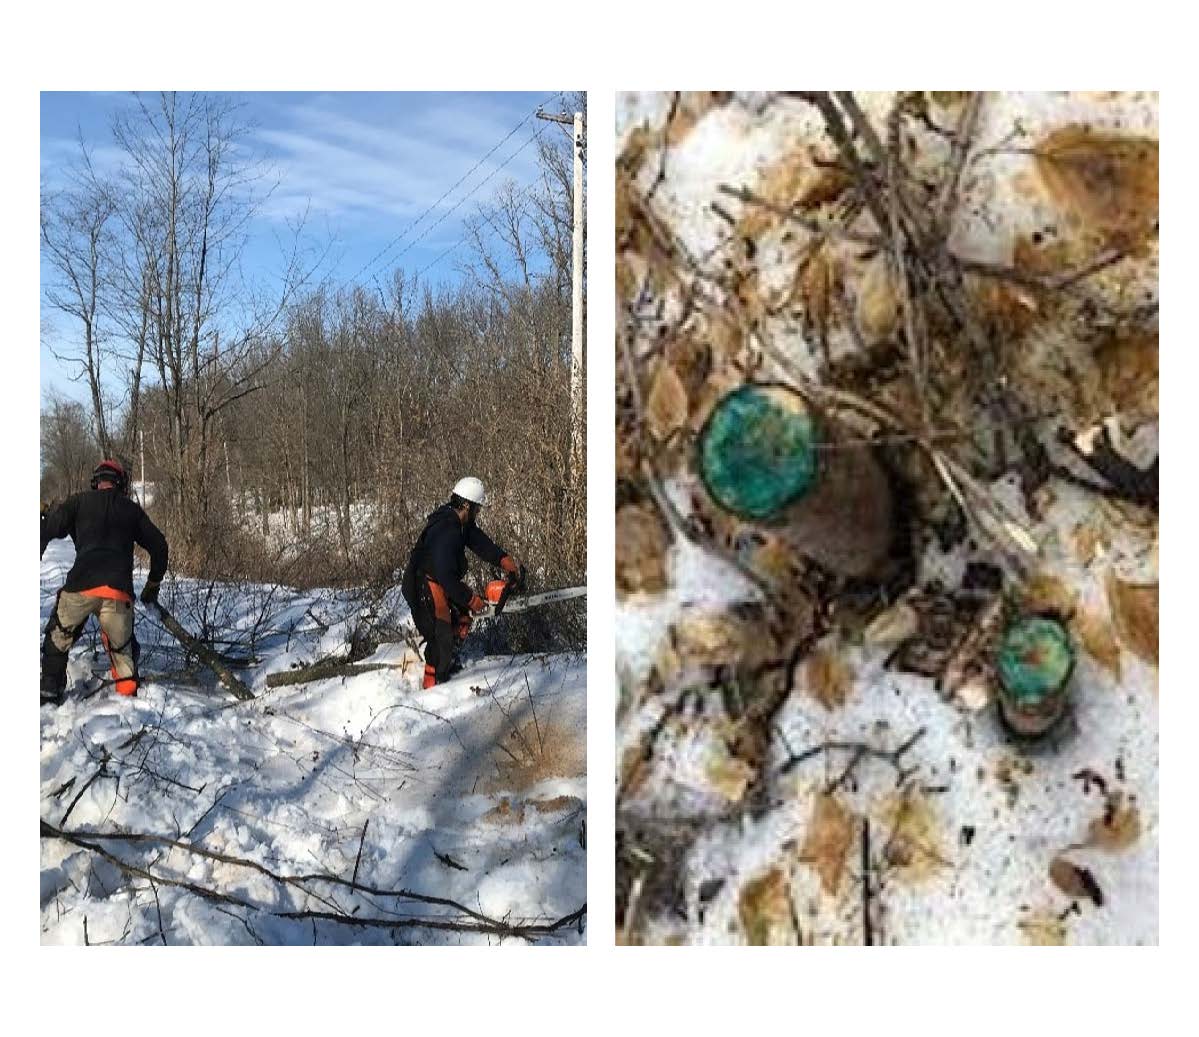
Cut stump treatments are when the invasive shrubs are physically cut, using chainsaws, hand tools, or specialized machinery like forestry mowers. Herbicide is typically applied to the cut stump to kill the shrub.
Cut stump treatment where the brush is cut with chainsaws (left) and herbicide applied to the cut stumps (right).
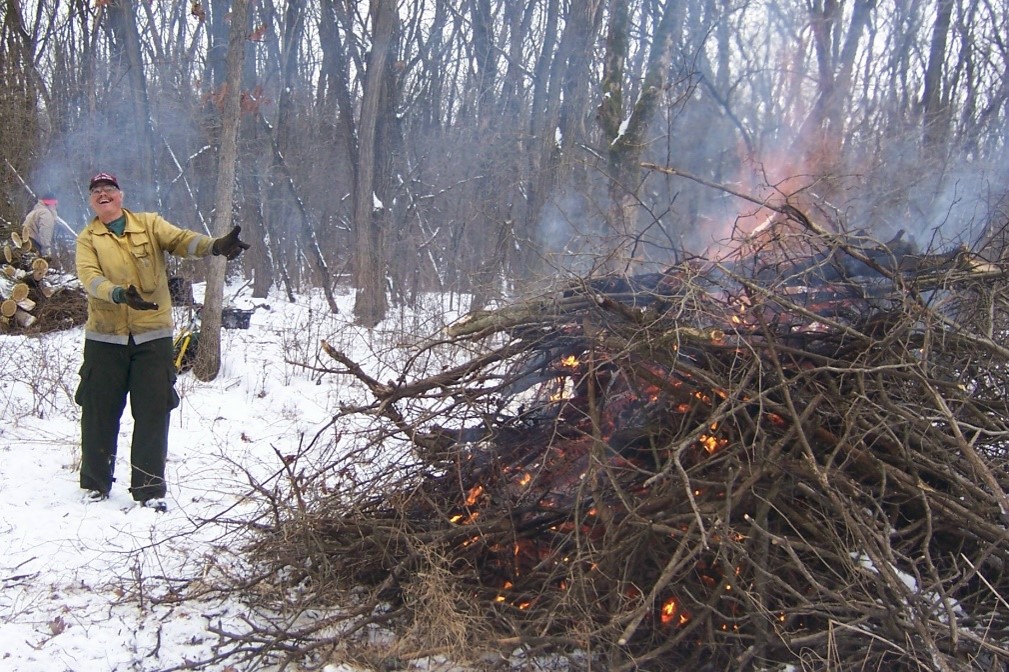
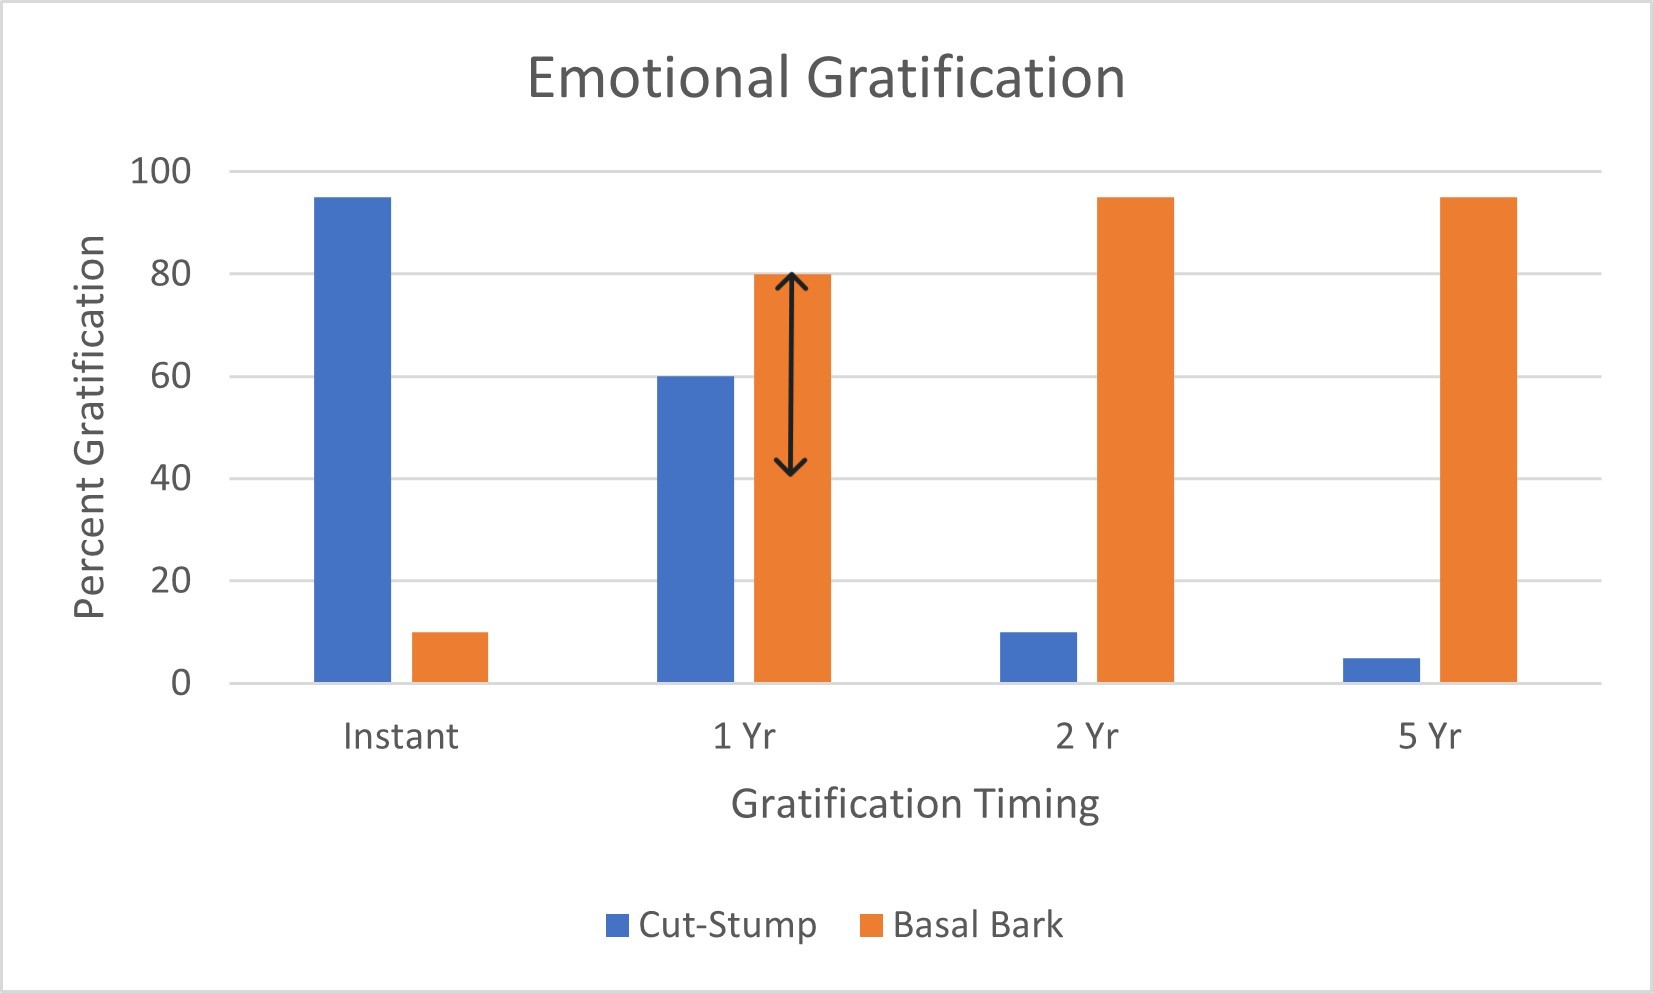
Sometimes, the cut material is stacked into piles and burned. This is fun and satisfying, and brush clearing using the cut/stack/burn method is a popular activity during volunteer workdays. The main advantage of cut stump treatments is instant gratification. We’re humans, after all, and it’s very satisfying to see visible progress after a day of hard work. A dense thicket of shrubs in the morning is physically removed, and it’s very satisfying to look back at our progress at the end of the day.
The cut/stack/burn approach is popular because it is fun and satisfying. We’re humans and we love instant gratification.
If machinery like a forestry mower is used, one drawback is that ground disturbance caused by the machinery can kill plant crowns located in the top inch of soil and result in opportunities for weedy species to establish. Generally, there is a slower recovery of the native plant community. This is especially true if the ground is not frozen solid. In our area, there are often limited numbers of days when the ground is frozen solid, which limits the acreage that can be treated under optimal ground conditions.
Mechanical clearing also results in instant gratification. Compare the area cleared (right) to the uncleared area of dense shrubs (back, left).
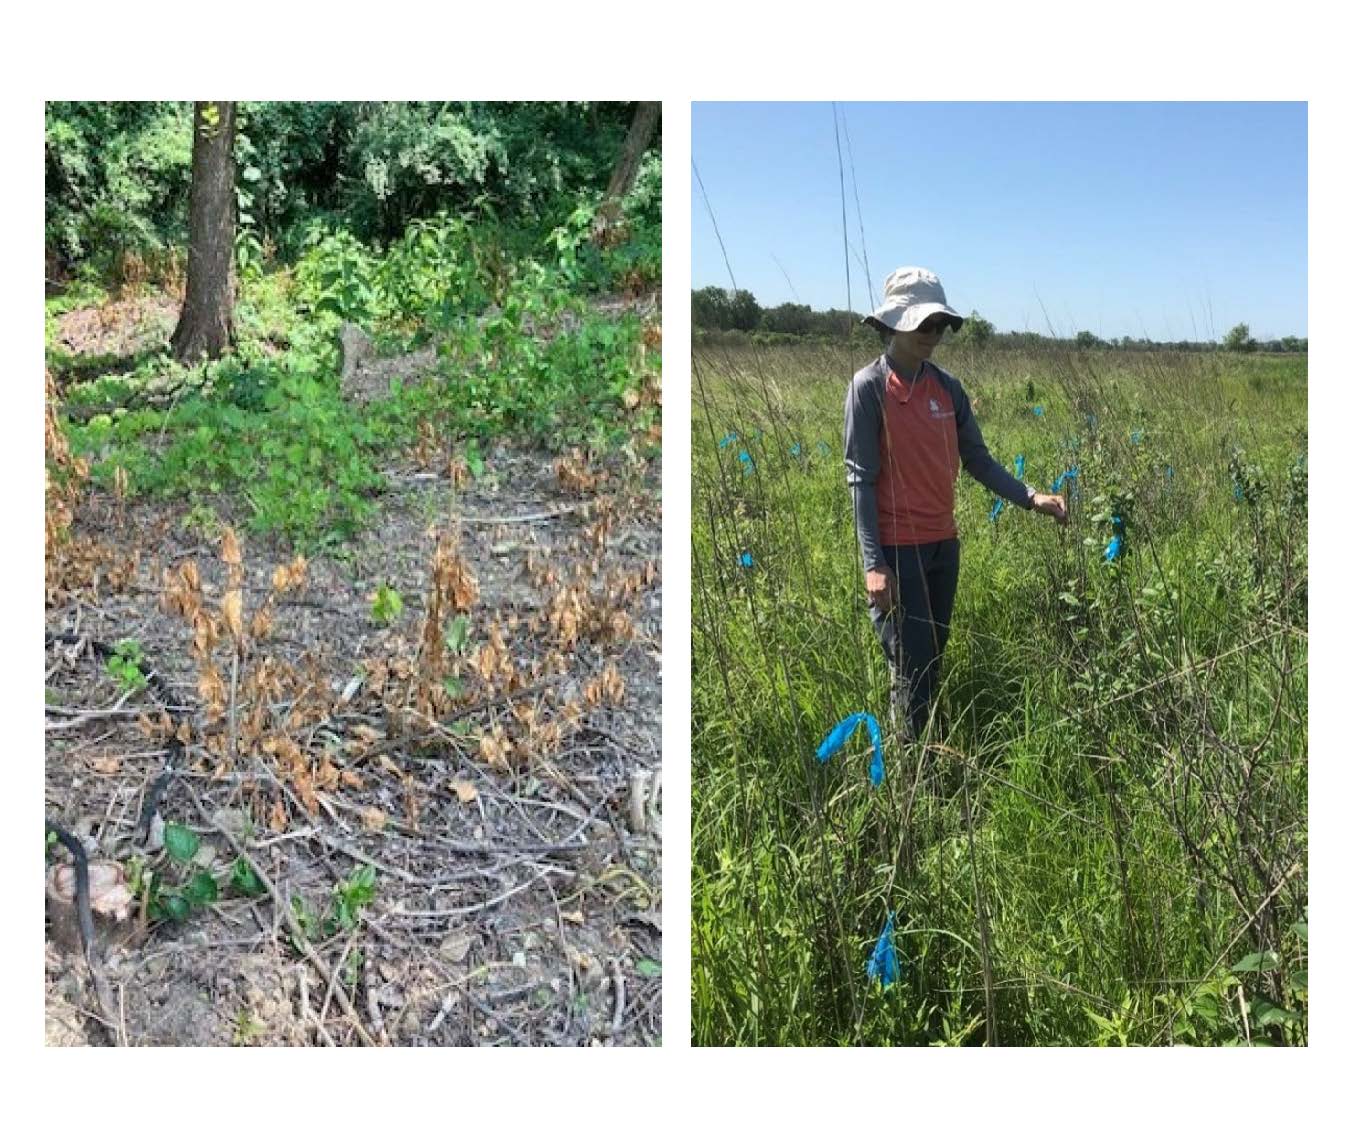
An unfortunate reality is that many invasive shrubs resprout vigorously after a cut stump treatment, and areas often need multiple re-treatments after the initially satisfying (but rather ineffective) cut stump treatment.
Invasive shrub resprouts after cut stump treatment. Note how much the shrubs grew back by the following summer.
In a previous study, I found that only ~30% of resprouting shrubs died from a follow-up foliar herbicide treatment. Insert sad face here.
Invasive shrub resprouts look dead after a foliar herbicide treatment (left). However, 70% of them rebounded to life (right).
Cut Stump Treatments – By the Numbers: Due to various factors, most of our cut stump treatments have been done by hand using chainsaws, and clearing with machinery has been used less frequently. For the past six years of available data (2017-2022), cut stump treatments have taken an average of 38 person-hours per acre. To complete 949 acres of cut stump treatments, it has taken over 30,000 hours by our staff, contractors, and volunteers. The initial cut stump treatments have used 1.0 gallon of herbicide per acre. Follow-up foliar treatments to re-sprouts have used an additional 1.8 gallons of herbicide per acre, and taken an additional 5 person-hours per acre. All that adds up to a lot of effort! However, multiple rounds of follow-up treatments are often needed, and in balance, little effective management is achieved especially compared with the amount of time and effort invested.
Basal bark treatments are an herbicide-only method. We typically use a backpack sprayer to spray the bottom part of the stem with 15% triclopyr ester (Garlon 4 or equivalent) in bark oil. It’s important to get full 360 degree coverage around the stem’s circumference for it to be effective. If most species are only sprayed on one side of them stem, the treatment will not fully kill them. A happy exception is that all canes that come out of the ground of multiflora rose and Japanese barberry need to be treated, but full 360 degree coverage is not necessary for those species. For small diameter shrubs, just the bottom inch or two need to be sprayed. For massively large shrubs (4-6+ inch diameter), the bottom 9-12” need to be sprayed. We try to use low pressure on the backpack sprayers to minimize the overspray zone and reduce collateral damage to other plants.
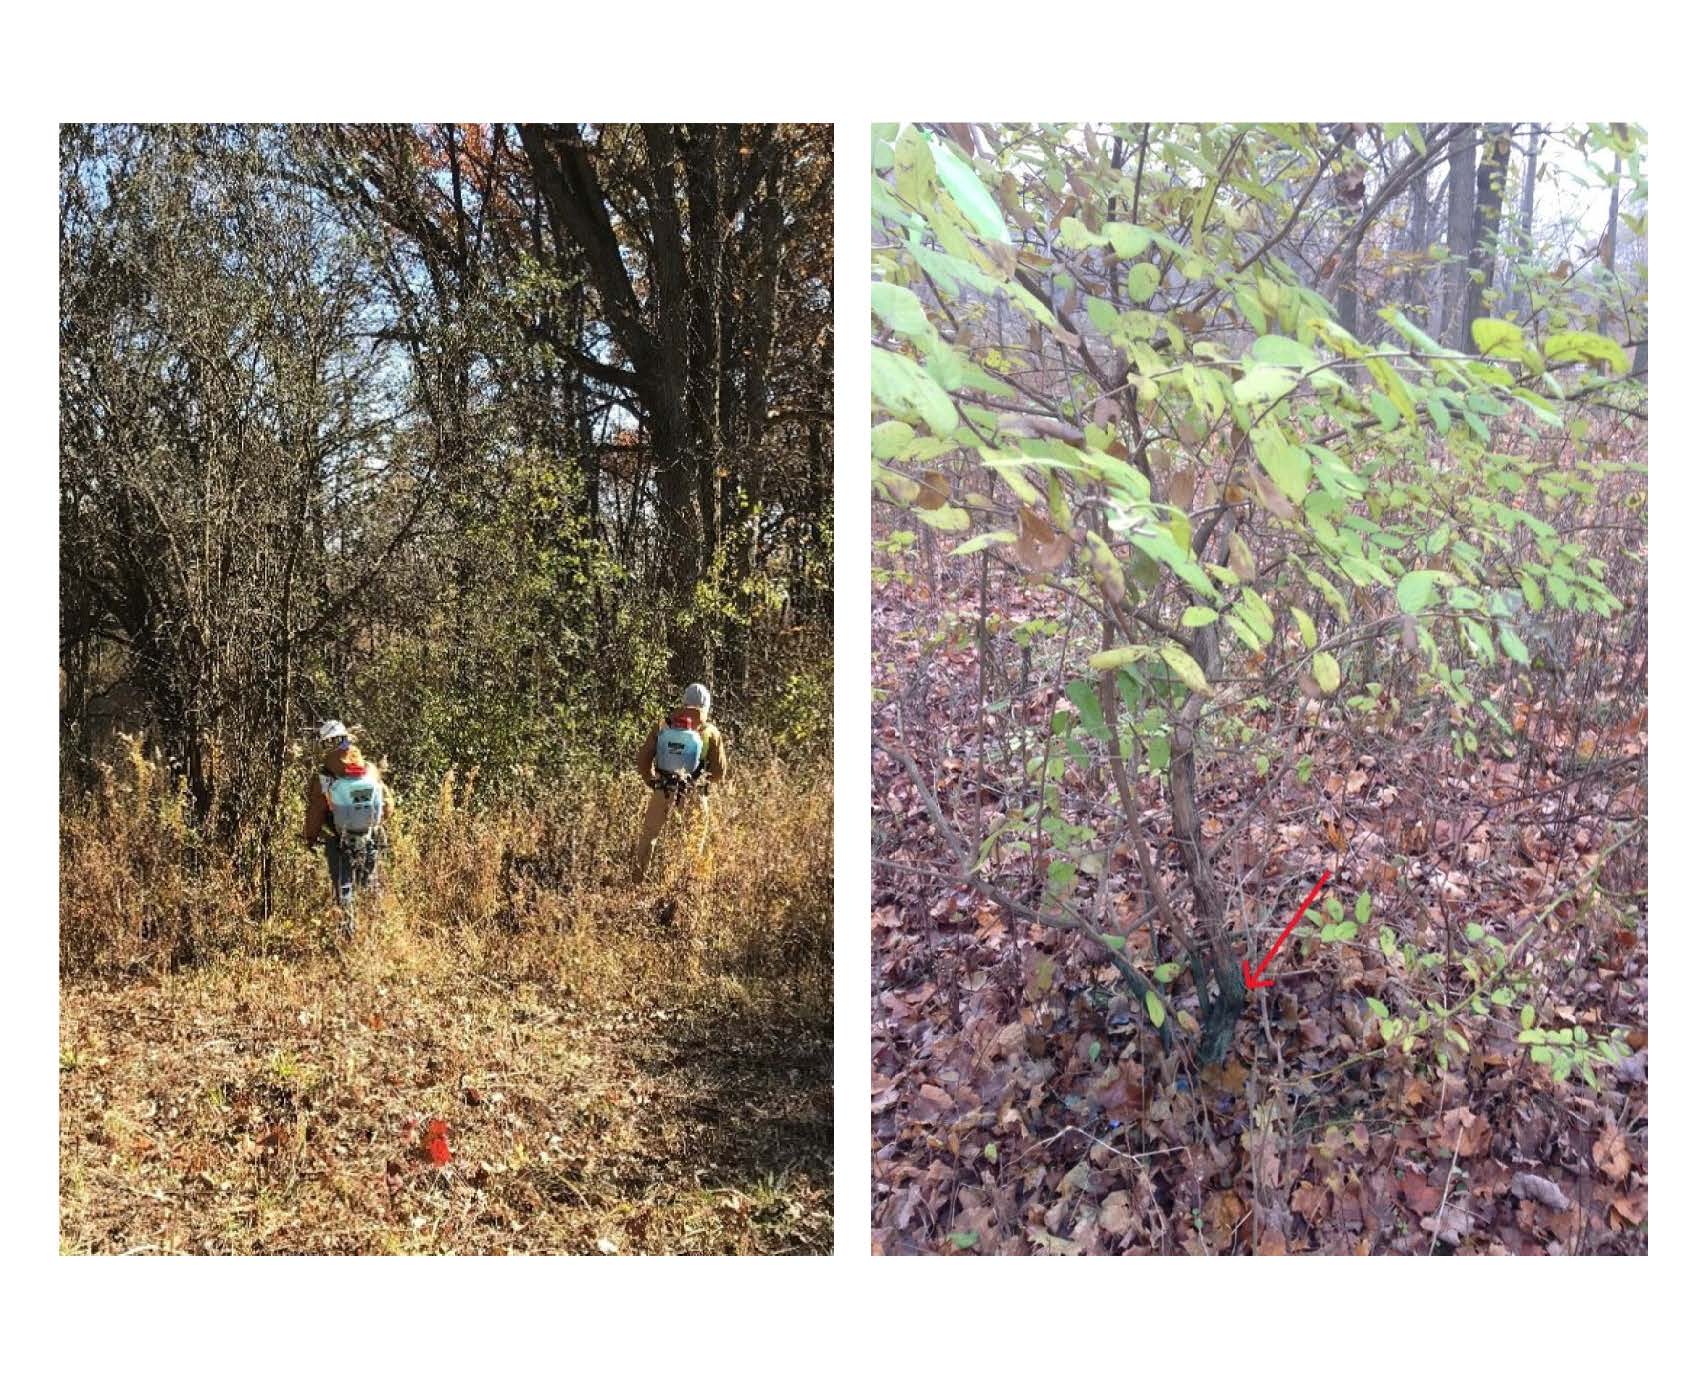
Basal bark herbicide crew (left) and invasive shrub with basal bark herbicide treatment (right).
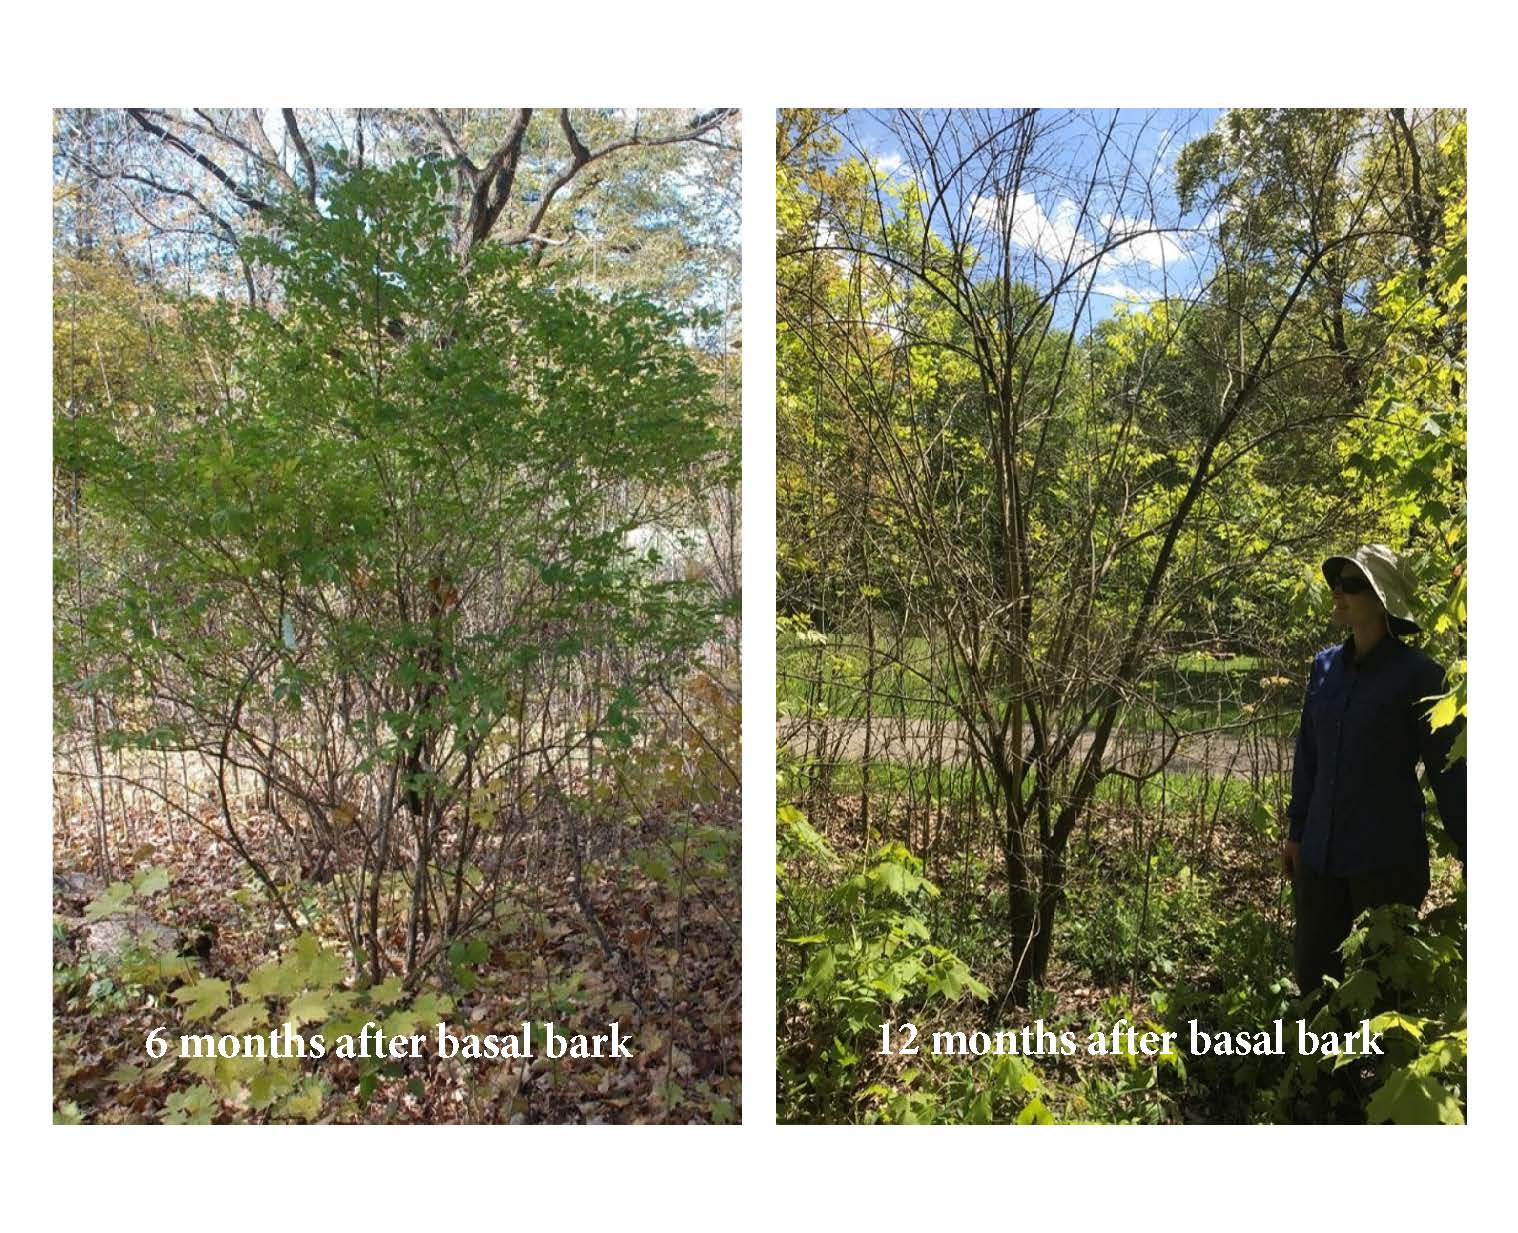
The main downside of basal bark treatments is that it can take a long time (even 12-18 months) for treated woodies to die. However, it’s highly effective – more than 95% of properly treated individuals do die. Eventually. It just takes time. From an emotional standpoint, it’s the complete opposite of the instant gratification of cut stump treatments – the gratification is delayed by many months or even years.
Slow death. Invasive shrub still has green leaves 6 months after basal bark treatment (left), but is fully dead 12 months after treatment (right).
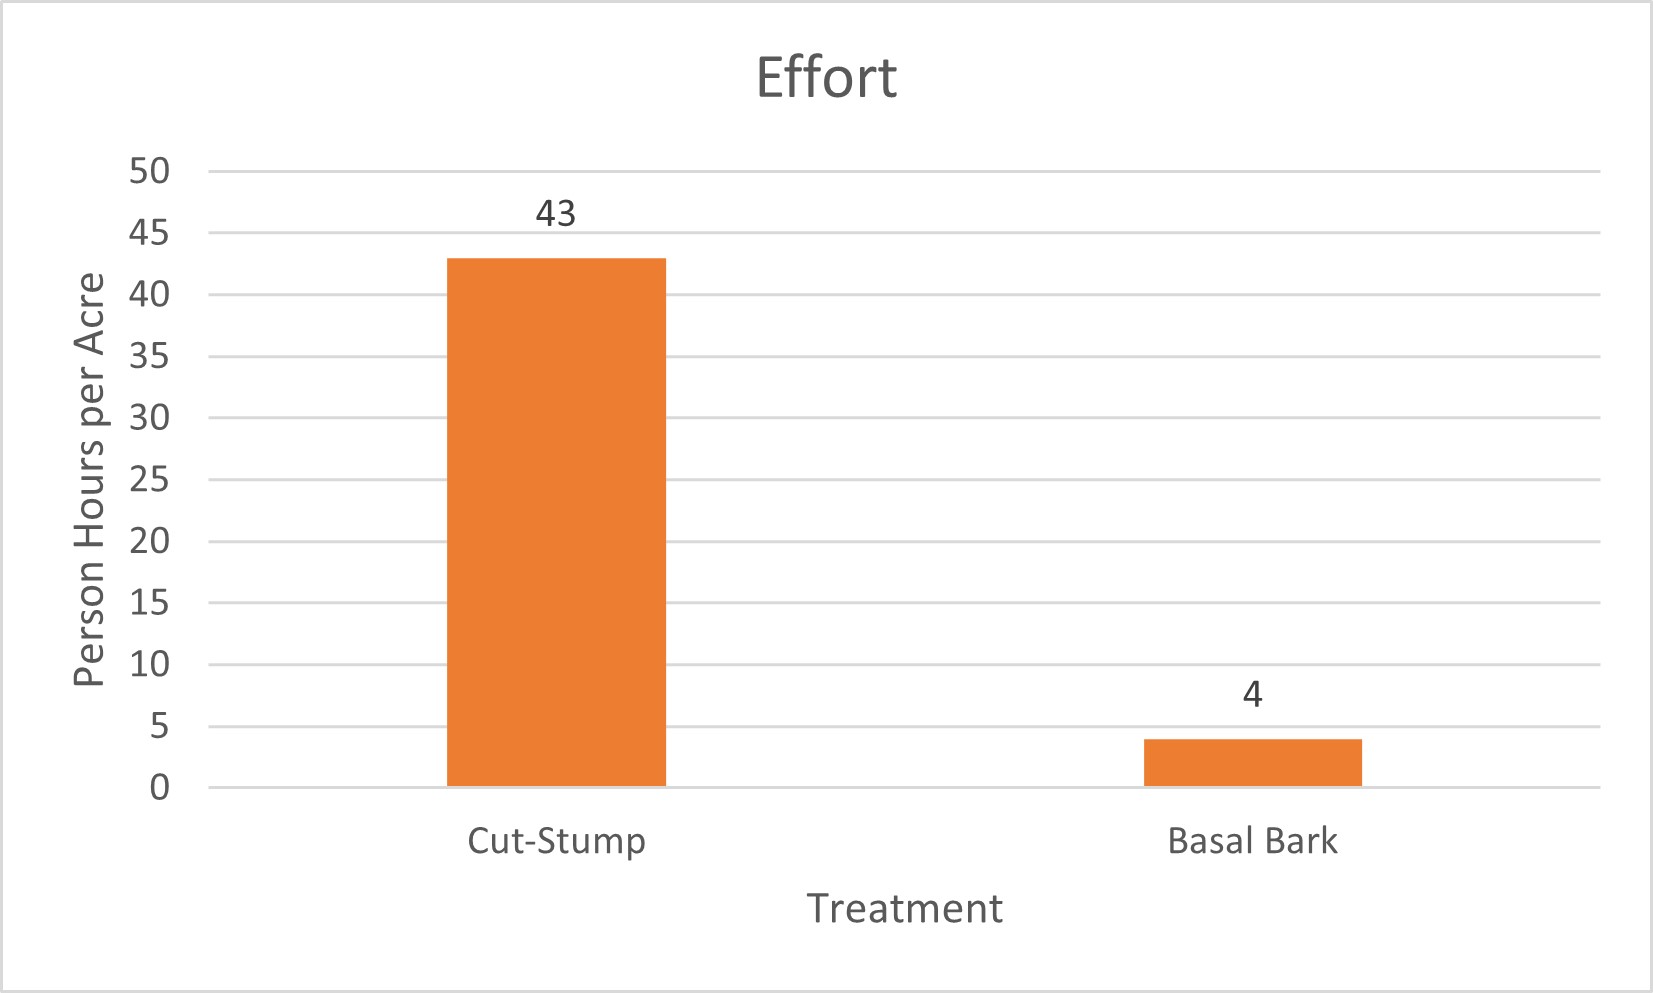
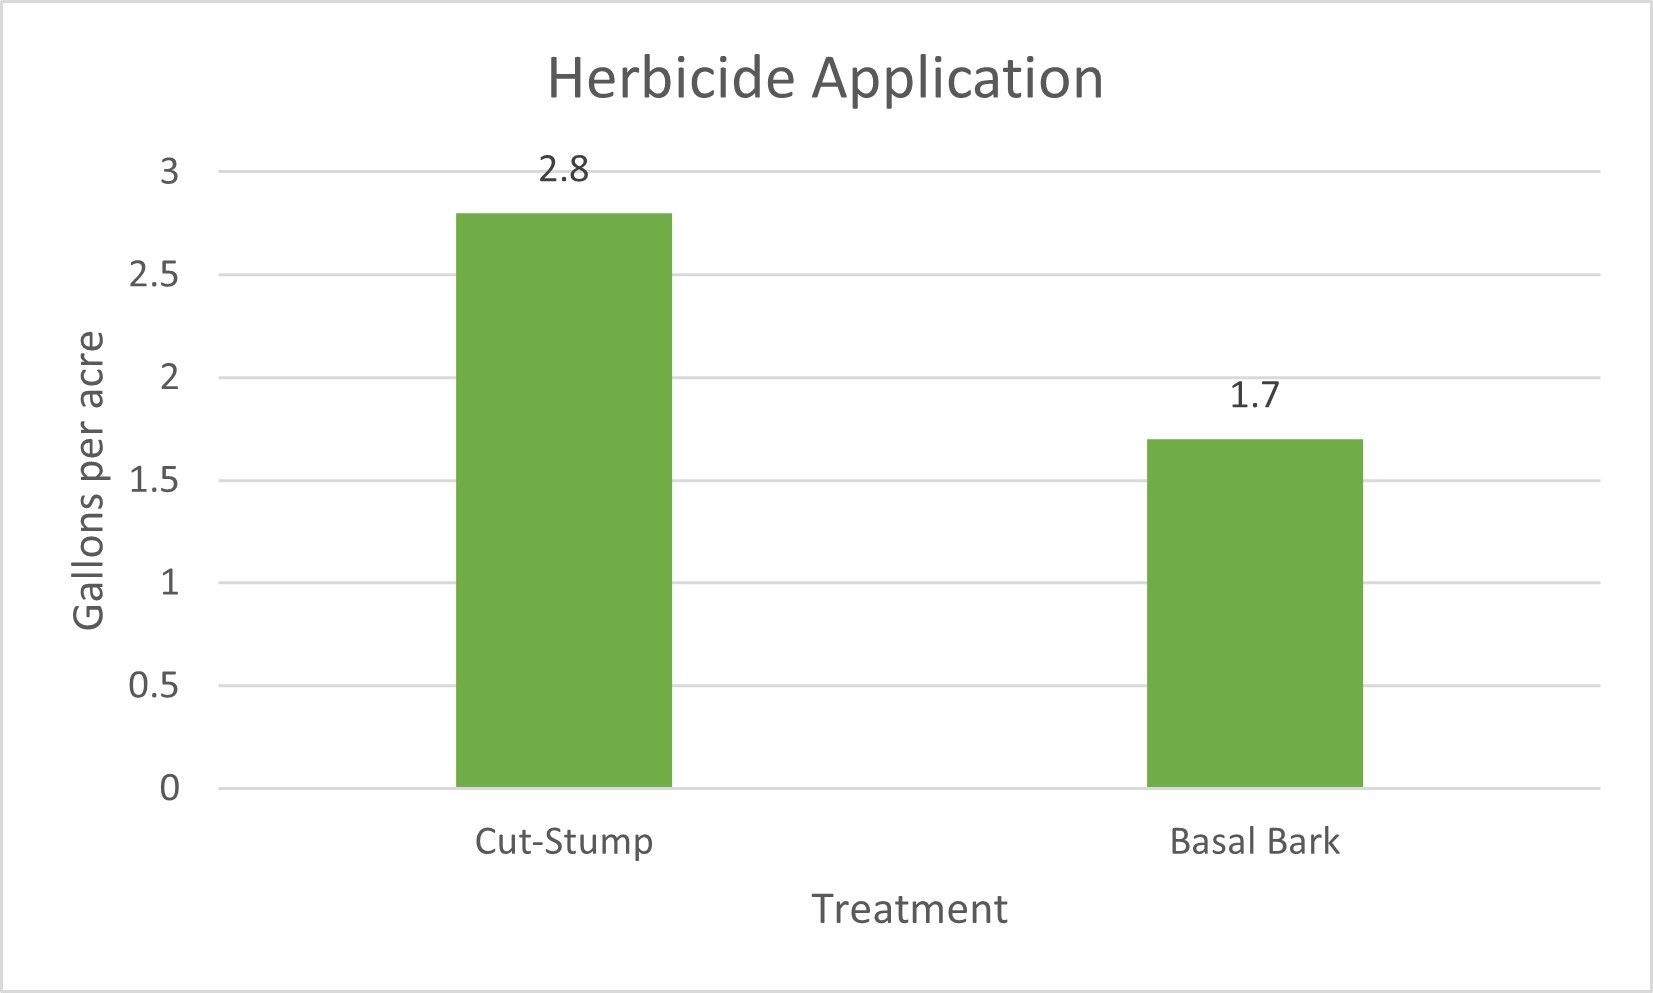
Basal Bark Treatments – By the Numbers: For the past six years of our data (2017-2022), basal bark treatments have taken an average of 4 person-hours per acre. A few of the very densest brush areas took more than 40 hours per acre, which is on par with most cut stump treatments. But those super-dense areas only accounted for 4% of treatment entries. In almost all cases, the brush looks scary from a distance and the edges can be dense. However, when you get in there, nearly all areas are actually passable to be treated with a backpack sprayer. Overall, basal bark treatments took significantly less time than cut stump treatments. Our staff, contractors, and volunteers have been able to treat 4,900 acres in less than 20,000 hours. An average of 1.7 gallons of herbicide was applied per acre during basal bark treatments, which is slightly more than the initial amount of herbicide applied during cut stump treatments (1.0 gal/ac) but less than initial cut stump treatments plus foliar resprout herbicide applications (2.8 gal/ac).
Cut Stump Treatments
Basal Bark Treatments
Instant gratification
Resource intensive – 43 hours/ acre by hand
2.8 gallons of herbicide per acre
Ground disturbance potential if machinery
Re-sprout lots
Foliar follow-up – only 30% effective on resprouts
Multiple years of follow-up needed
Delayed gratification
Resource efficient – 4 hours/ acres
1.7 gallons of herbicide per acres
Up to 12-18 months for shrubs to die
Dead standing
>95% effective
Patience needed
Given the scale of acreage that needs invasive woody treatments, we need to be able to treat thousands of acres per year effectively with our current resources. Like most natural resource management organizations, we have a limited amount of time, money, and personnel. Basal bark treatments take patience, but they are very efficient and effective. We need to recognize our human emotions, and to acknowledge that the biggest advantage of cut stump treatments is that they give us instant gratification. However, to manage the scale of the woody invasive threat, we need to have patience with basal bark treatments, a slower-acting but more effective management approach. It’s important to effectively scale up invasive woody treatments in order to maintain or restore highly diverse natural communities. Efficient, effective management (albeit with delayed gratification) is ultimately more satisfying!
* Special thanks to my co-worker, Becky Blankenship, for making the graphs!
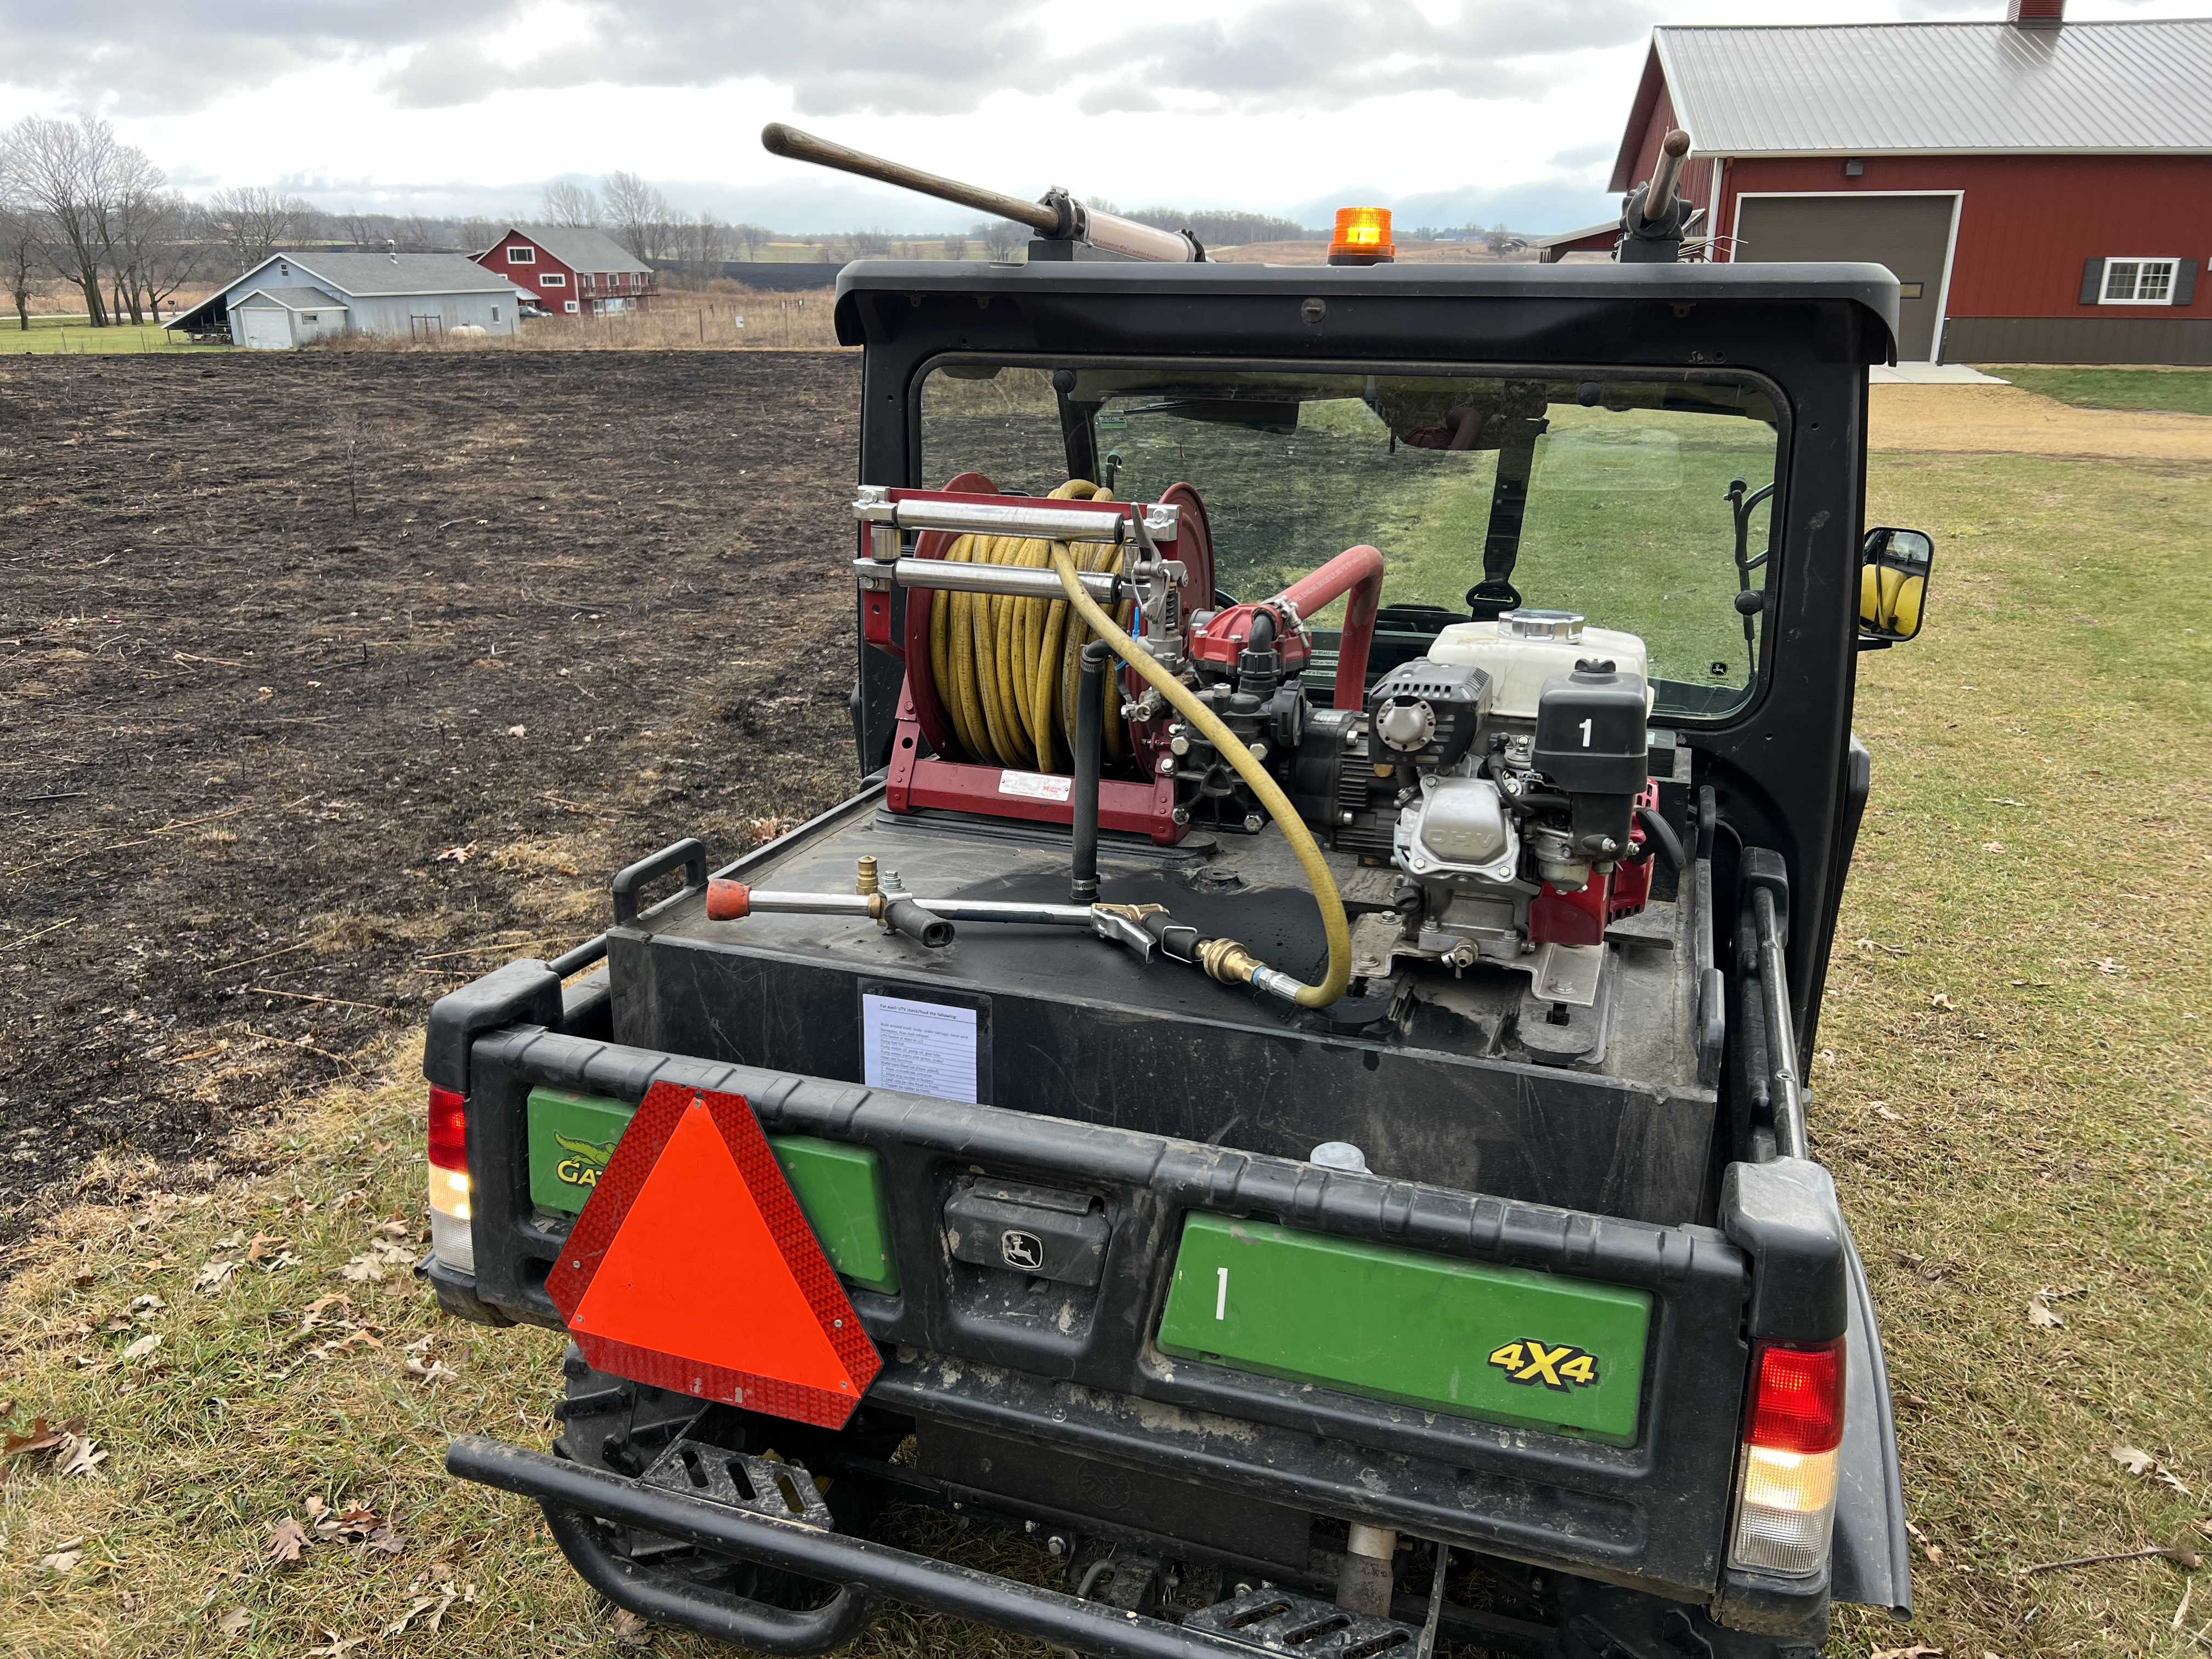
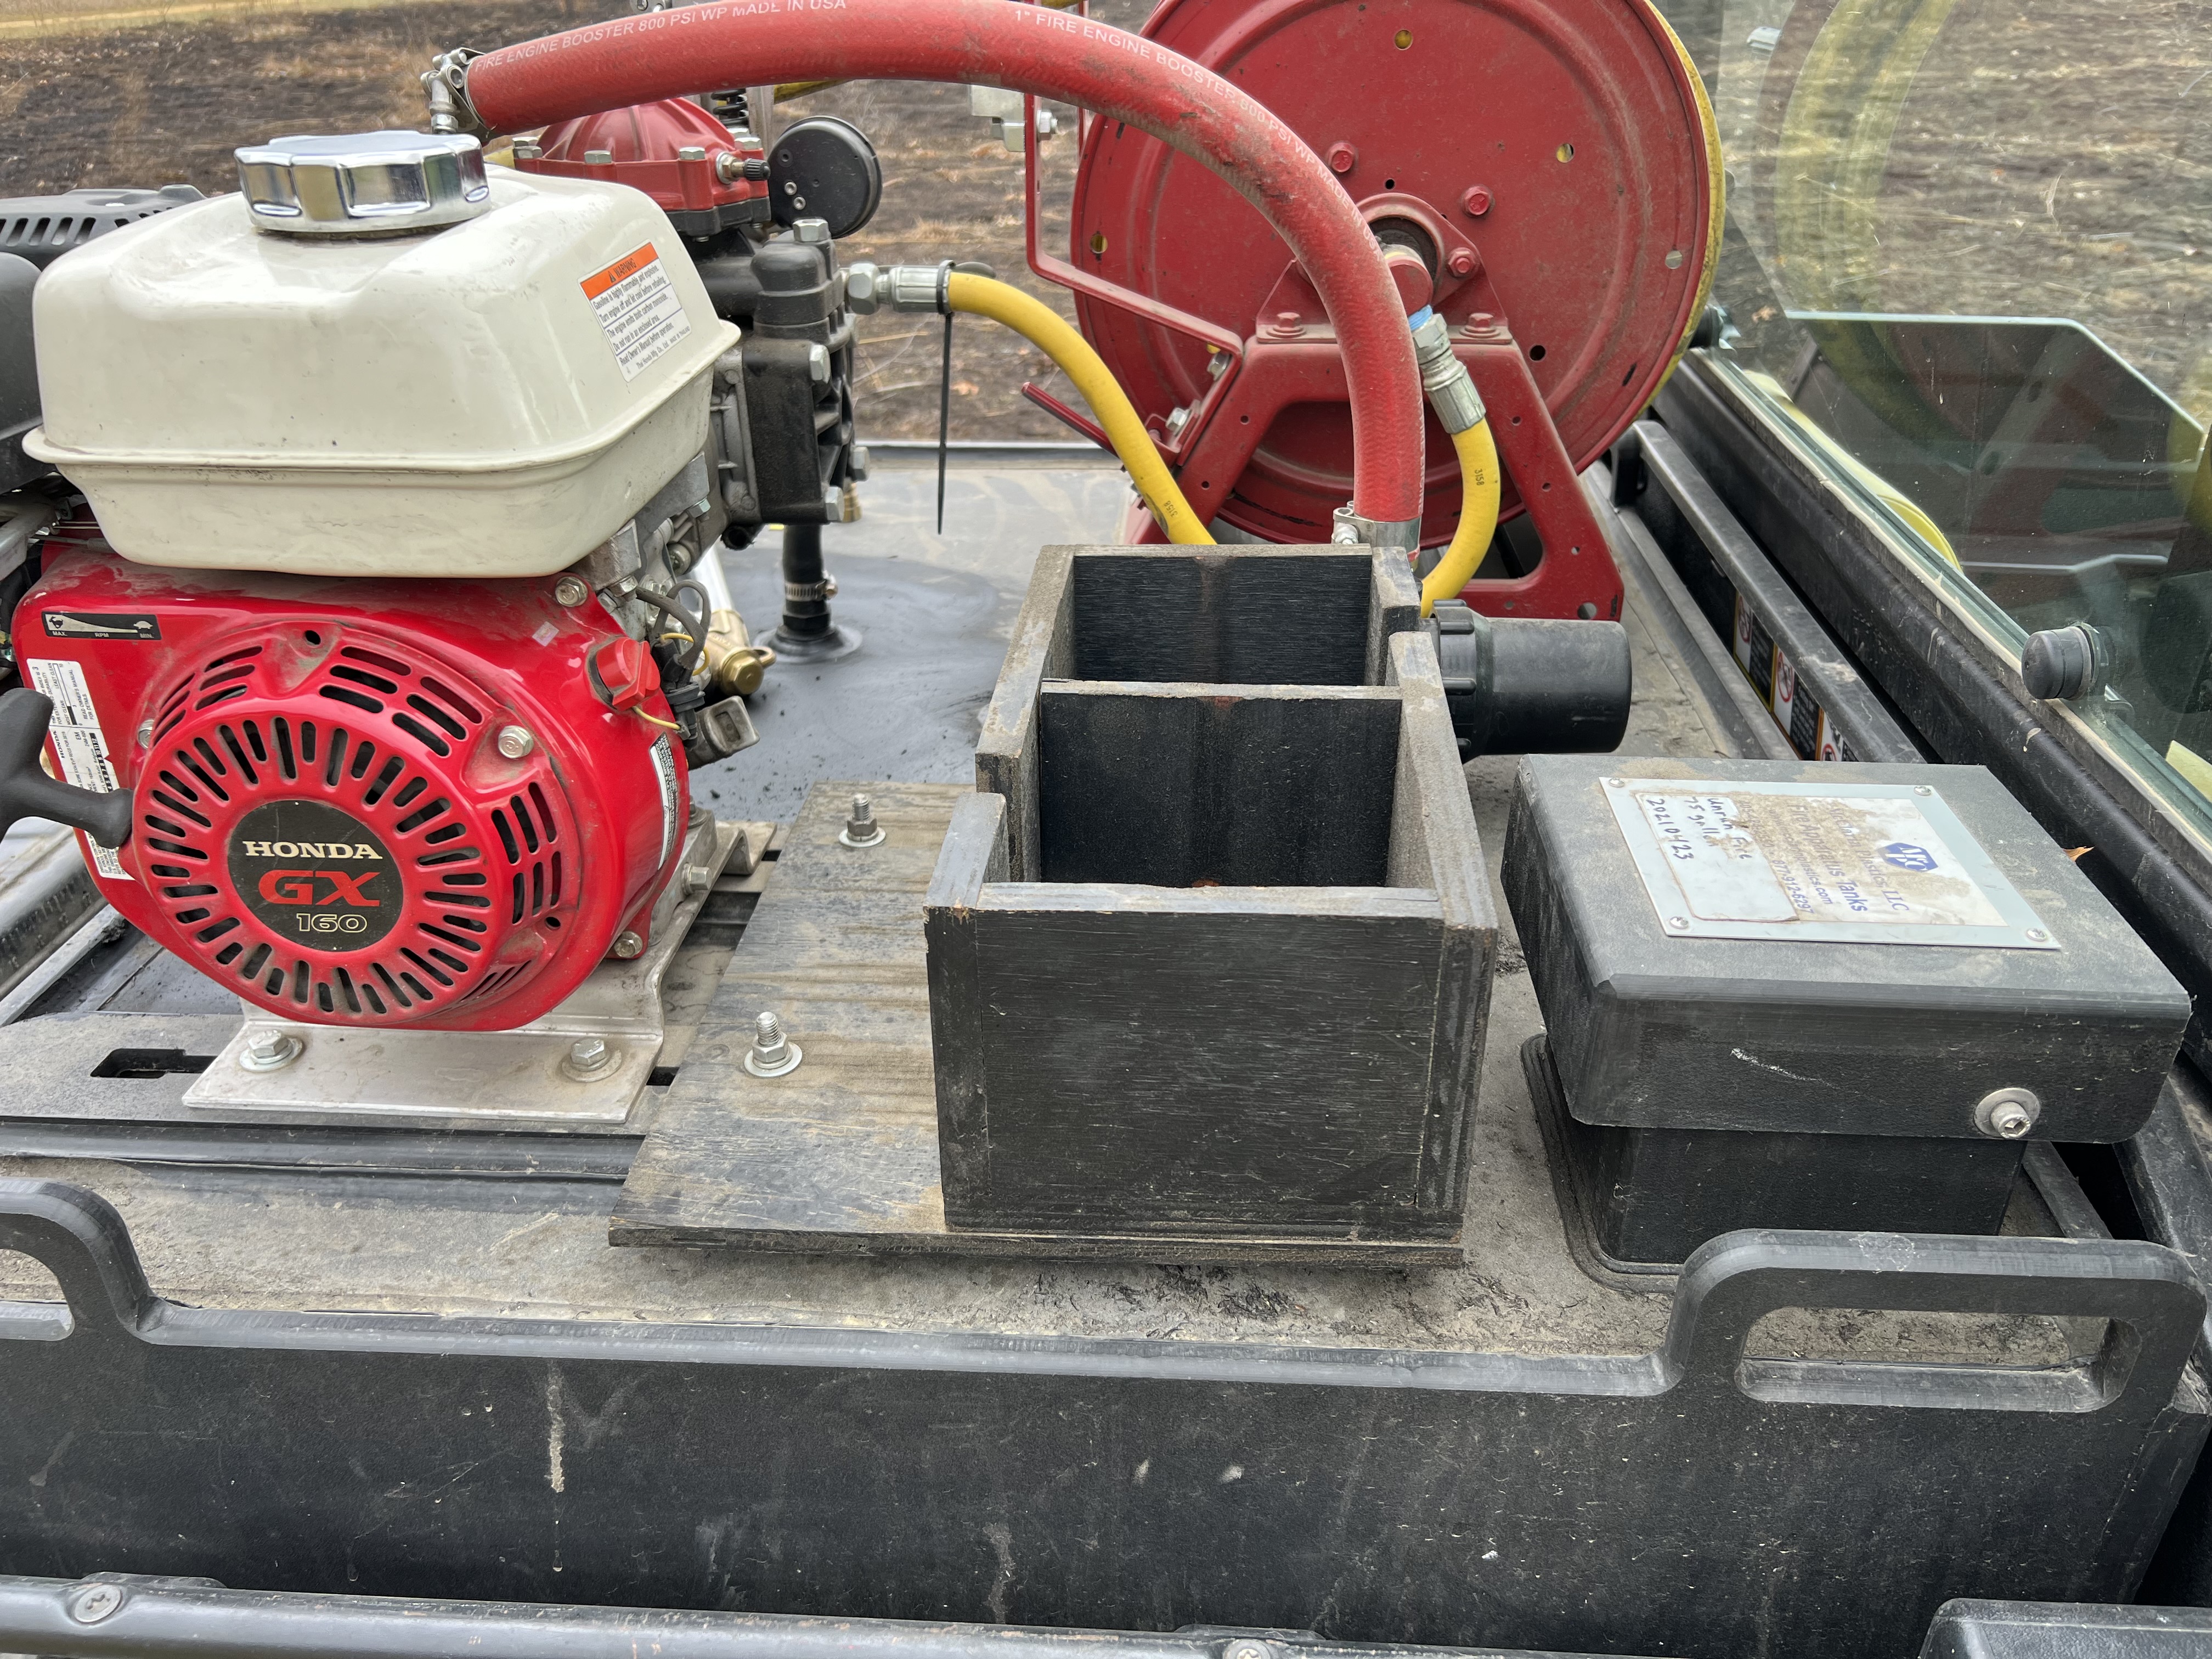
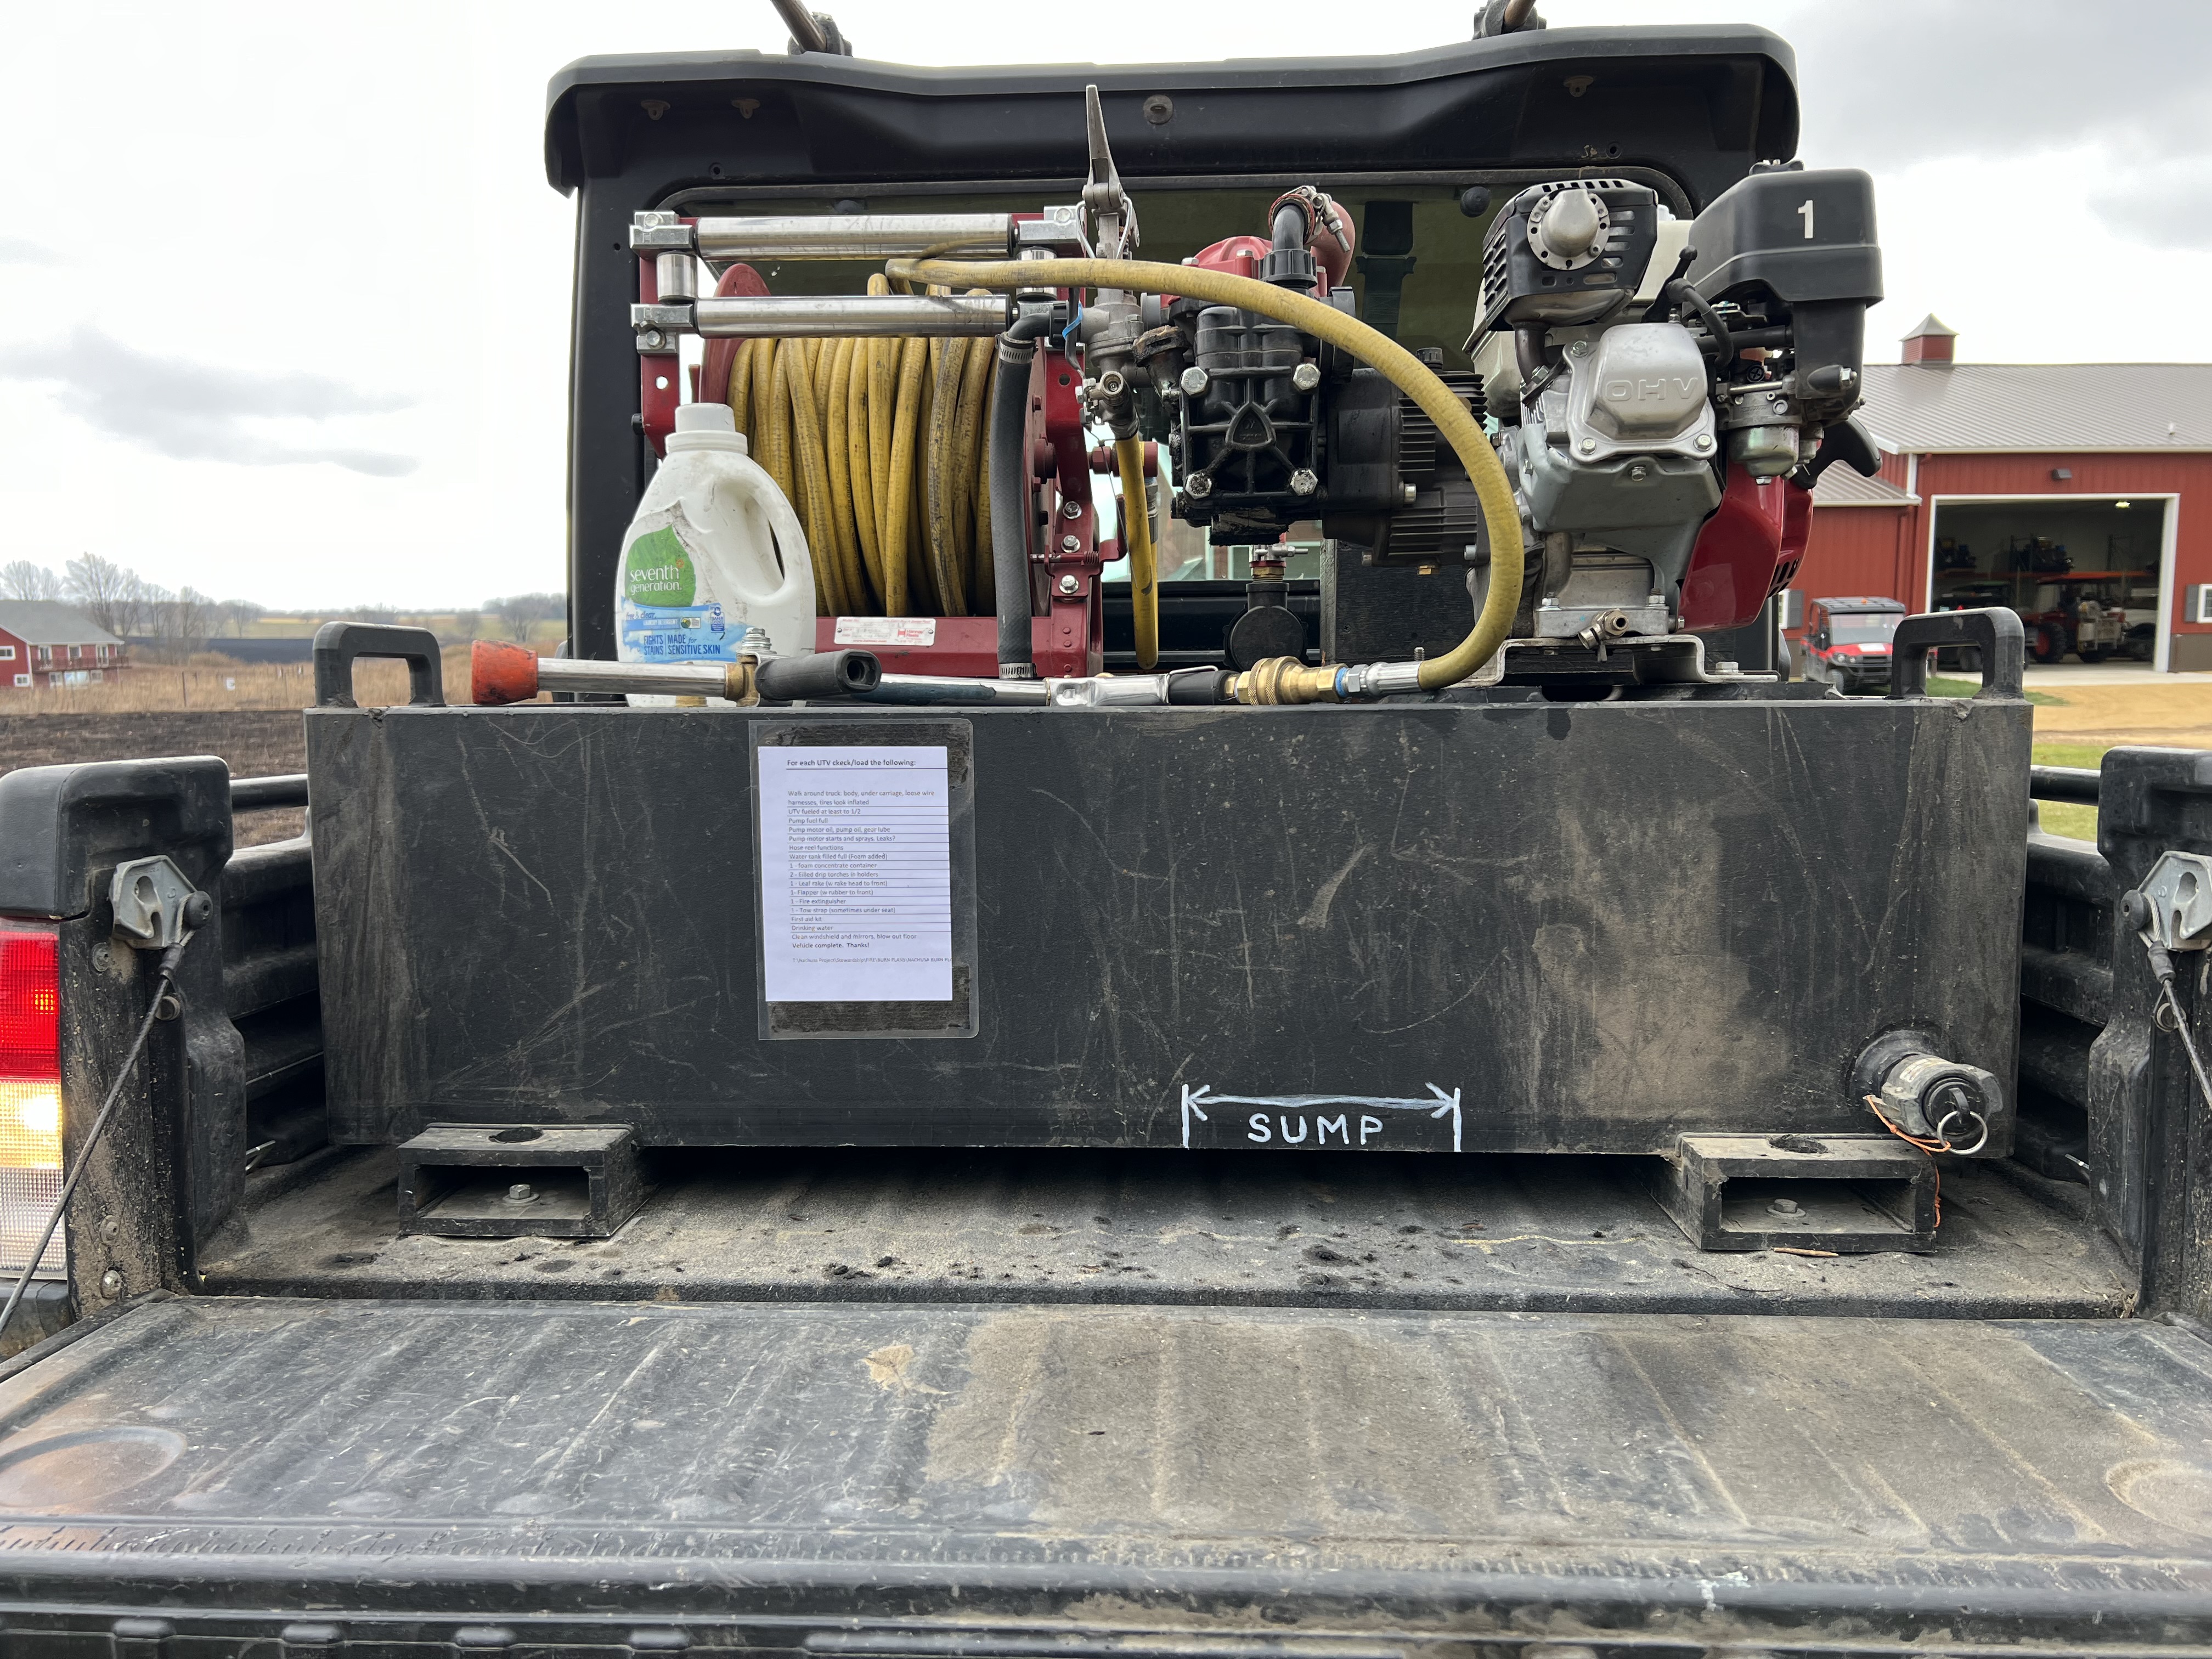
Last week’s pumper unit had the tank taking up the entire bed. It was longer and shorter. The pump, motor, torches, and hose reel were all on top of the tank. But the design above is also nice and works fine. Here the pump, motor and torch holder are on the deck. I could not fit the hose reel on the deck too. The deck extends under the tank which is about the same volume of 75 gallons. Here the tank must be taller to meet that volume. This tank also has a sump on the bottom which allows the pump to drain off all the water. When you order a flat bottom tank always ask for sump.
All the other components are the same as last weeks post. I like both these designs equally. They both ride smoothly and seem stable.
Above is the unit I profiled last week.
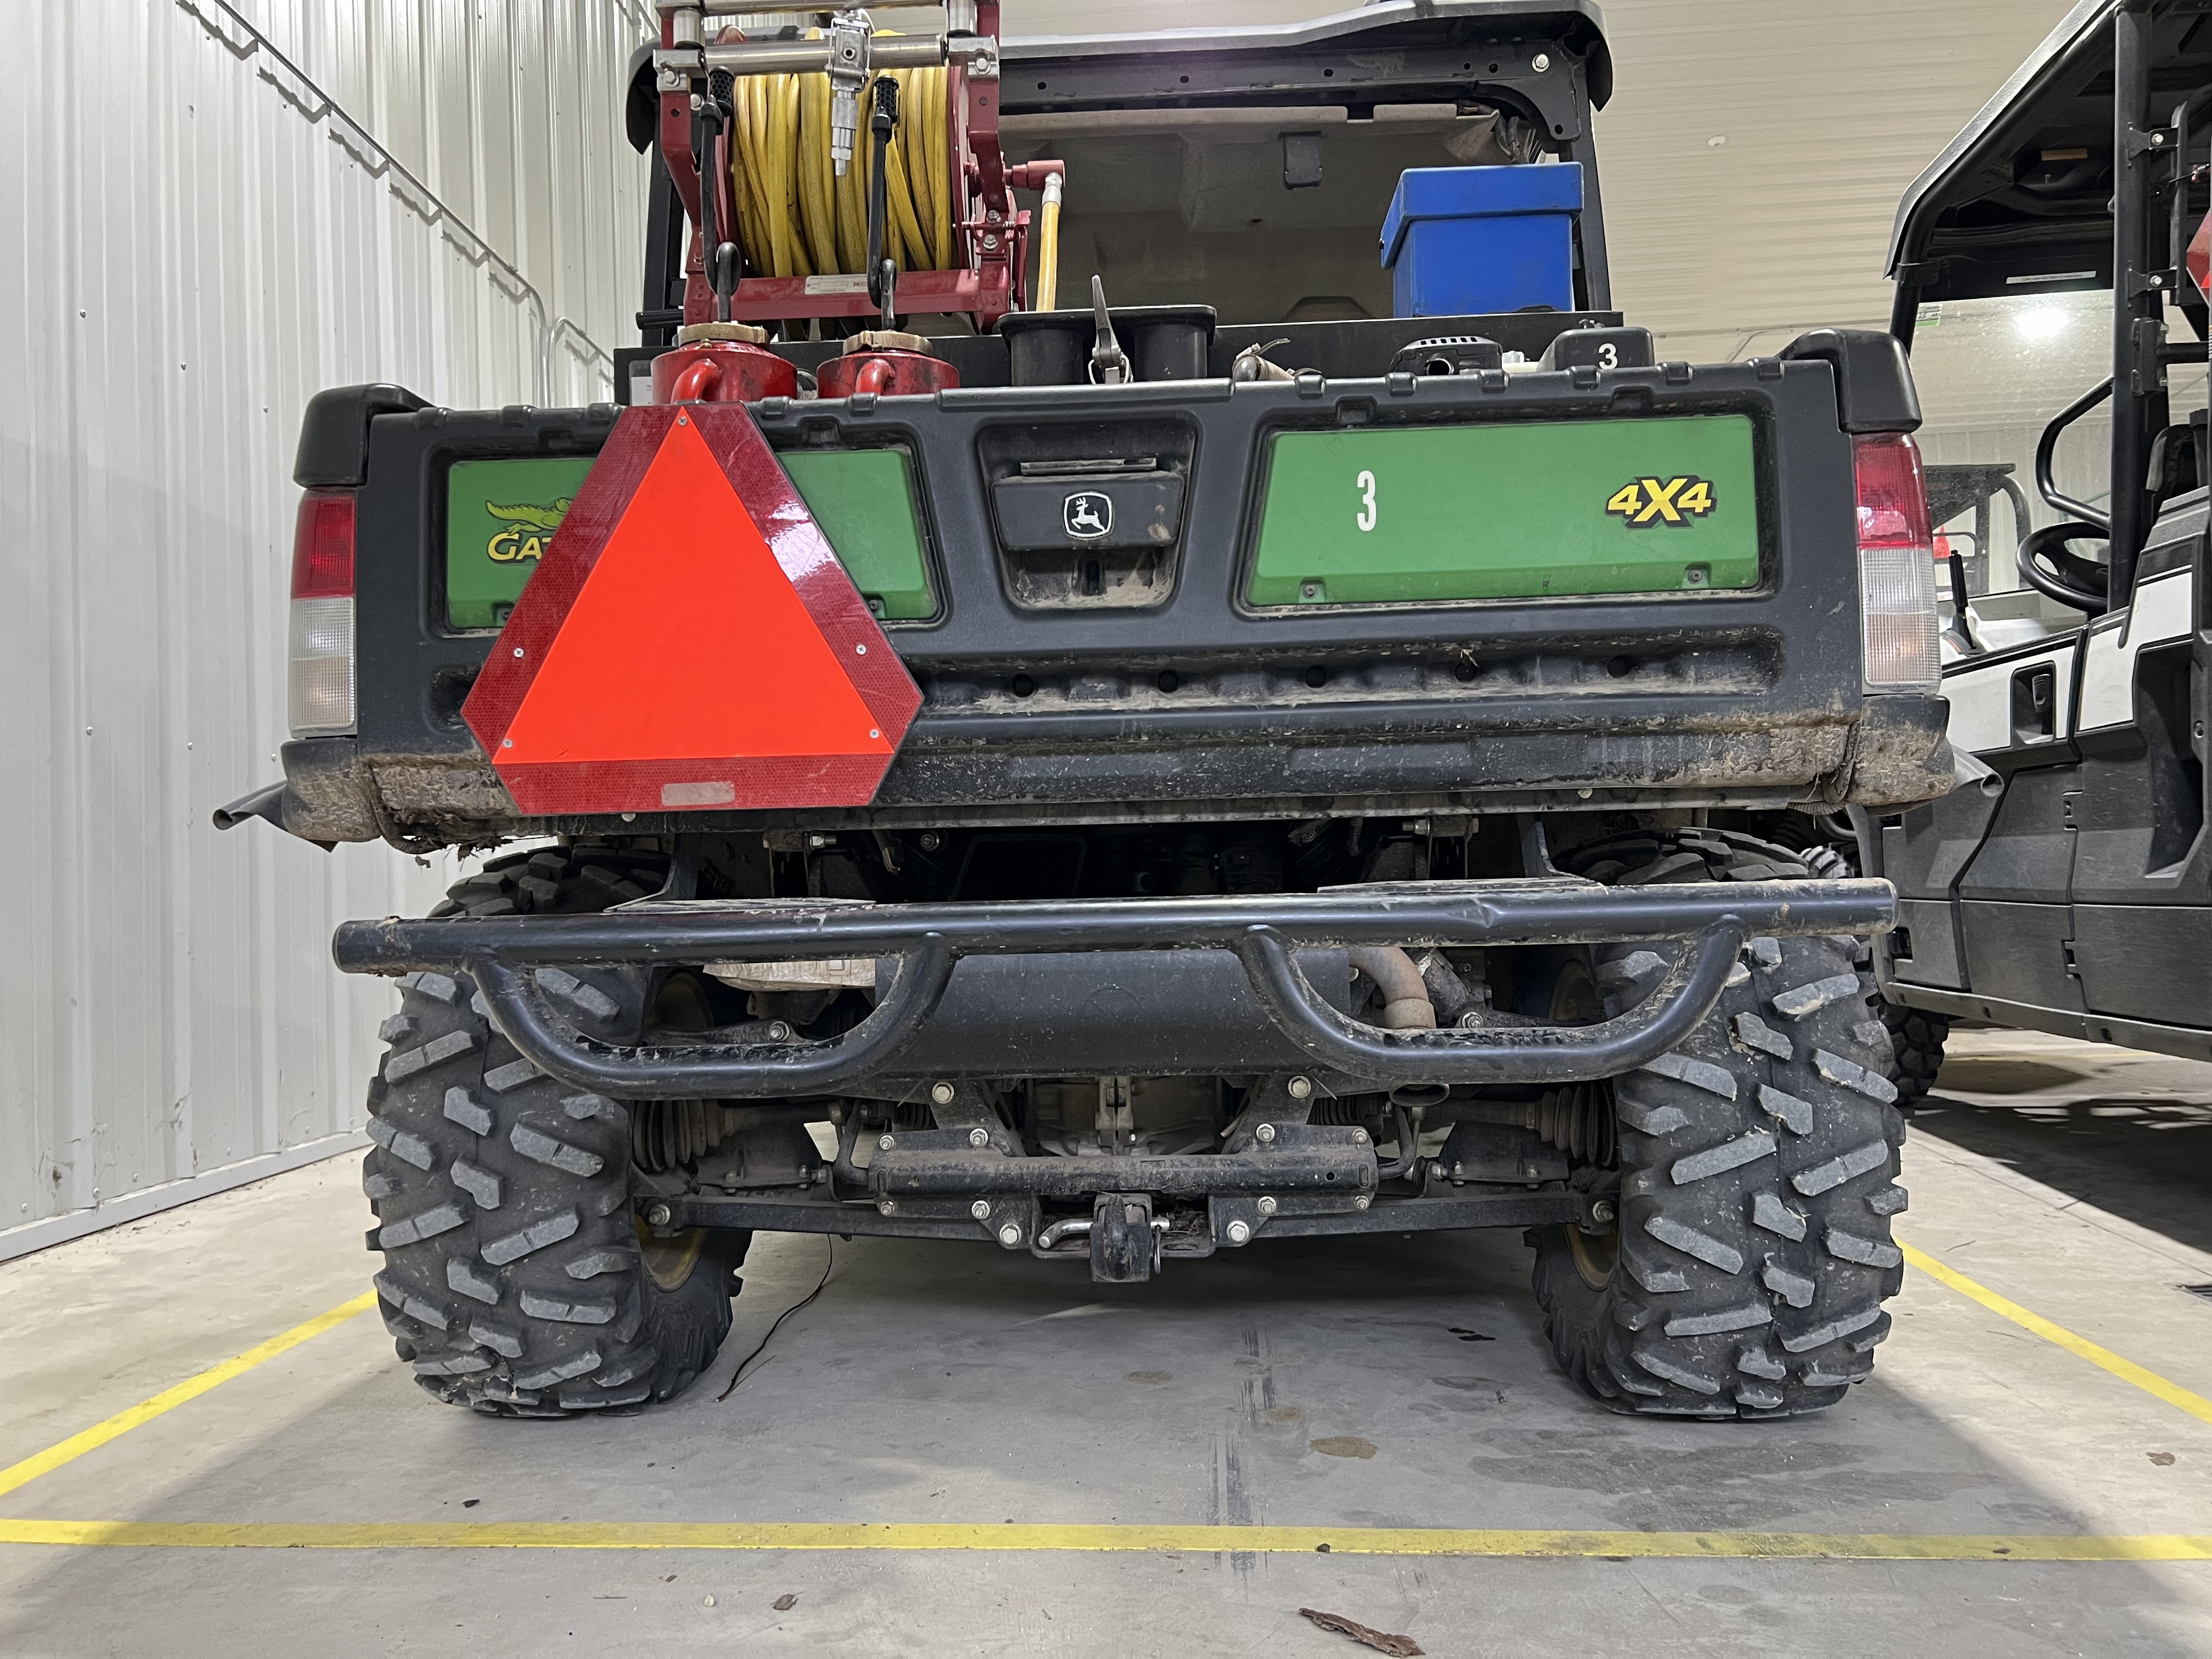
Note above how the tank full of water compressed the shocks enough that the machine is flat on the bottom. If it were without any skid in the bed the hitch would be about two inches higher.
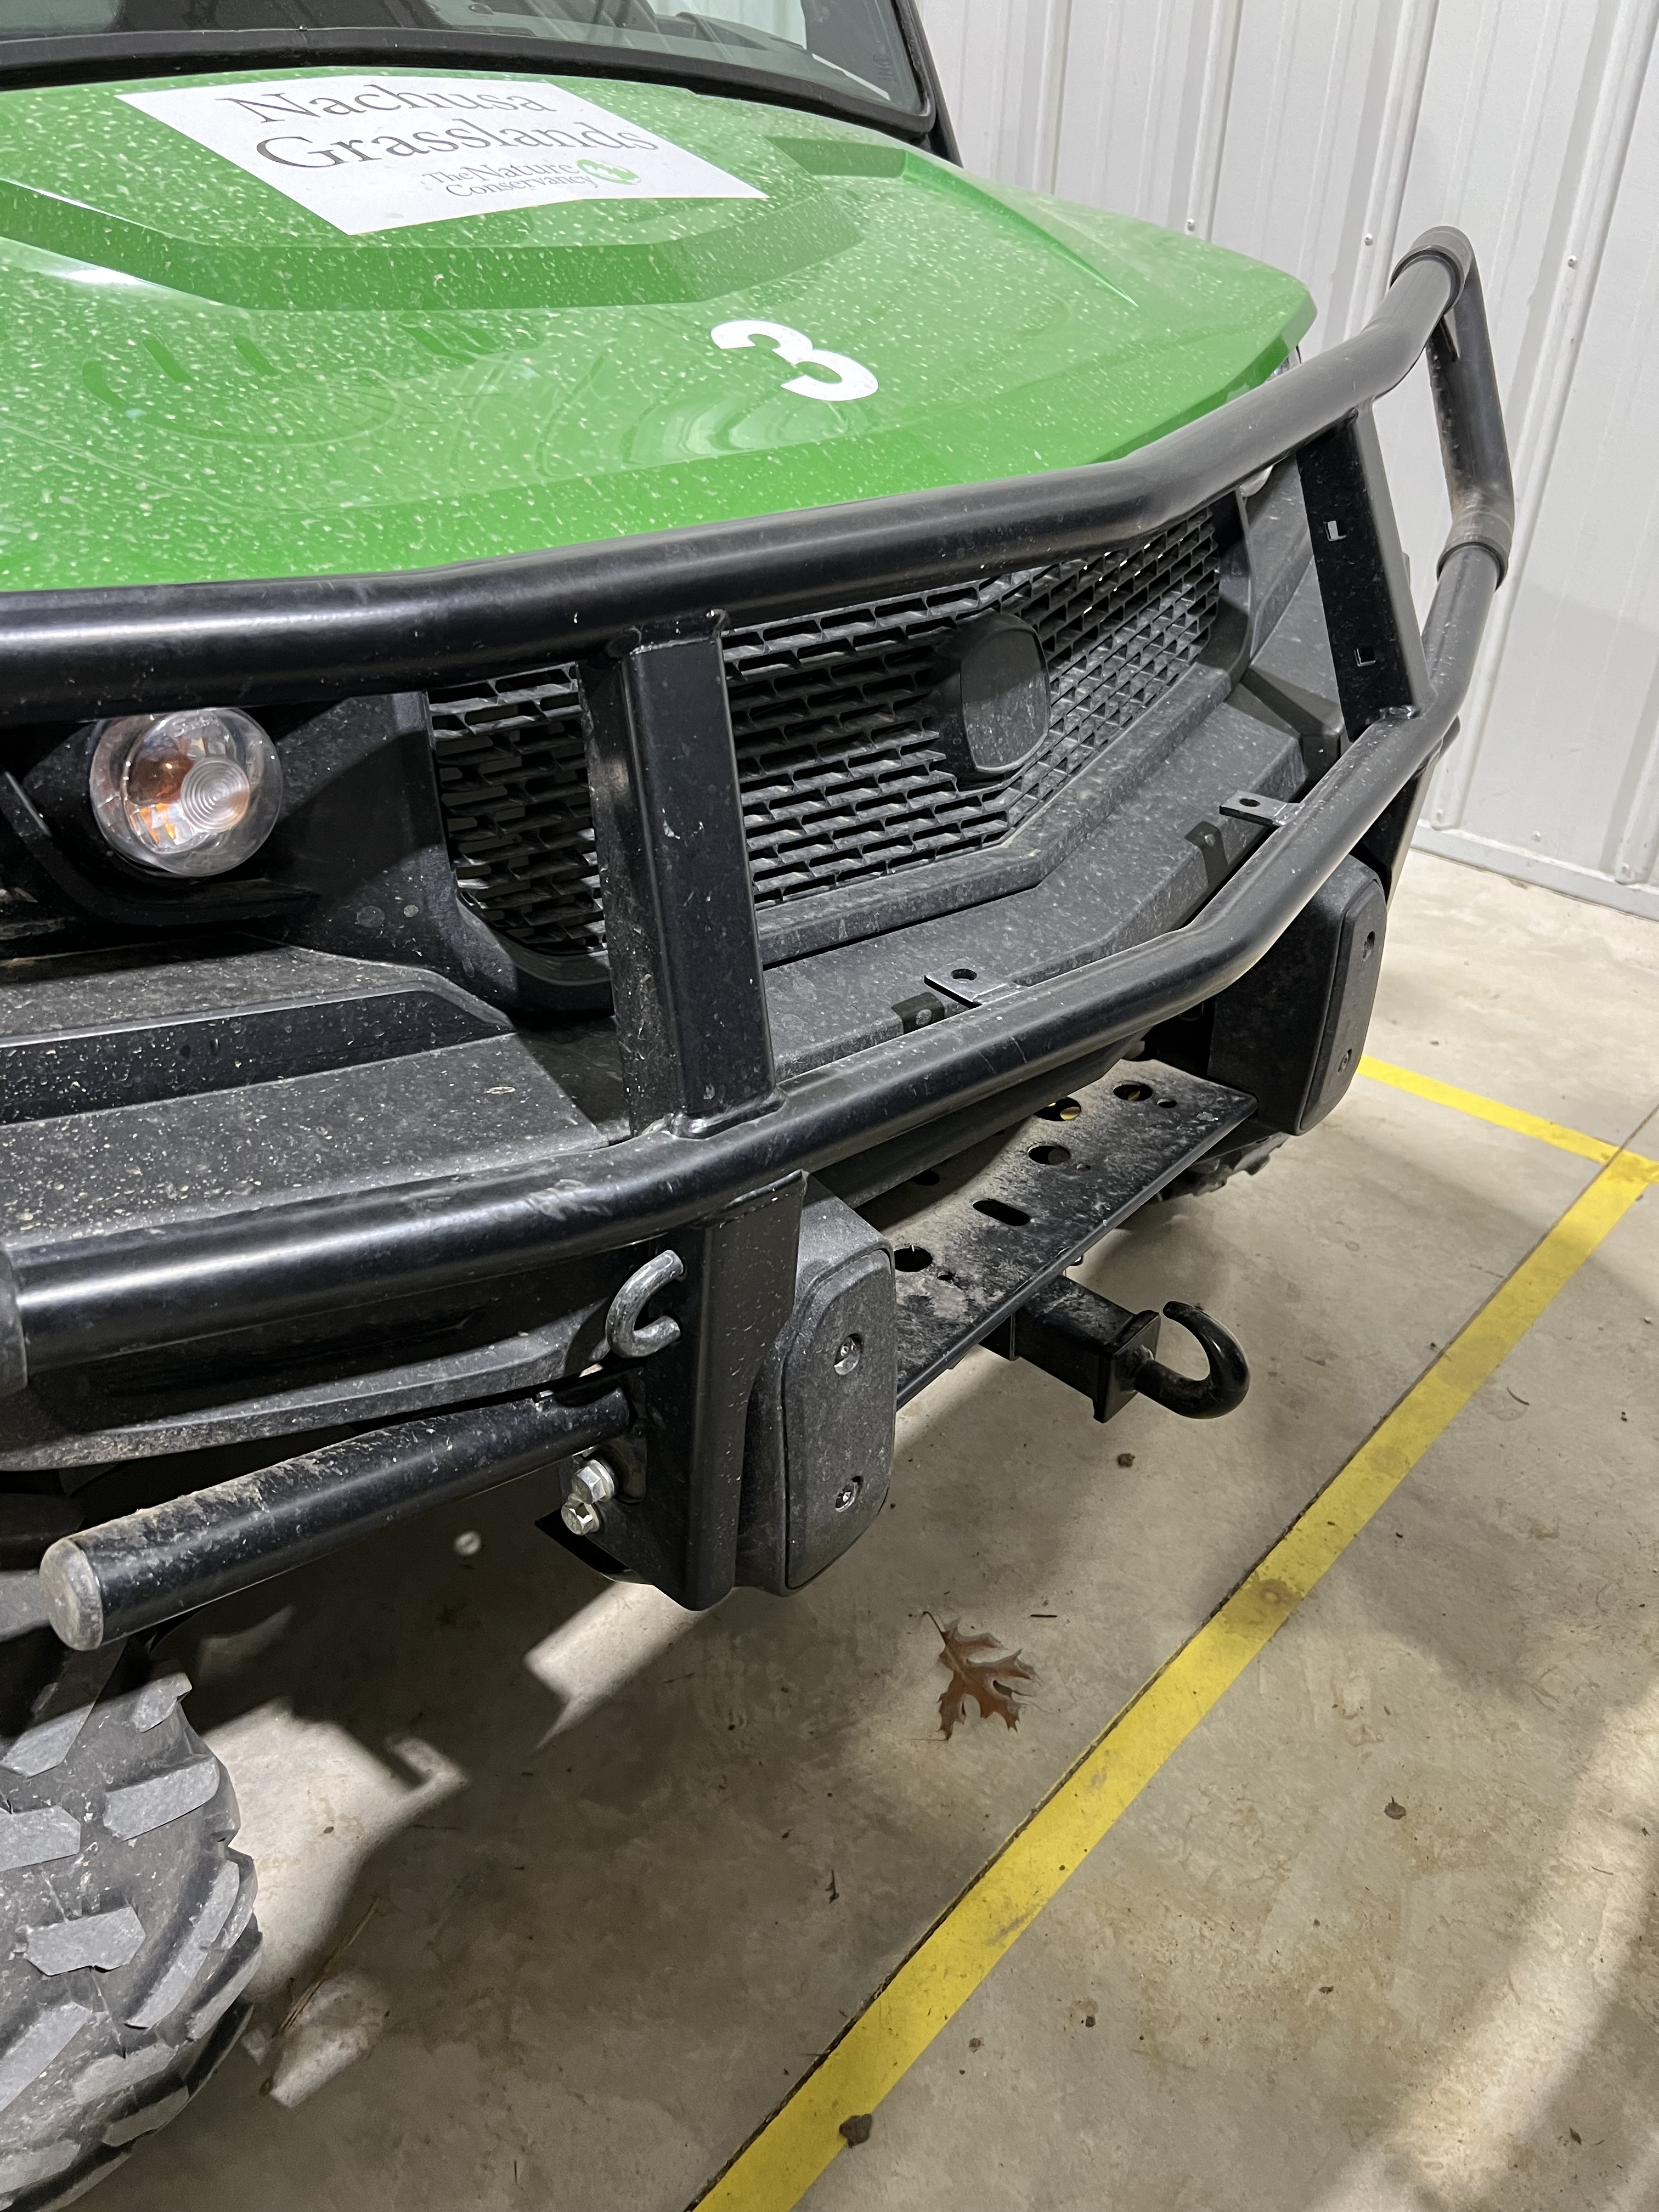
This model has a hitch receiver on the back and front. These are handy for chaining down the UTV on a trailer, or for pulling a UTV that is stuck in the mud. We try to keep a tow strap in each UTV and truck.
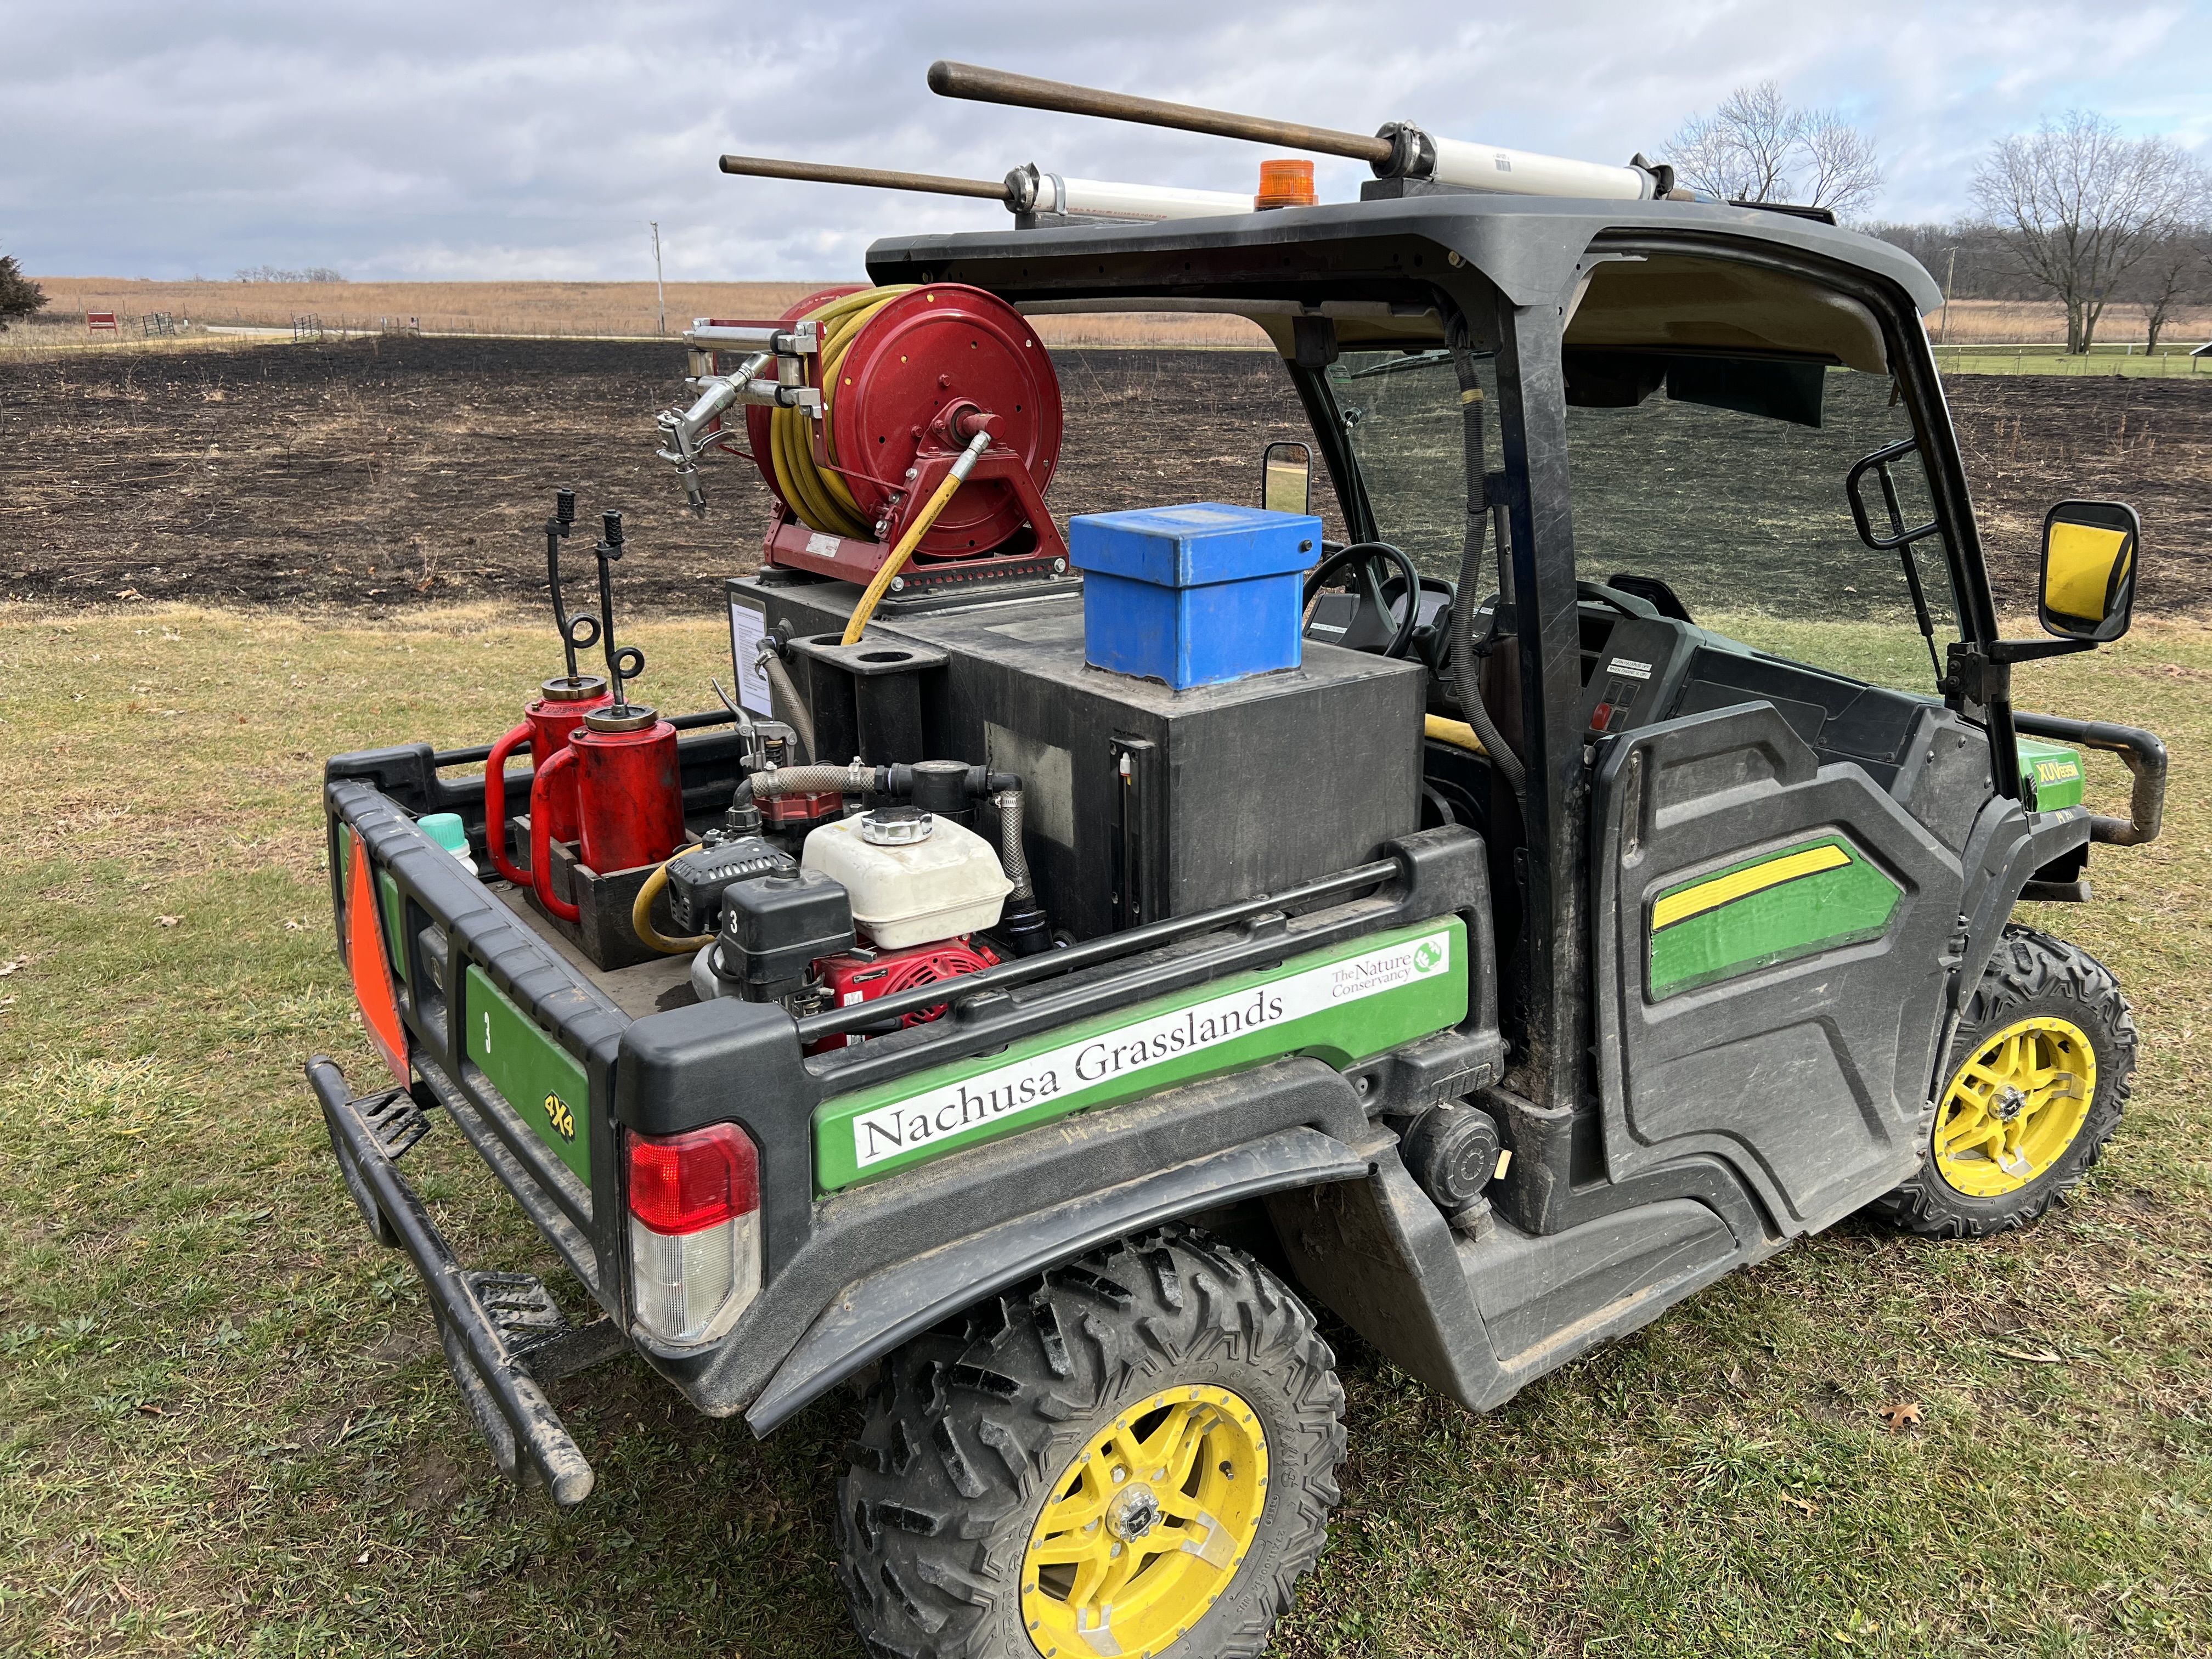
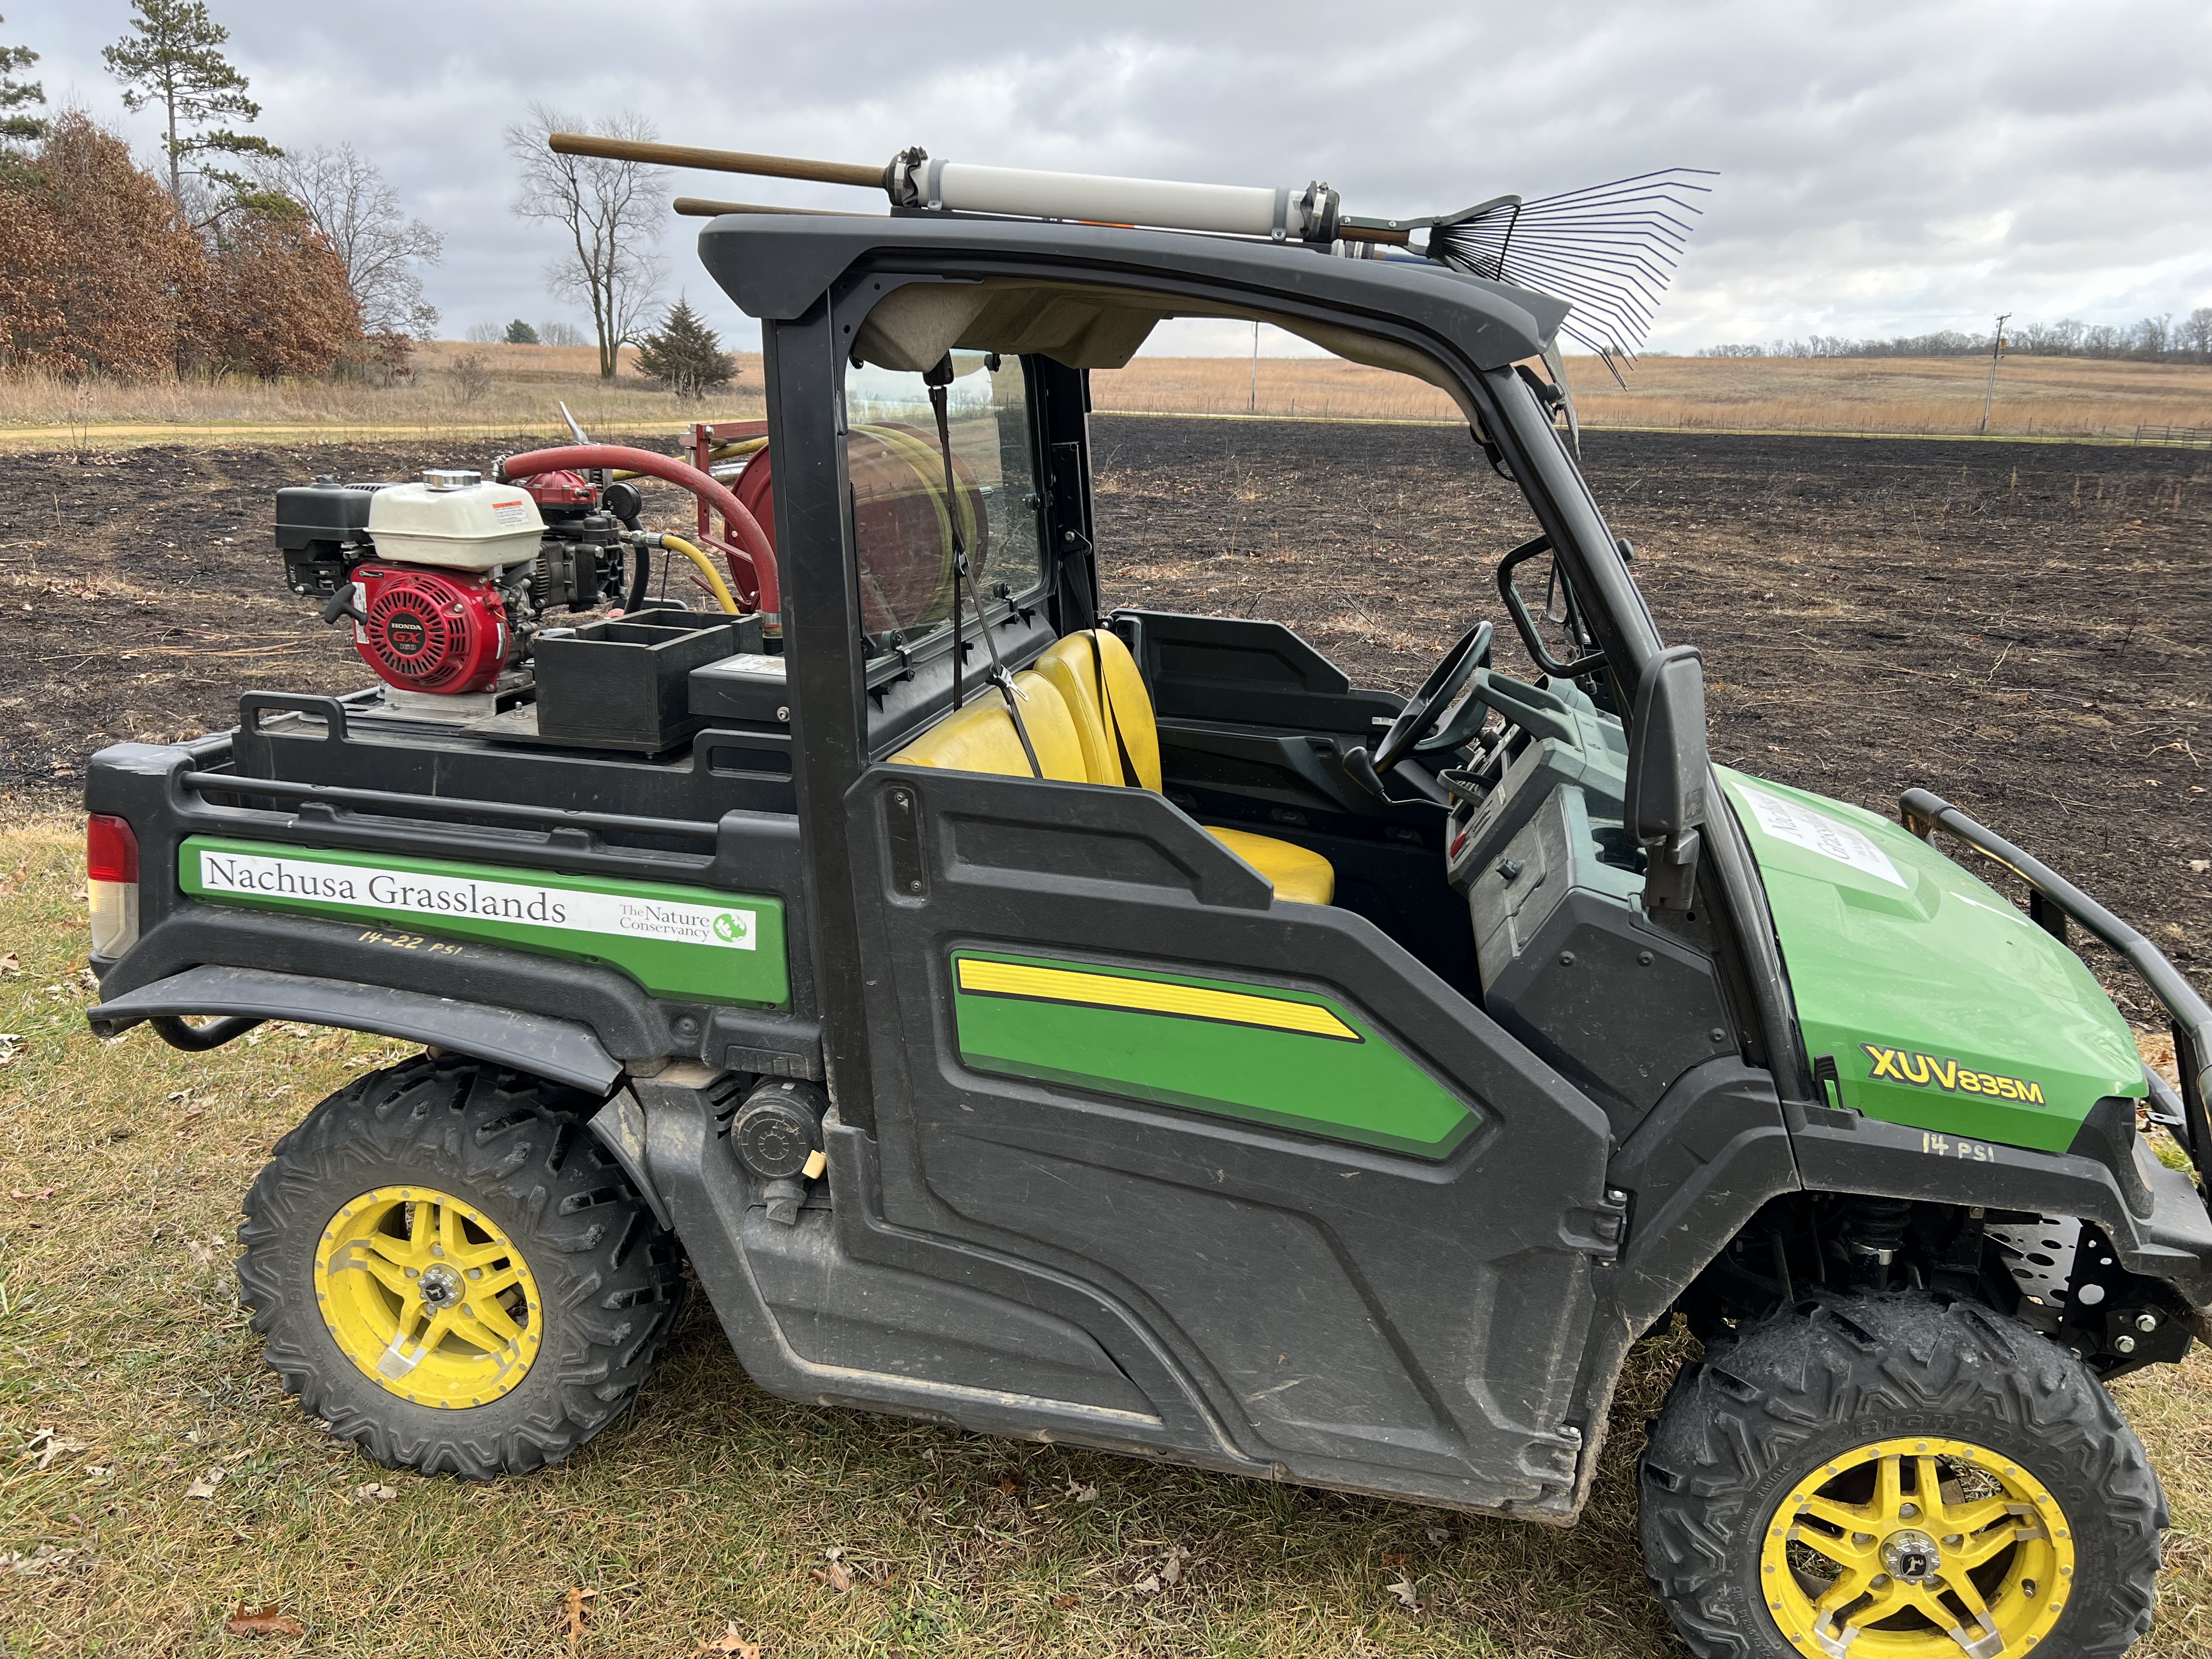
Here are recent photos from a slip-on pumper unit we have at Nachusa Grasslands. We like this one.
This is a 75 gallon unit with the pump, motor and reel on top of the tank. The tank is made of half inch polypropylene. There are baffle partitions in the tank to limit sloshing of the water. This tank has a sump. Always ask for a sump on a flat bottom tank!
This unit was made by Unruh Fire. The current price is about $8,000.
We added the hazard light on the roof. It helps you see the machine better. The light turns on with the key. It is a Federal Signal brand Firebolt LED. It is bright enough and not too tall. The next bigger lightis also nice and about 2 inches taller. Cheaper lights may not flash bright enough.
The tool racks hold a rake and a flapper. The tube is 1.5 inch PVC, but 1.25 inch would likely also work fine. On each end of the PVC there are two layers of tire inner-tube rubber hose clamped. We cut a slit in each rubber layer. We slit one innertube one direction, and the second layer the other direction to make a cross. The tubes are bolted to the roof with PVC plastic pipe straps. In this UTV we had to remove the ceiling liner to be able to bolt the clamps.
In use, you slide the rake or flapper into the tubes. The friction of the rubber innertube holds them in place. They work but have the tool head to front, especially for trailering. Once I drove under a oak limb which pulled on the tool and broke the plastic clamp. But having tools on the roof is nice. Short people can still access and store the tools.
The mirrors are good, especially the driver side mirror.
When full this 75 gallon pumper unit is at near 1,000 pounds, so the upper limit of weight for this UTV . But it sits pretty level. If you were to look at the rear suspension you would see the unit sits low with this weight. We run the unit in Low gear except when on the road.
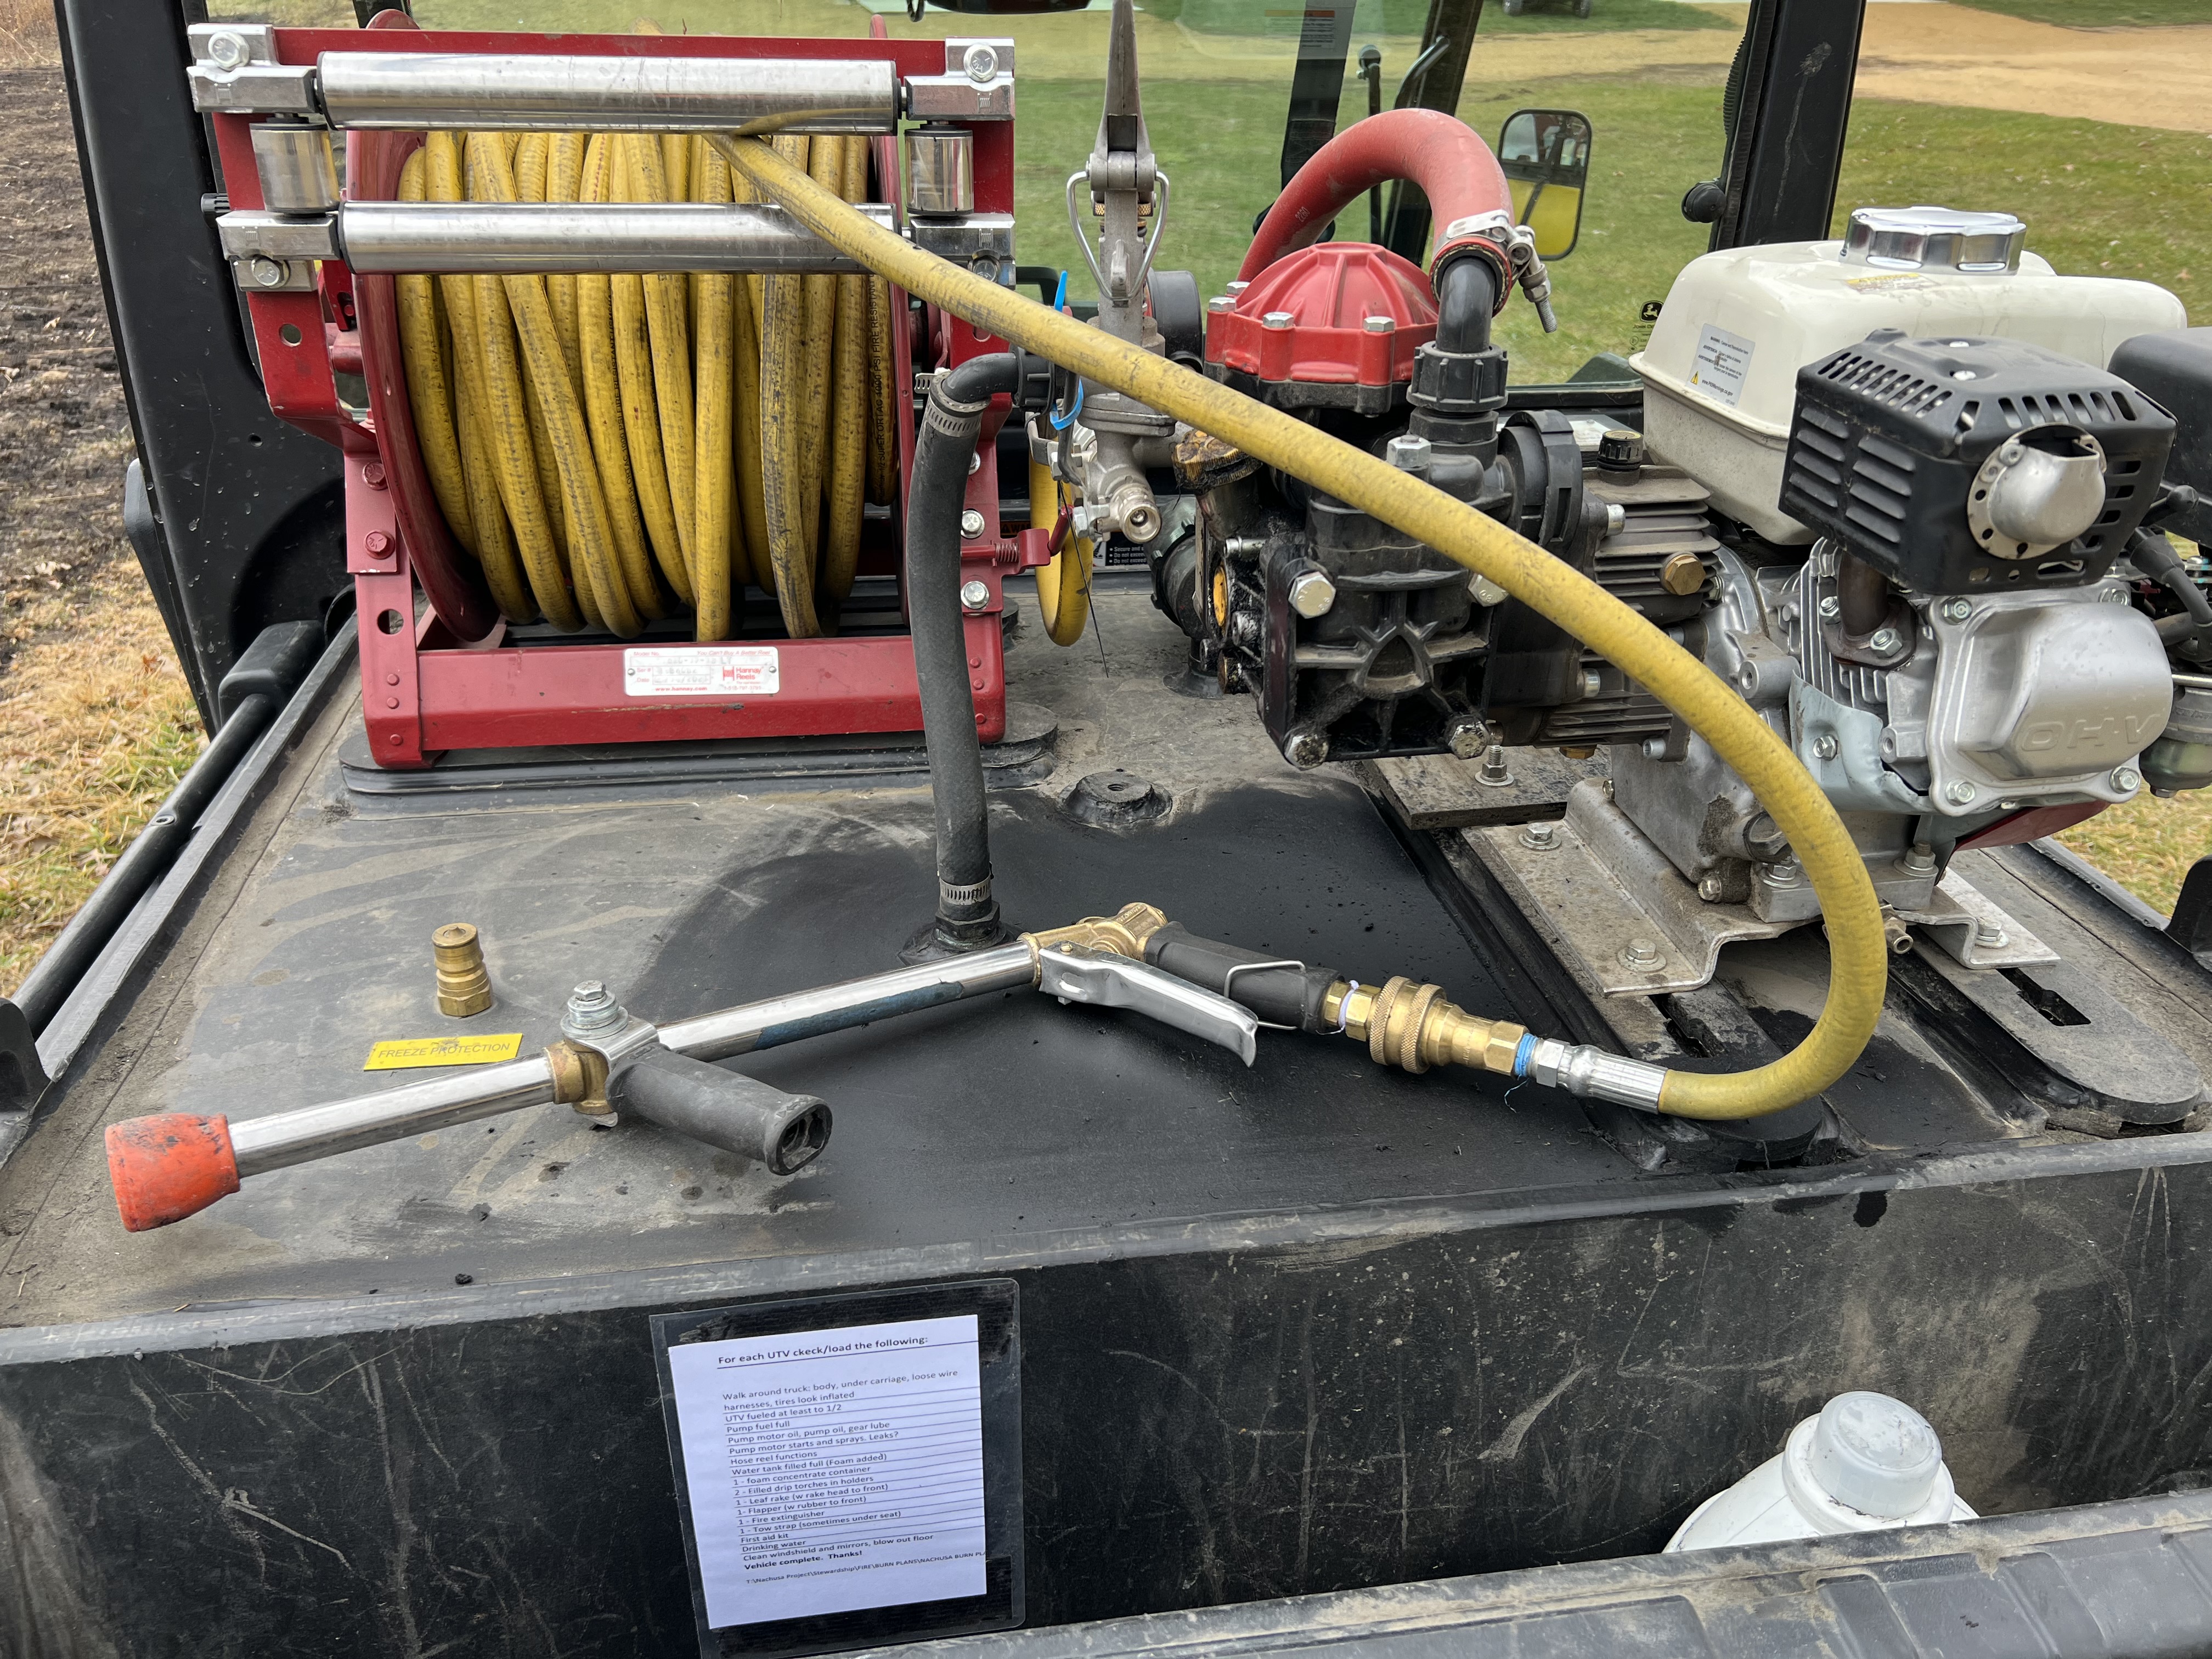
The motor is a 5hp Honda, the pump a Hypro D30 which produces a flow of water of about 3-4 gallons per minute but at high pressures of 150 to 350 psi. This Hypro D30 has been discontinued but there are other brands with similar specs. The hose is heat resistant half inch yellow of about 100 feet in length. The chrome hose roller is great. I see the little fire foam container in the bed. That is Class A foam in a used laundry detergent bottle. We add a capful or two per tank.
The nozzle is a Hypro rifle style. We also use a JD9 hand gun style. There is a quick attach there to switch nozzles. I like the JD9 for its lighter one handed ease of use.
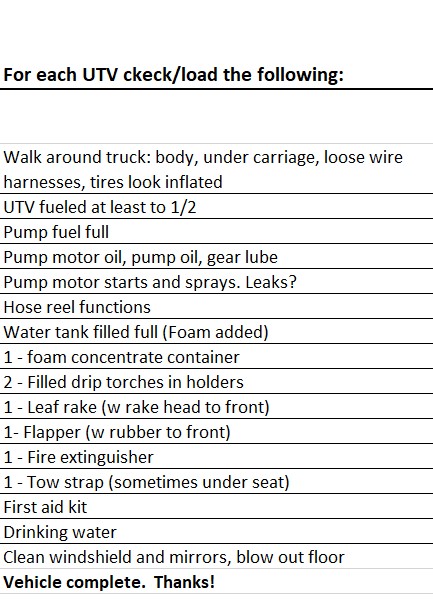
We recently started putting the UTV morning checklist on the back of the tank. This helps others help us get ready.
Side view shows the water fill tower on right. Then the homemade wood double drip torch holder. The black round water strainer is behind the torch holder. The water in the tank passes through a screen strainer up the red hose to the pump. We check the water strainer every day as some days there is some green scum on the screen. We think this might be due to the fire foam we batch mix in the tank. My guess is we leave the soapy water in the tank for weeks and it grows scum. If your pressure drops off suddenly, check that you have water, and then check the water strainer.
A tank sump is very important. The pump draws water from the recessed sump on the bottom of the tank near the center. If you don’t have a sump your pickup tube will suck air even though there is ten or fifteen gallons of water sloshing around the bottom of the tank.
We wrote “sump” on the tank so we don’t skewer the sump with the pallet forks we use to load the unit. Notice the two rectangle plastic frame member that hold the tank above the UTV bed. Those two frame members allow the sump space to be there. We had those two frame members left a few inches long on the rear end so we could drill a hole in them and bolt them to the bed of the UTV. This works better than a ratchet strap.
If your tank sits flush on the UTV you likely don’t have a sump. The tank drain has a Banjo quick release cap. We tie the cap with a string to the tank so we don’t lose the cap.
For overnight freeze protection you drain the tank, then close drain. There is still water in the tank since the drain is on the side of the tank. Then spray out the remaining ten gallons of water. Then add maybe a gallon of pink RV antifreeze and spray into the tank until you see the pink start coming through. You can do this at low RPM and pressure.
There are other fire pumper units posts on our blog. There is a search button on the home page. Type in logical key words and find more good info. For this topic try “pumper unit”
While there, press the “follow the GRN”.
Addendum: Want to spend half as much and get most of the function of the unit I show? These are made for herbicide application. For the nozzle you want the extra large tip so you can spray near the maximum gallons per minute of 3-4.
This one even cheaper with no hose reel and less hose. But a good sprayer.
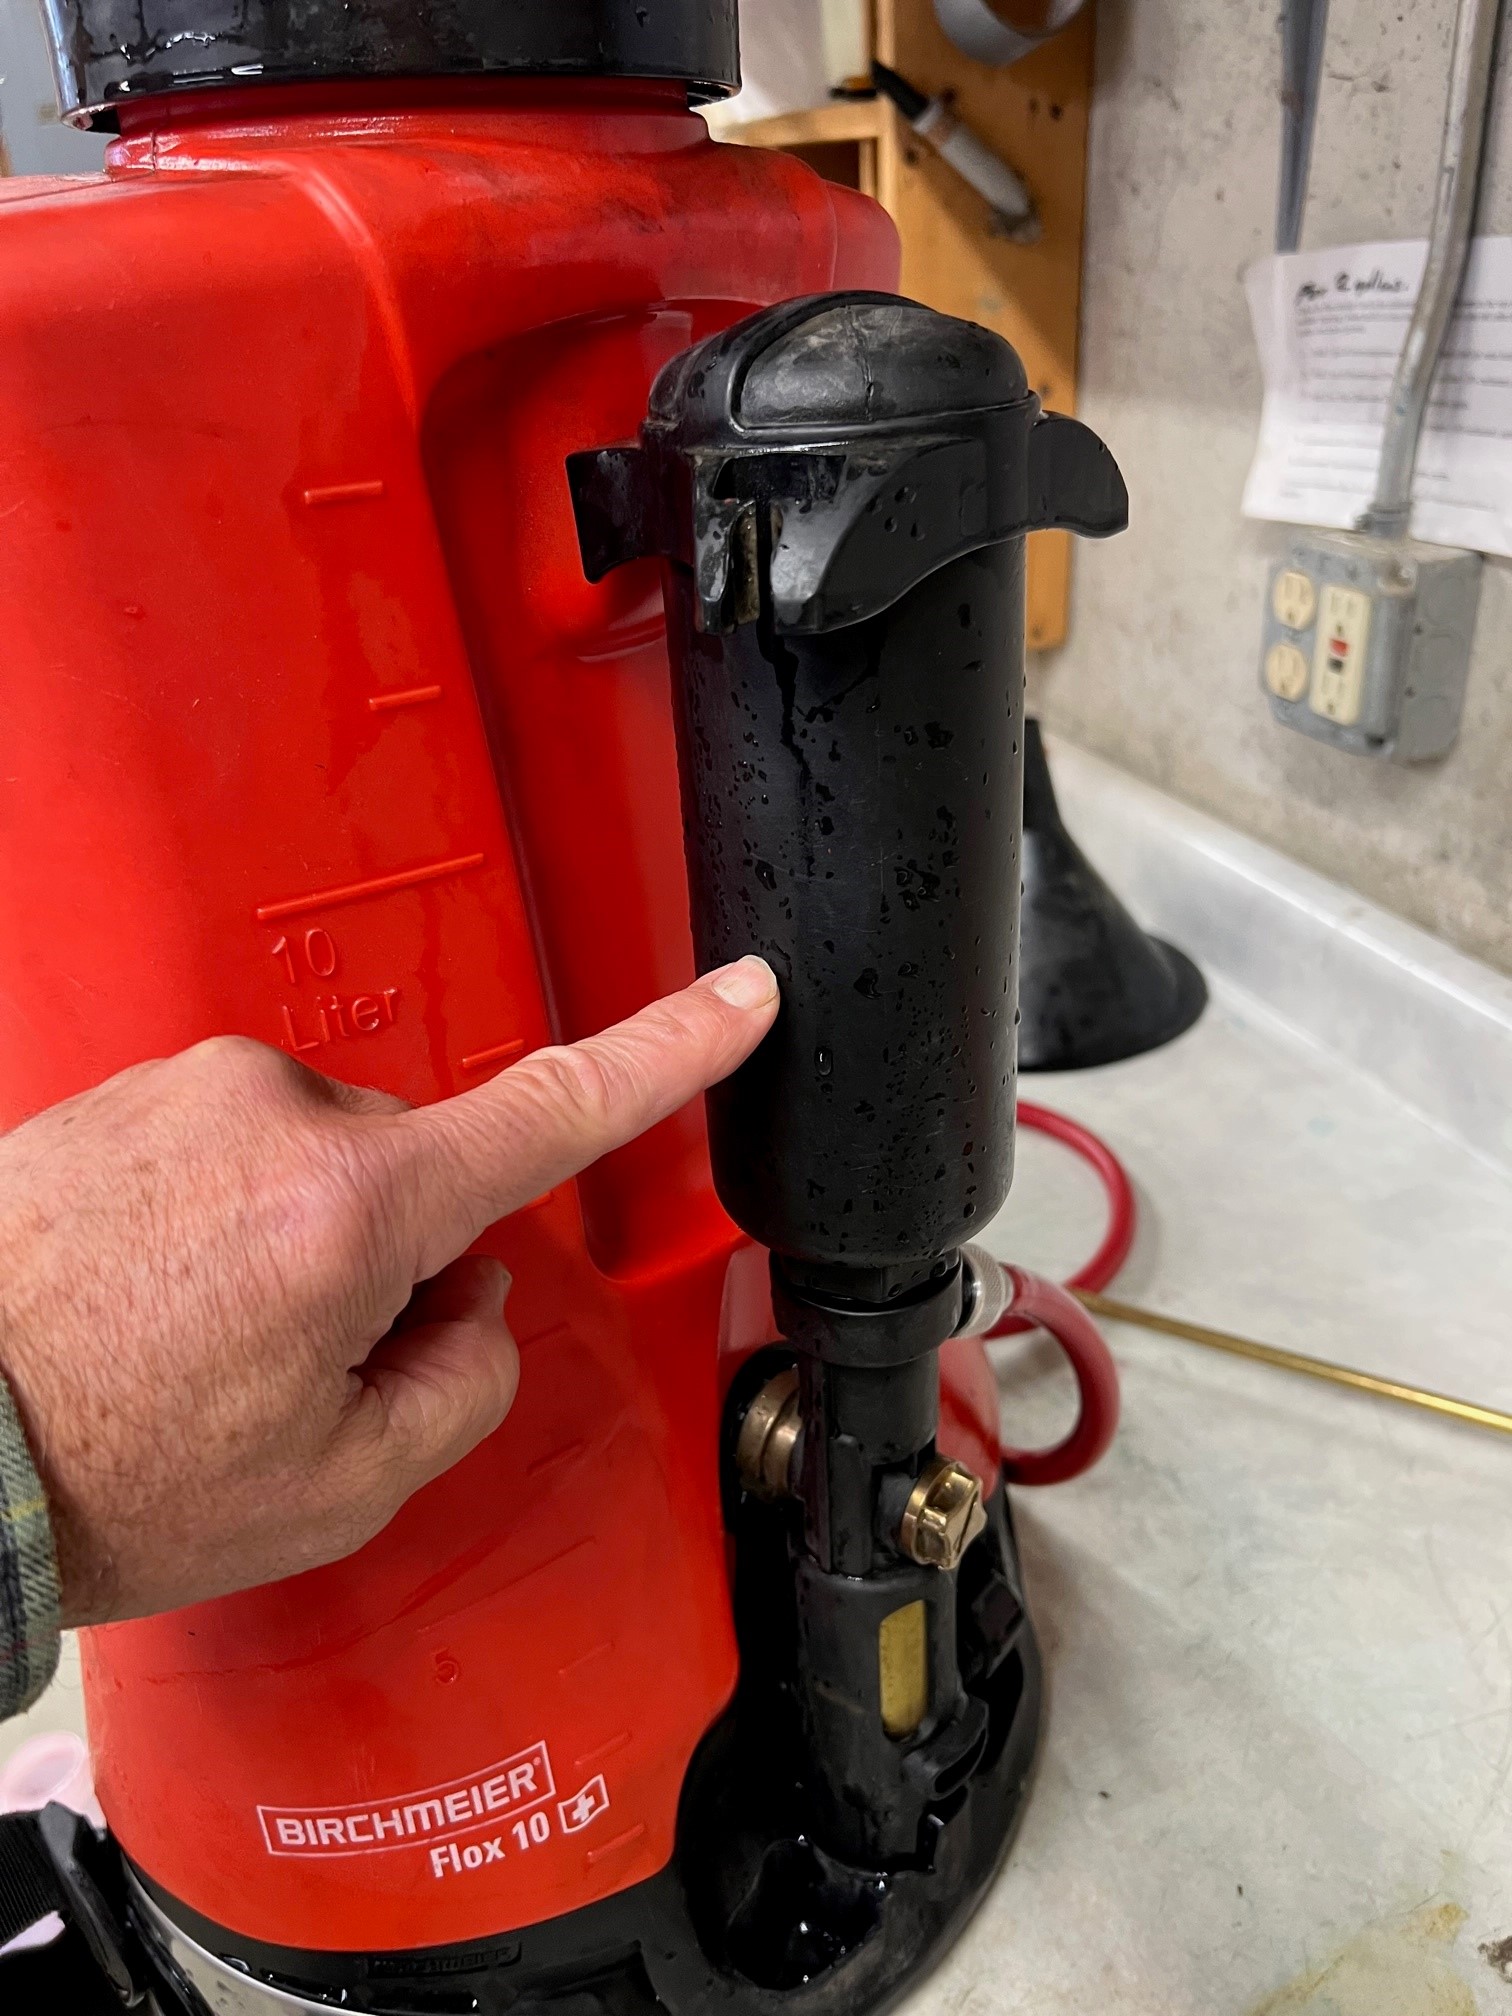
I have seen this issue before. A repair tag on the Birchmeier that says “does not pump right” or “does not spray right”. Indeed, when I tried this pack it would only pump one stroke and then the handle seemed stiff with pressure. When I sprayed it the fluid came out fast but pressure faded immediately.
I know what this is!
The air bladder is full of basal bark liquid. I am pointing to the air bladder. To get it out you empty the tank. Then rotate off the air bladder…but watch out because it will start to empty with a slow gurgle and a rush if you fully unscrew the bladder. I used a funnel over a 2 gallon jug to catch it. Screwed bladder back on it worked perfect.
How did air bladder get full of liquid? If a pack falls over in a truck the air in bladder can move into the tank and the liquid in the tank move into the bladder. So affix your packs so they don’t fall over.
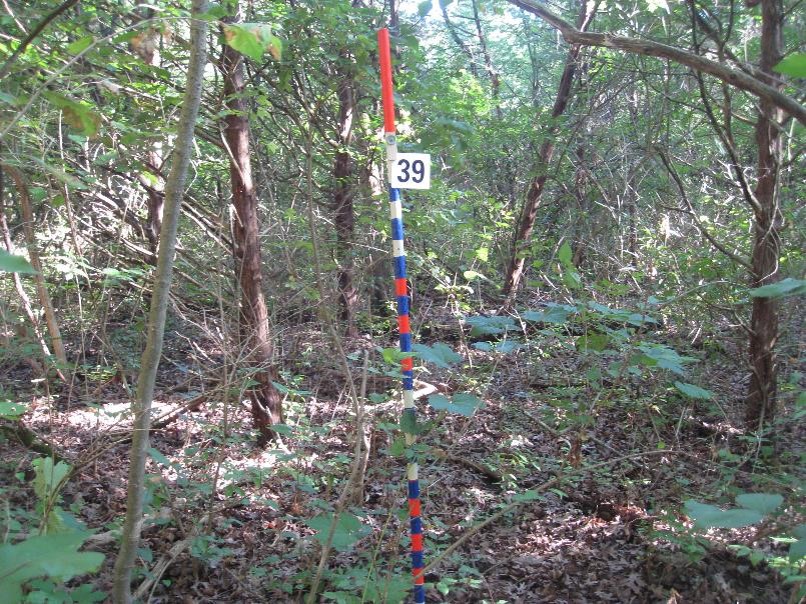
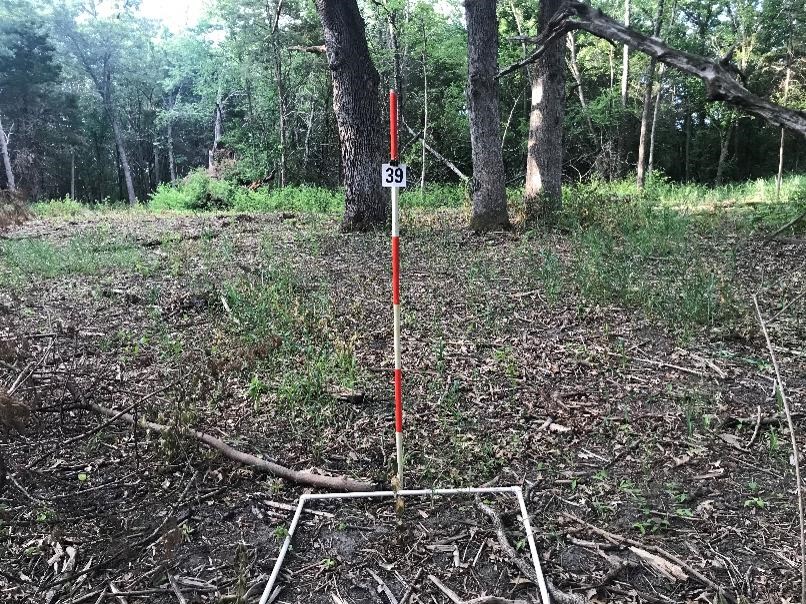
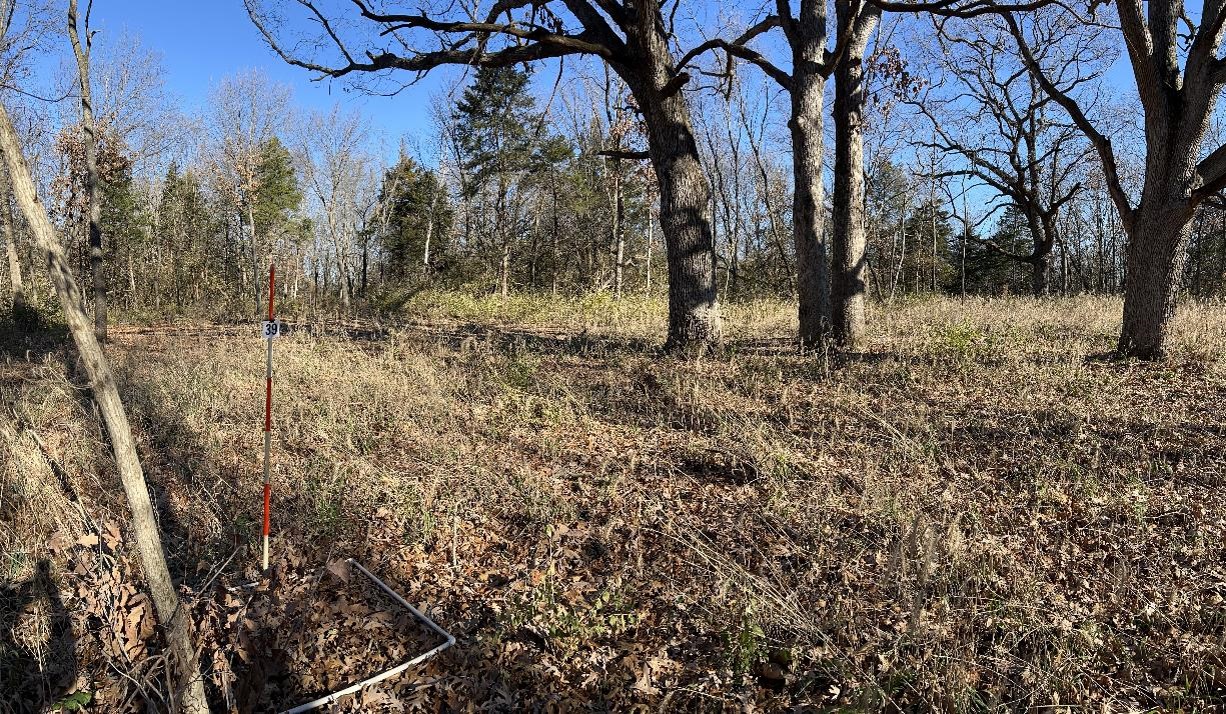
We did a lot of brush thinning that first year so there is a stark difference after year one for the photos looking north. The second photo shows the black after our spring fire, and the slash from the brush mowing. The third and fourth photos seem pretty similar to the second photo. In the third and fourth photo I show a slight panoramic I took with my phone to help place the oak trees in the photo. This gives the viewer a way to anchor the photos.
Unfortunately the brush was originally so thick that you can’t see the oaks in that first image. It might have been better to move the photo point a little closer to the oaks to get them in that first photo, or perhaps clear a bit of brush. Often I will paint a stripe around a tree to help the viewer see it.
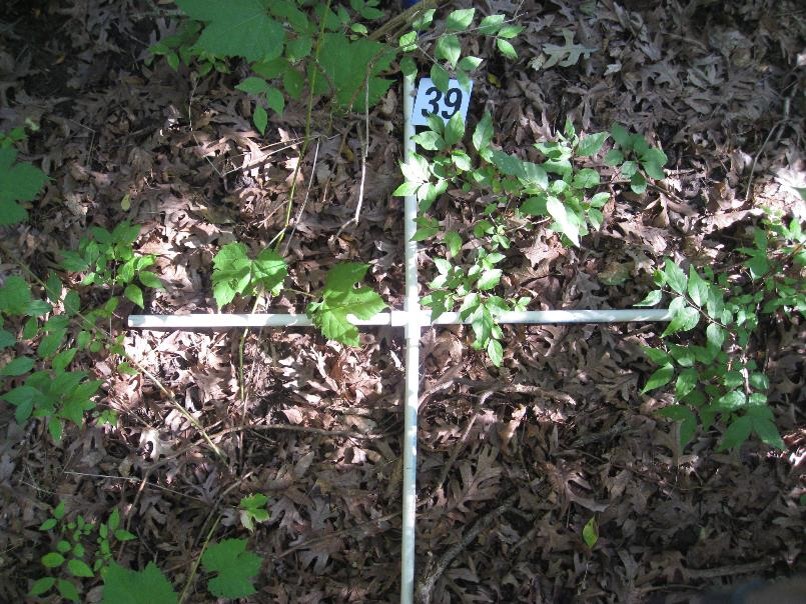
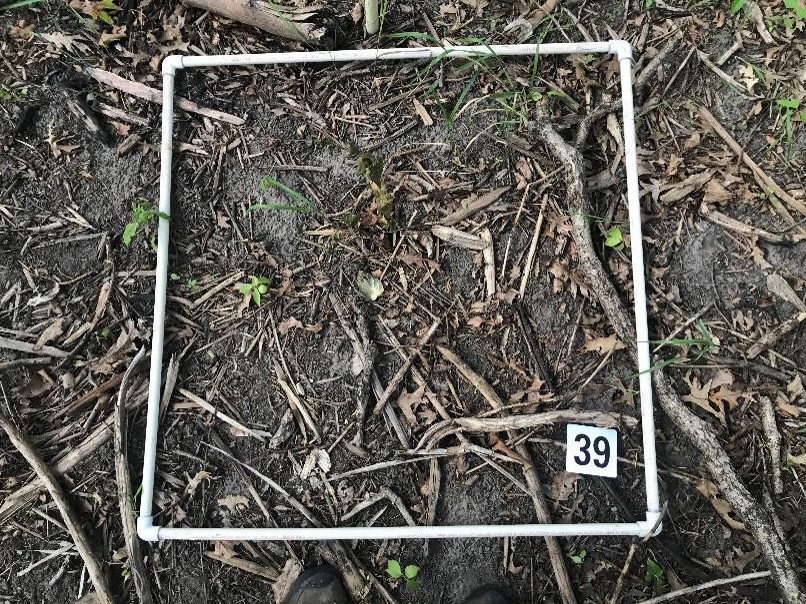
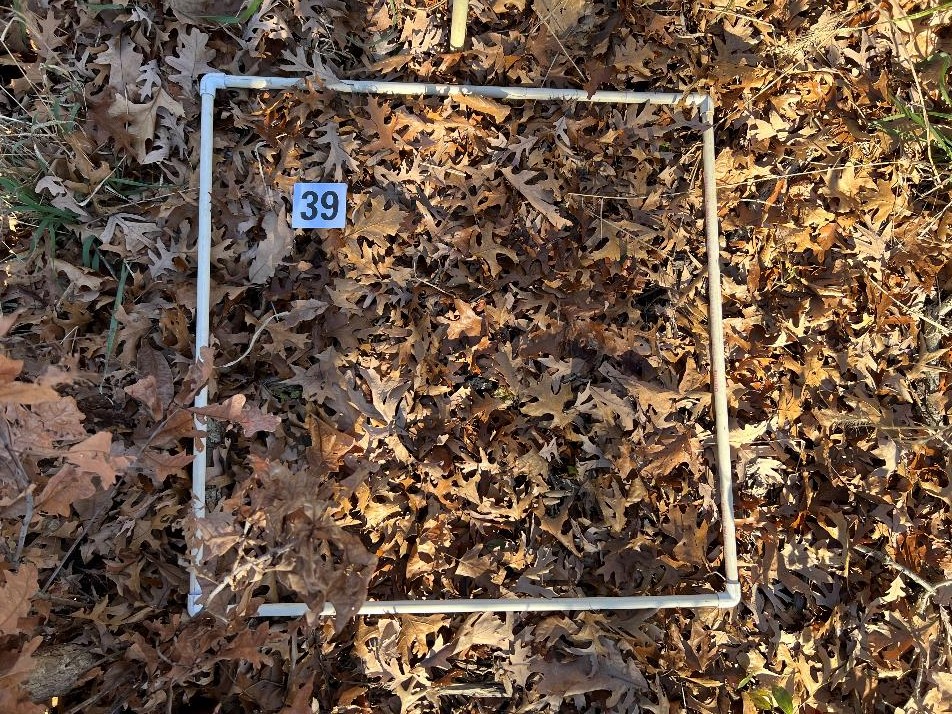
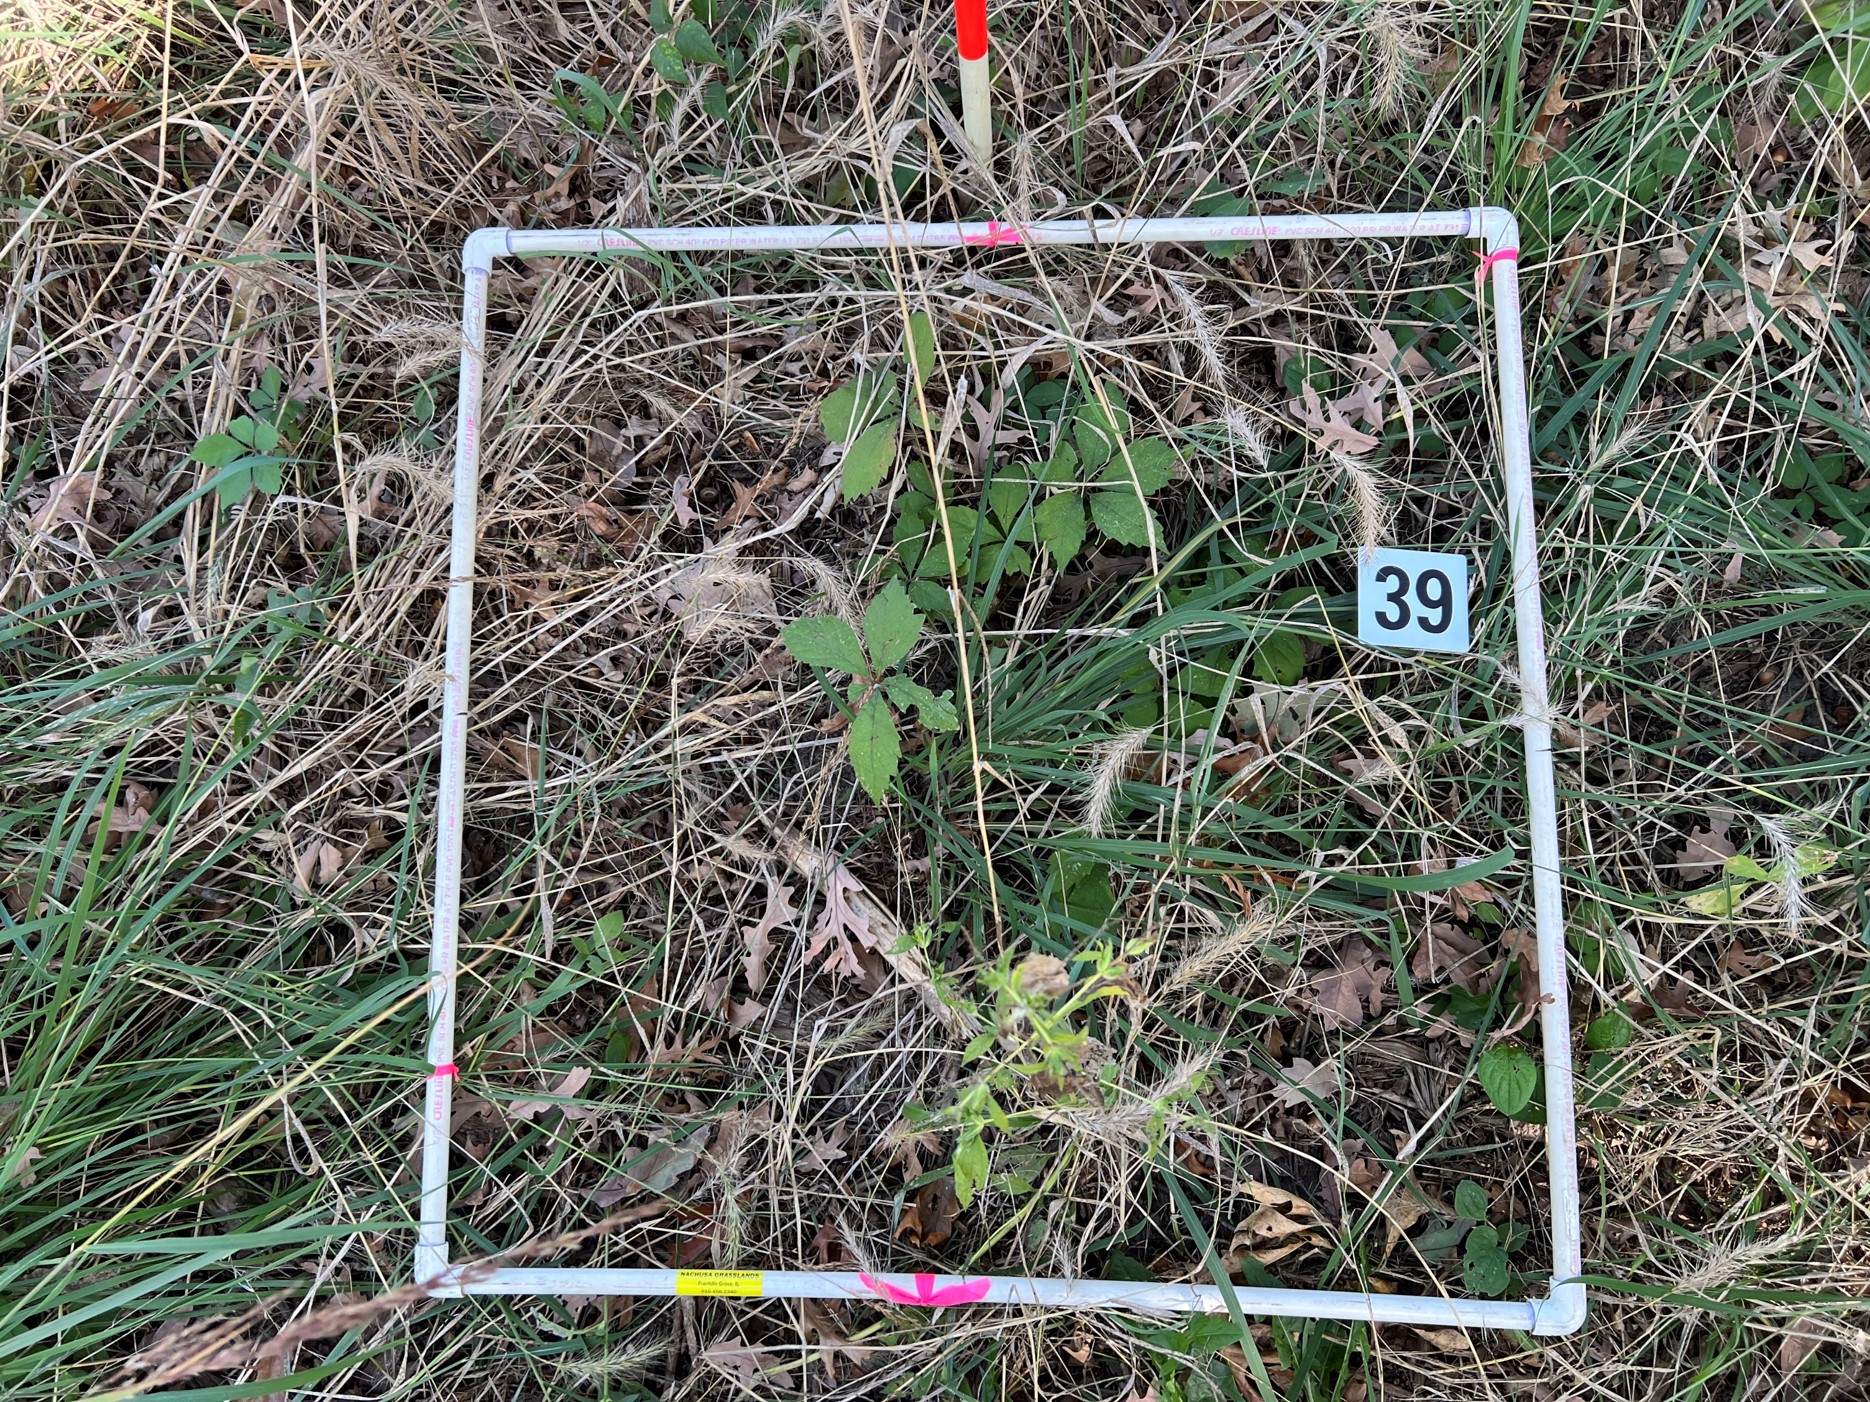
What do you think of the photos looking down? To me, they are less helpful as I can’t make out the species easily from the images. Is the herbaceous layer improving or not?
Why am I doing the photos in different months? Because grant deadlines crept up on us and those were the days we had to take photos.
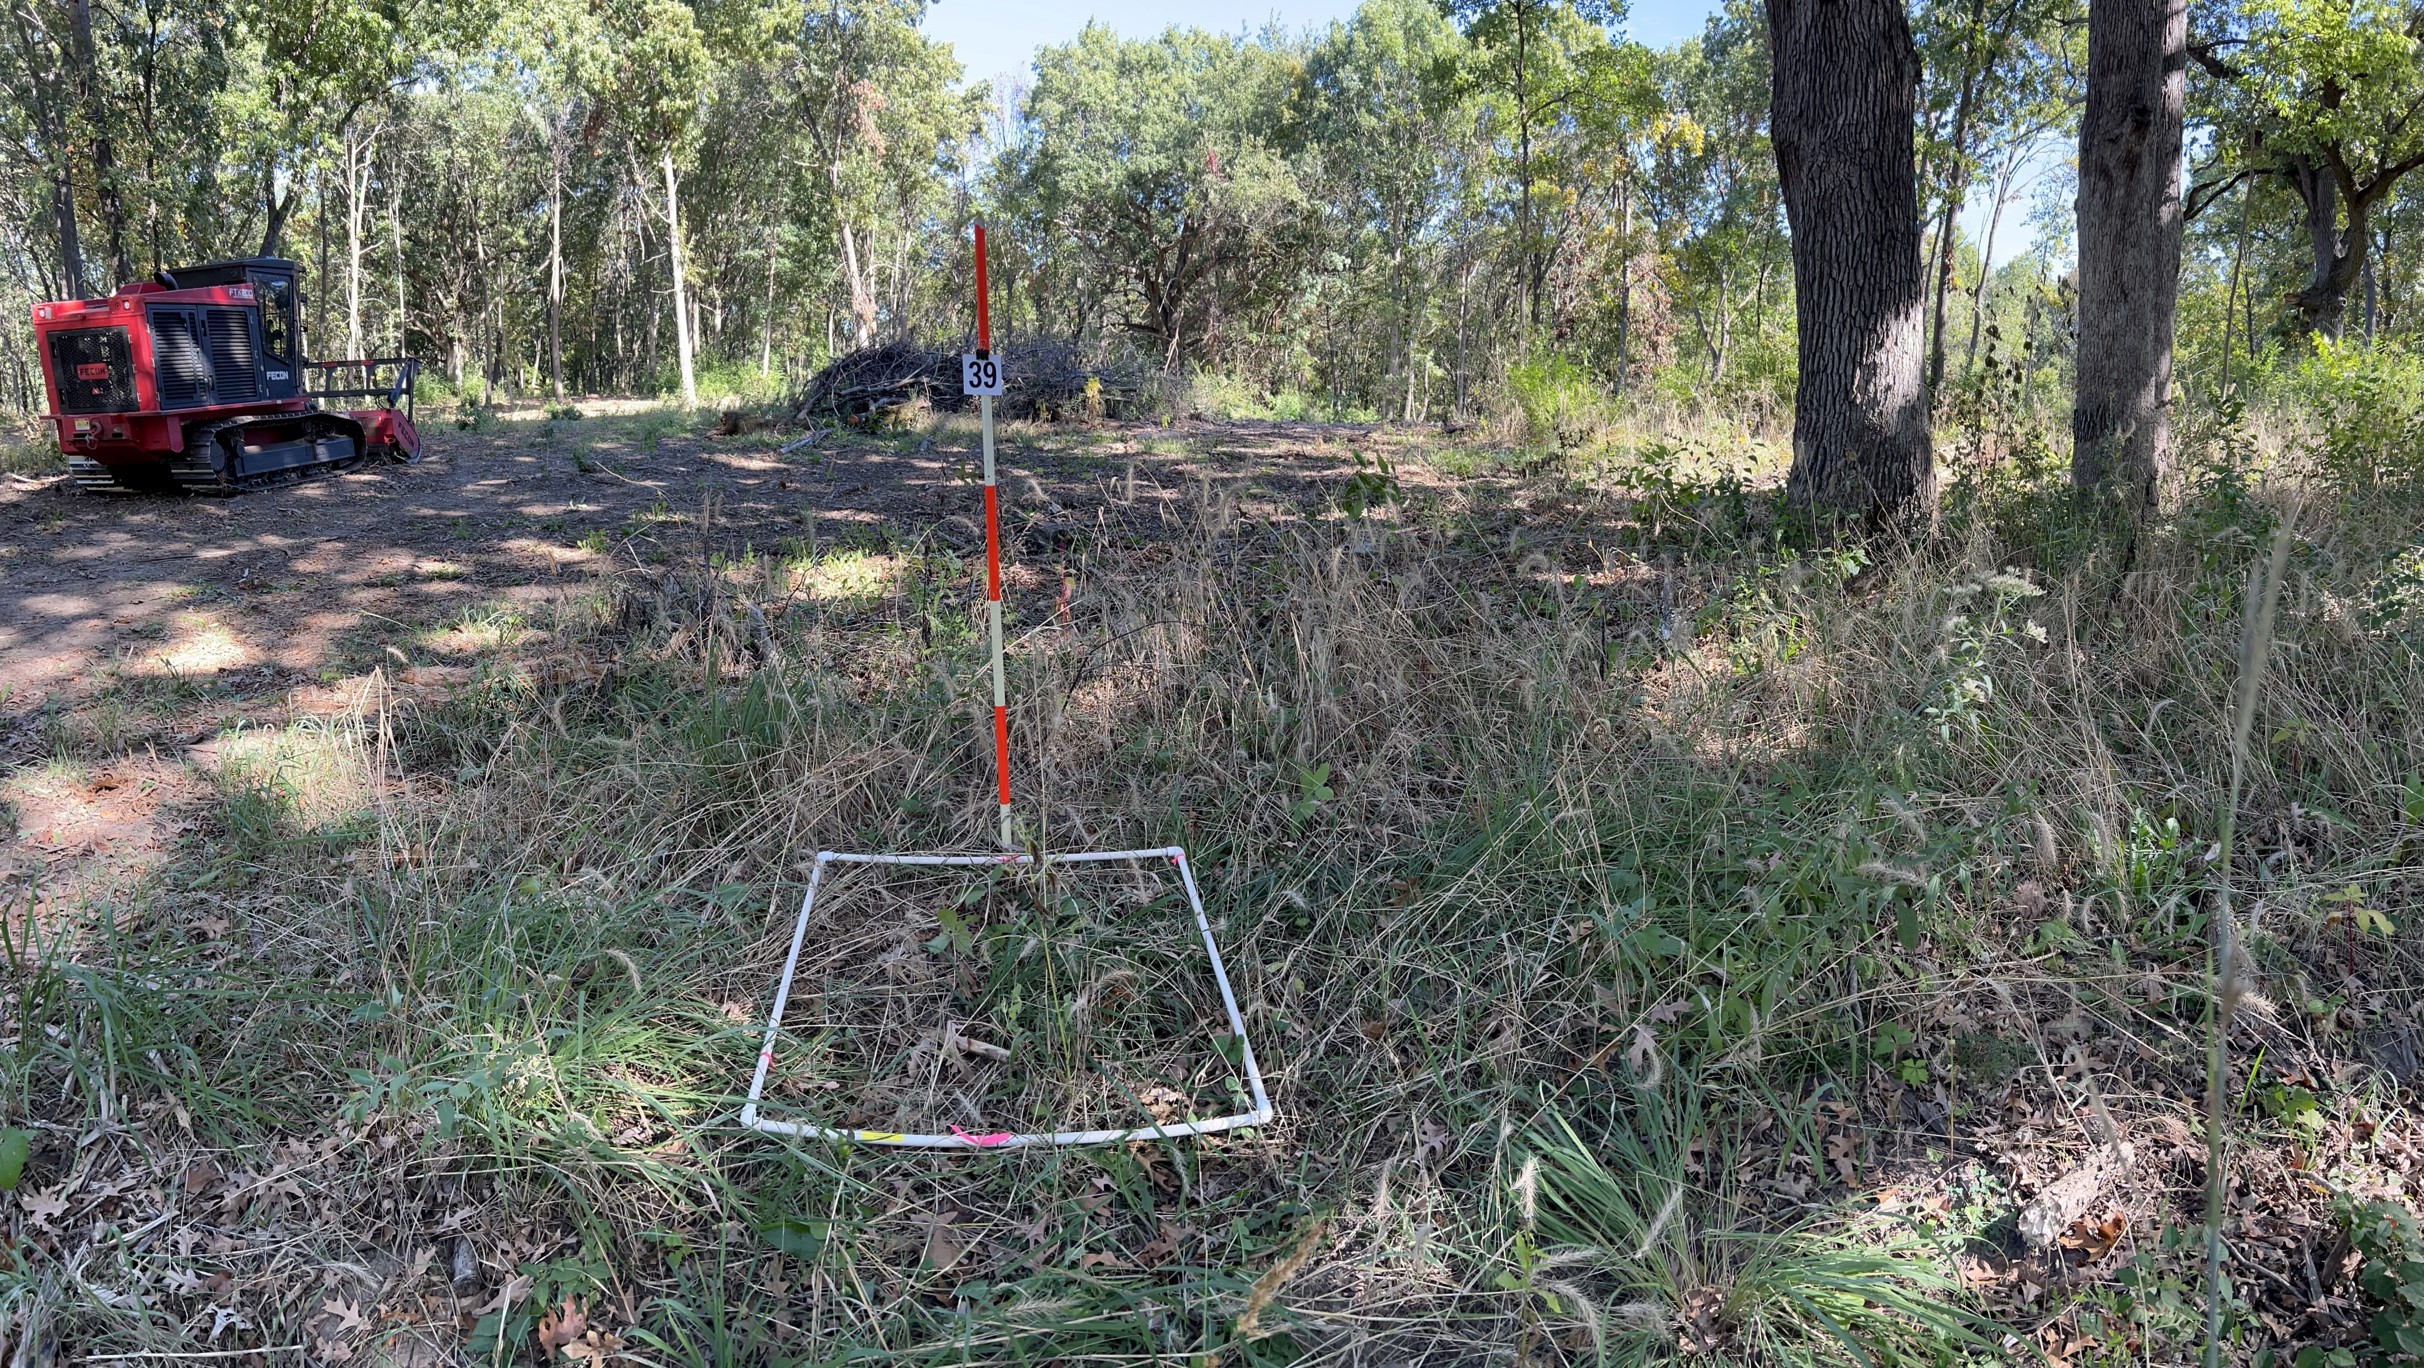
The cool thing about these photo points is that we also collected the baseline vegetation data before we did any brush clearing. We recorded all species and their percent cover in each quadrat of 50 random quadrats. We will go back next year, which will be year 5, and resample for vegetation and take new photos.
The pairing of vegetation data with photos makes the photos more meaningful and vegetation data more visual.
Prescribed fire is an essential management tool in grassland systems. It can help suppress invasive species, particularly woody species, and maintain native plant diversity. Some plants and animals thrive in recently burned habitat, others prefer some thatch cover or have larval stages that overwinter in surface litter. When managing for the entire ecosystem, it is helpful to maintain a rotation of burned and unburned areas, providing opportunities for a strong diversity of species with differing fire tolerance to thrive at the landscape level. This is certainly a challenge in highly fragmented landscapes like tallgrass prairie within the midwestern United States.
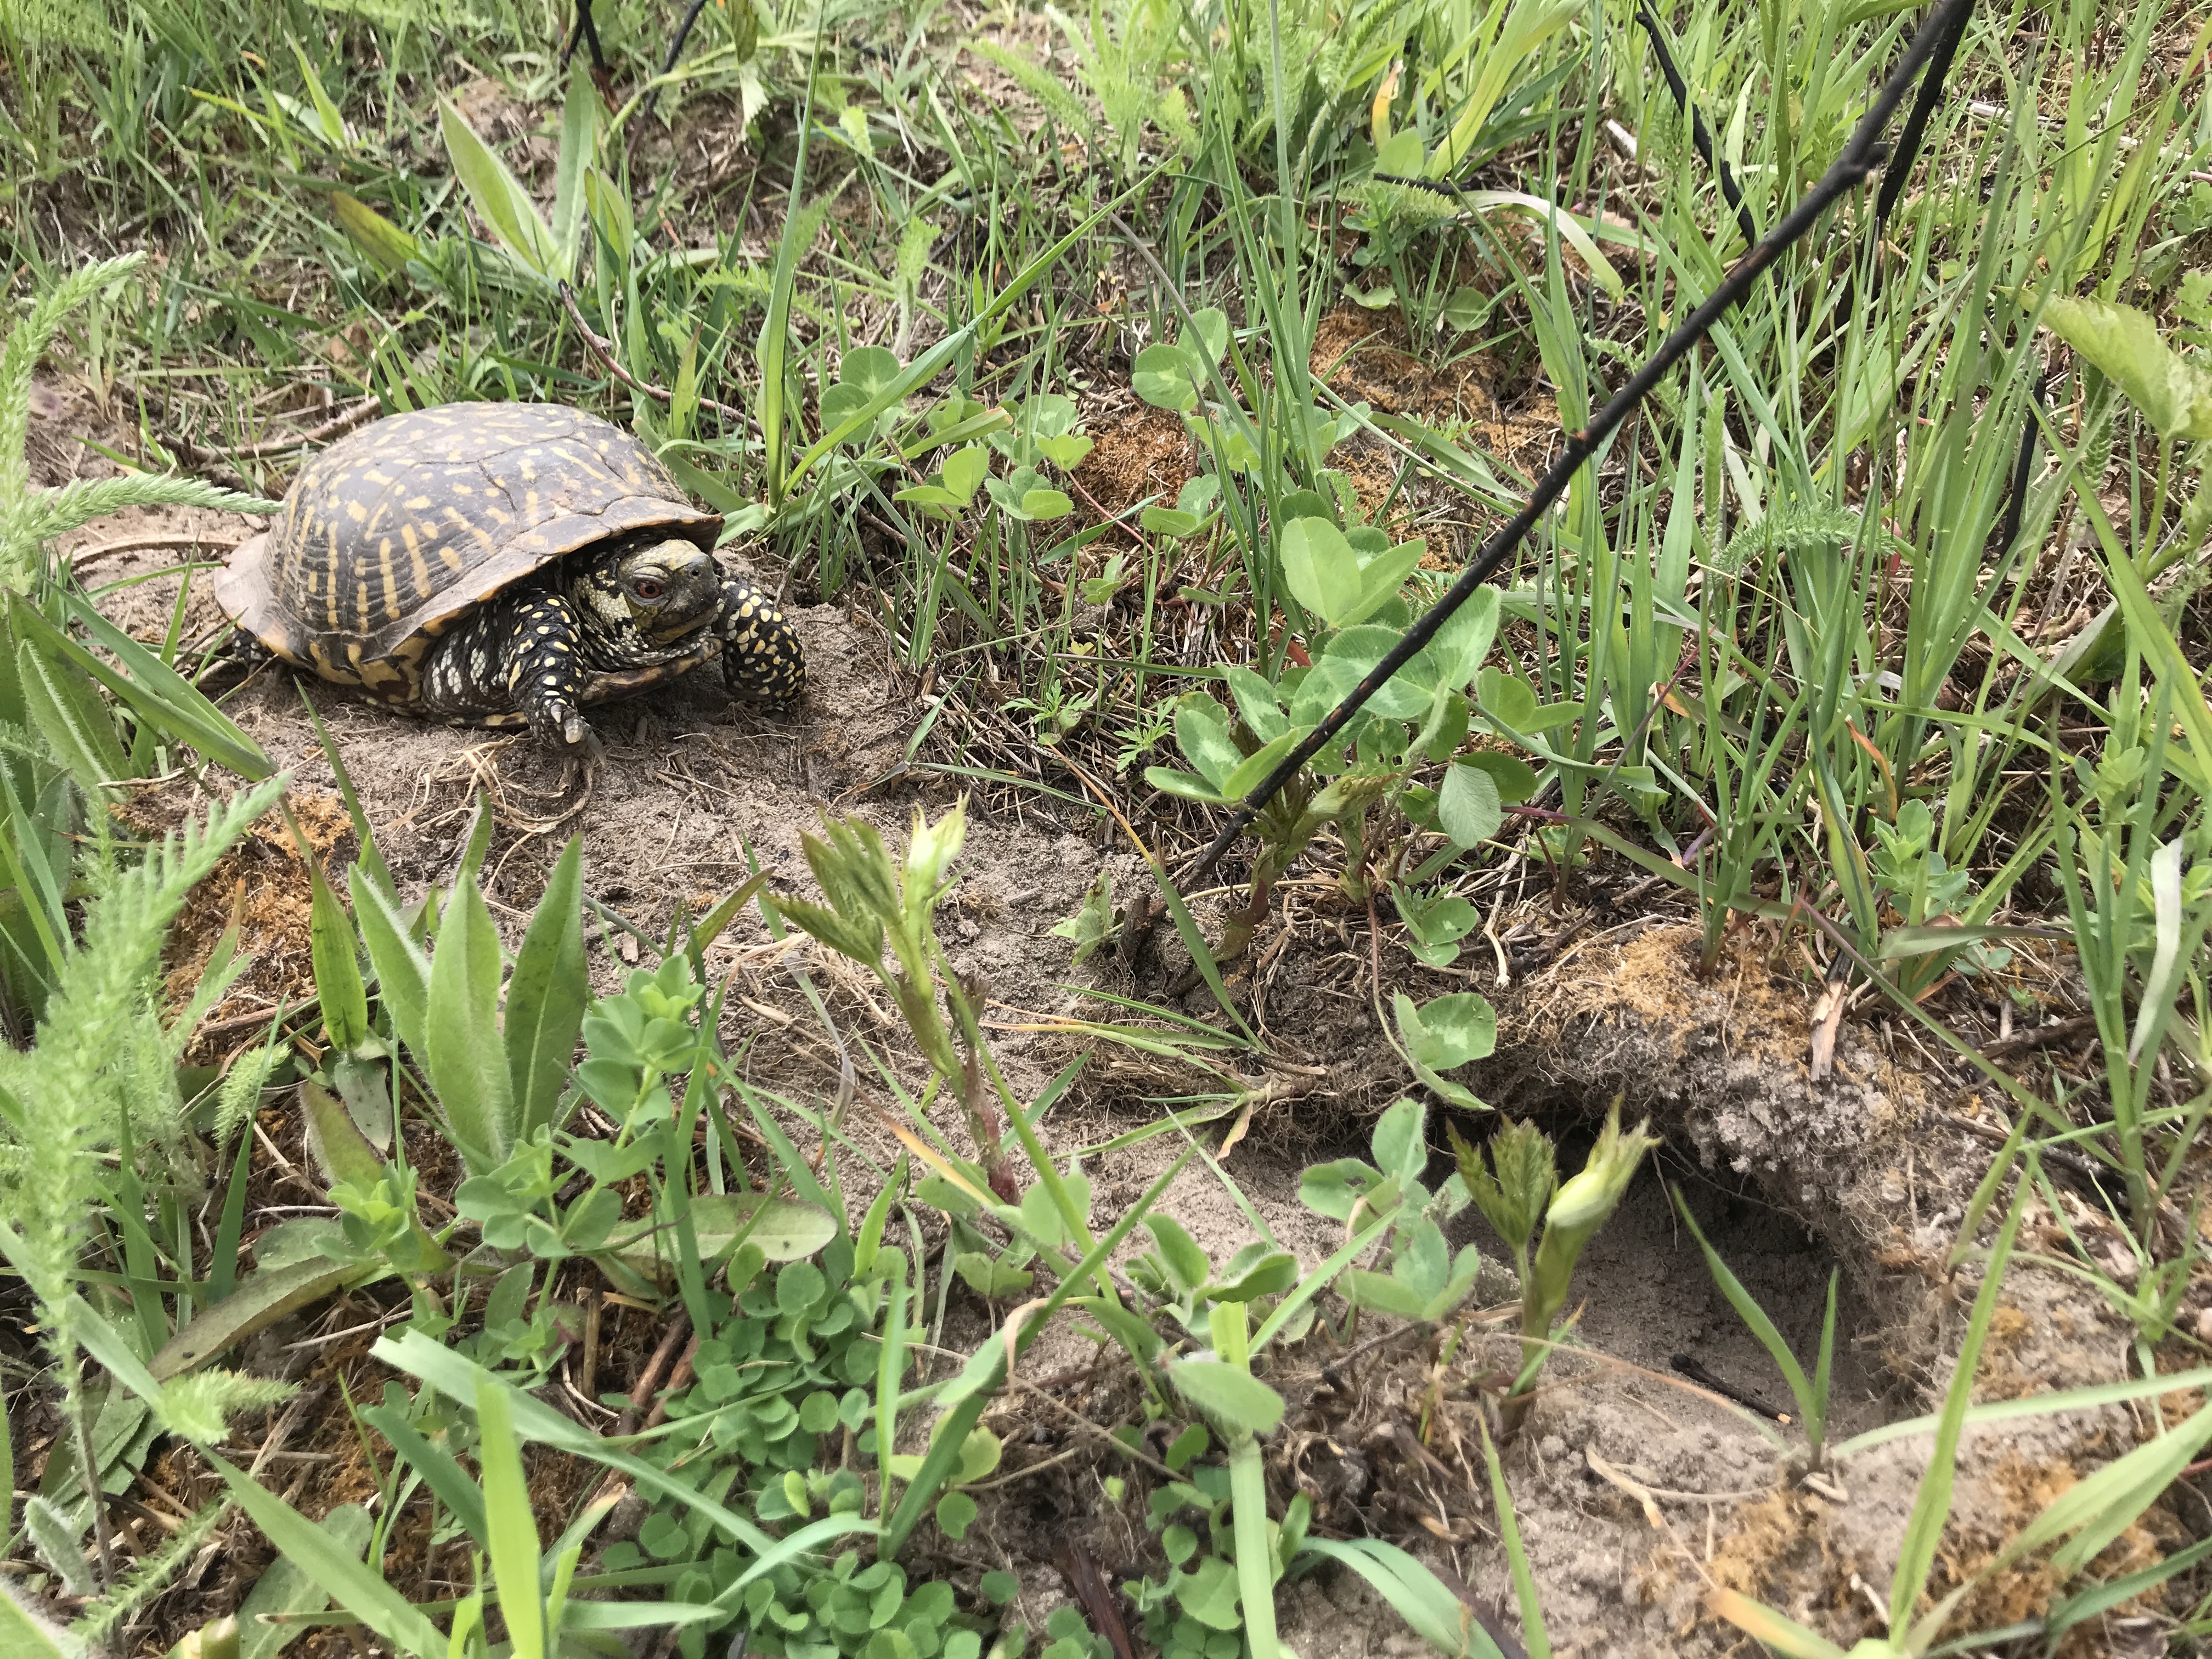
Habitat fragmentation is a leading cause of declining biodiversity throughout the Midwest region. This is particularly true for reptiles like ornate box turtles. As a result of fragmentation, the ornate box turtle is a state-threatened species in Illinois, where they persist in small, isolated areas. Prescribed fire is needed to maintain the open grassland habitat the turtles prefer as well as support overall biodiversity.
Ornate box turtles spend winters belowground. As temperatures cool in the fall, turtles begin digging holes and spending nights underground. Once temperatures reach a certain level, they will stay belowground essentially sleeping through the winter. As temperatures warm in the spring, turtle metabolism ramps up and they dig out of their holes. The days and weeks when the turtles enter and emerge from their burrows are a sensitive time. Their metabolisms are running more slowly, they physiologically move and respond to their surroundings slowly. If a fast-moving grass fire moves through their habitat, they may not be able to burrow down or hide quickly enough to avoid injury, or worse, death.
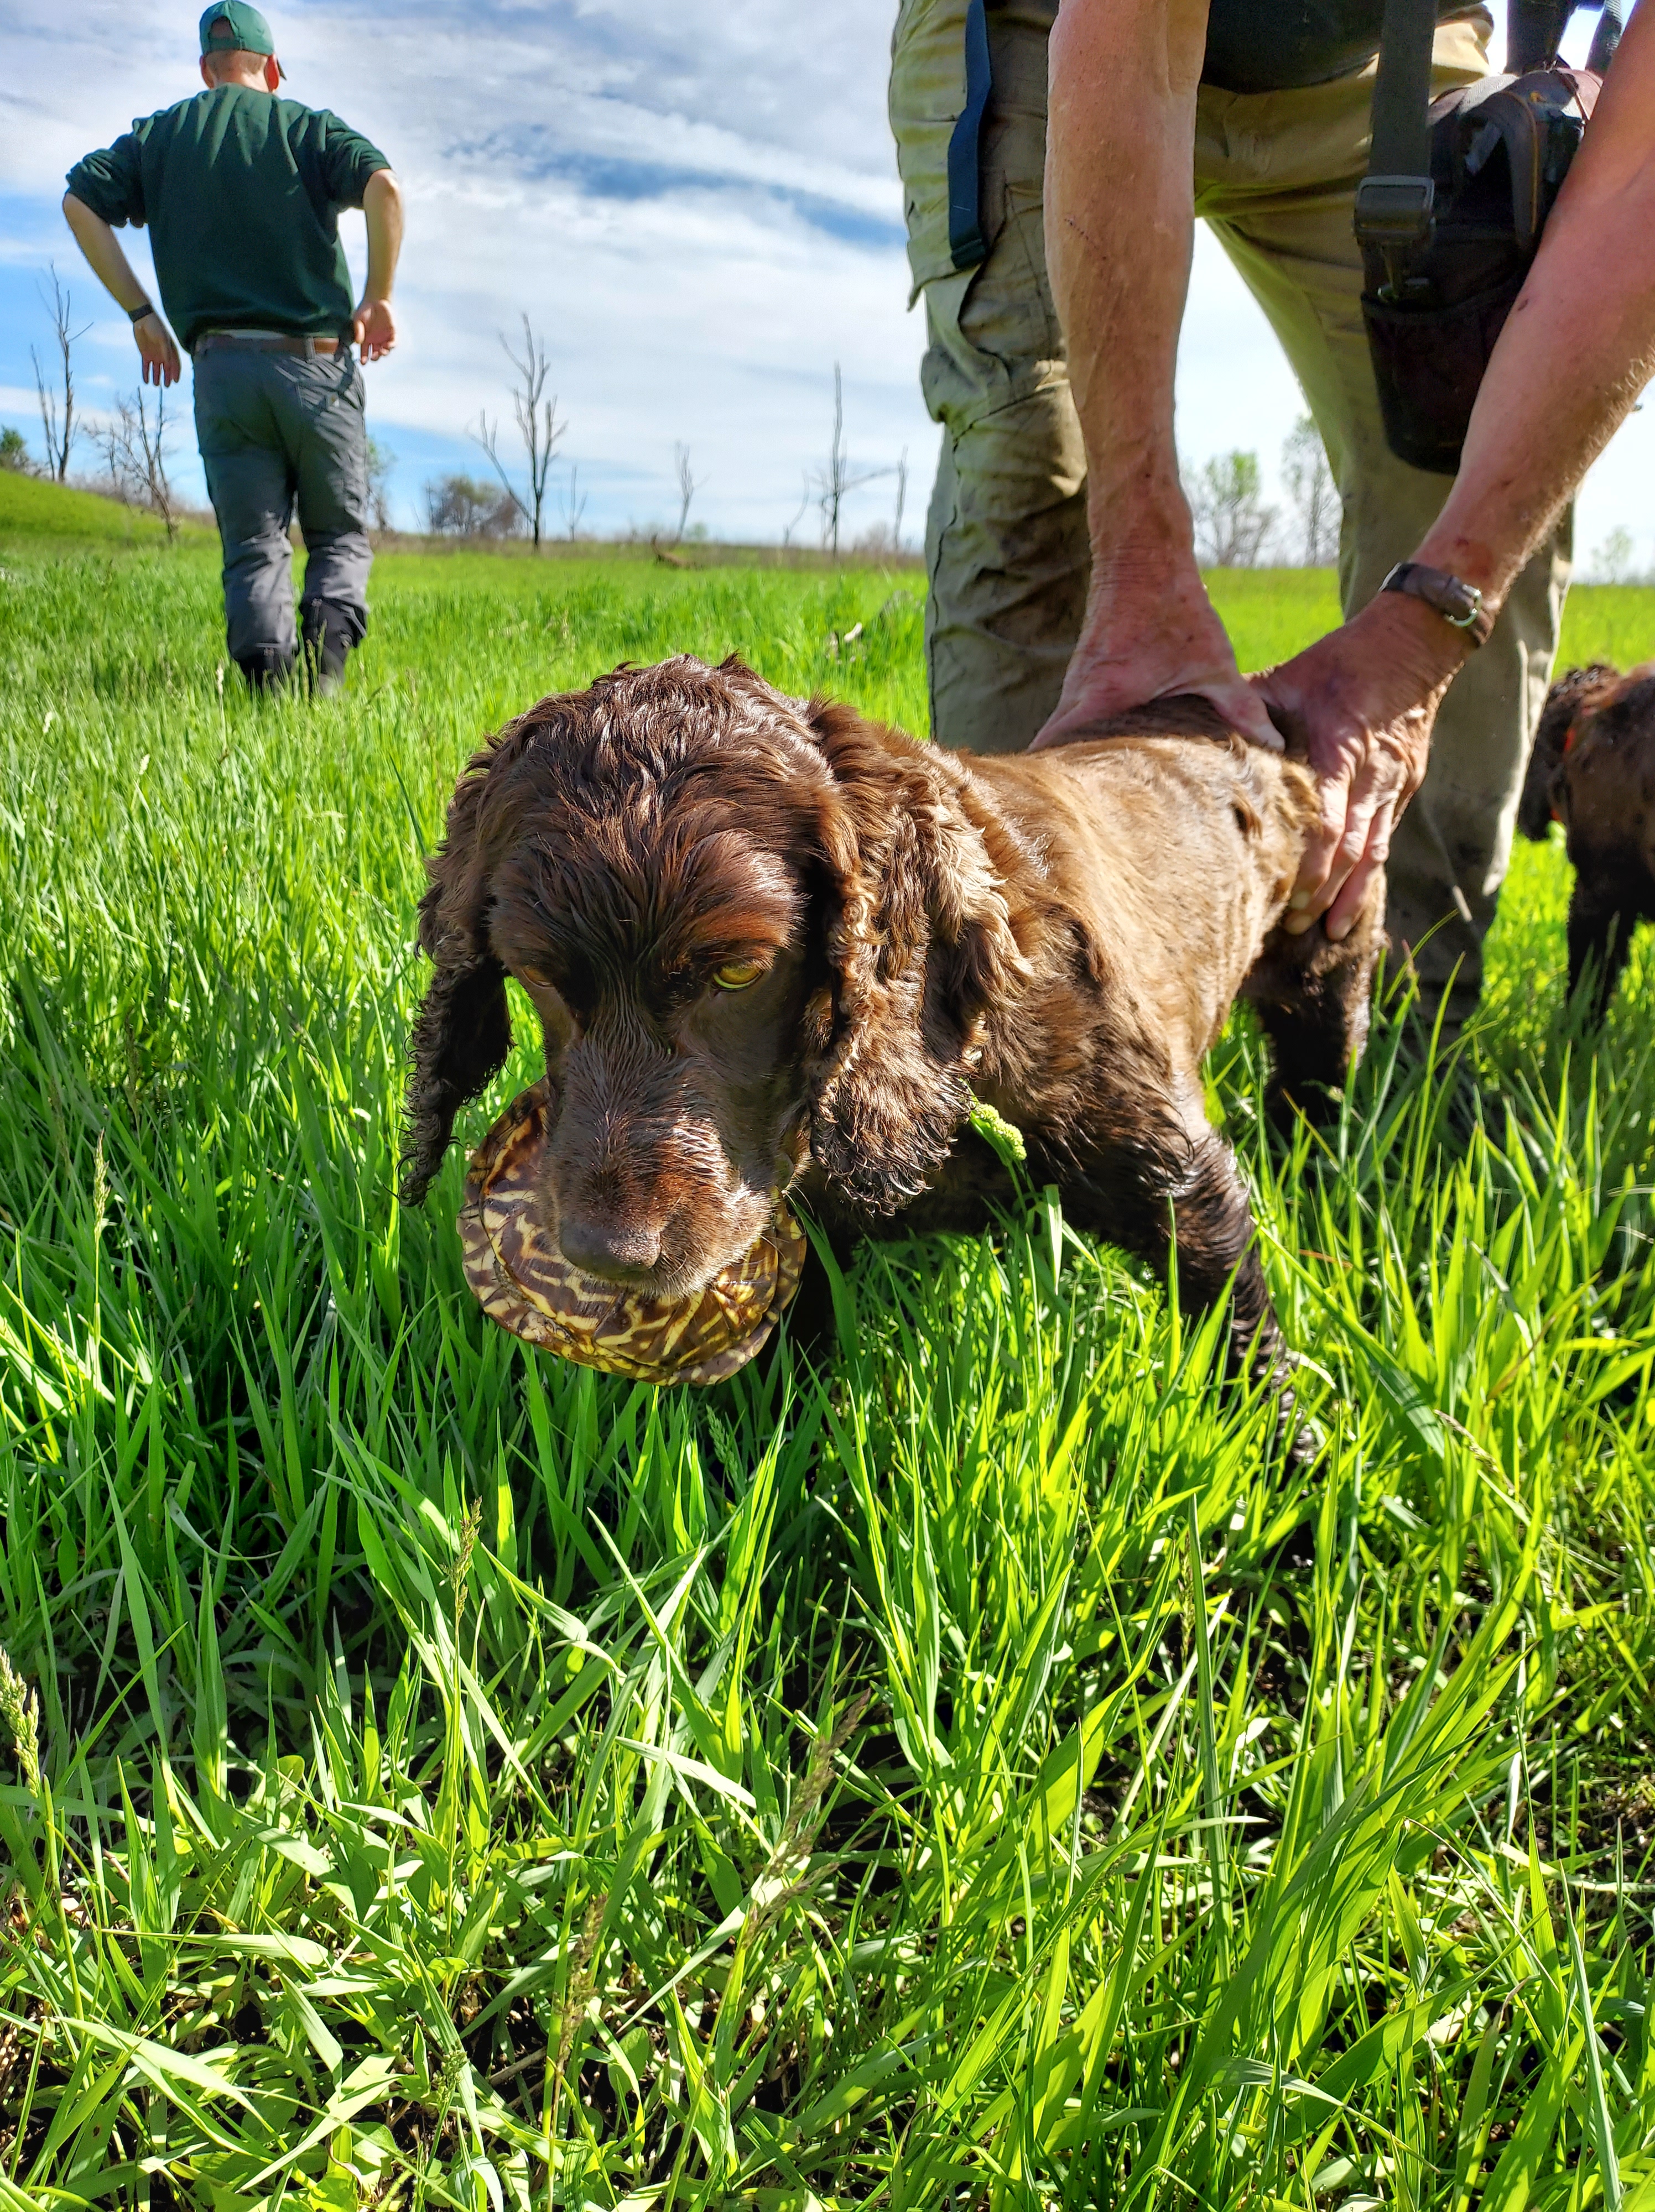
Turtle tracking dogs smell turtles and pick them up. Researchers quickly accept the turtle, give the dog a pat on the head, and then return the turtle to the that spot within an hour.
To help land managers identify these sensitive turtle times, Devin Edmonds and colleagues from the Illinois Natural History Survey and University of Illinois Urbana-Champaign conducted a study to determine exactly when turtles burrow in the fall and emerge in the spring. Devin attached radio-trackers to turtles in three different populations in Illinois. Observed turtle presence aboveground was correlated with air temperature, soil temperature, shell temperature, and soil inversion date to generate a predictive model land managers can use to determine conditions when turtles are most likely present aboveground.
Air temperature was the most predictive of all the environmental variables considered. In the fall, turtles can remain aboveground in cooler temperatures than in spring. Warmer air temperatures are needed in spring for turtle emergence. The best model includes both air temperature and day of year to accurately predict ornate box turtle presence aboveground in Illinois:
Fall
Spring
Date
Air Temp
Probability turtles aboveground
Date
Air Temp
Probability turtles aboveground
1 October
16° C (60° F)
10%
1 March
15° C (59°F)
10%
1 November
16° C (60° F)
6%
1 April
15° C (59°F)
20%
1 November
15° C (59°F)
<5%
1 April
10° C (50°F)
<5%
Author recommended thresholds in bolded bottom row.
Lower air temperatures further reduce the probability that turtles are aboveground. We encourage land managers to be aware of areas where ornate box turtle populations exist and prioritize prescribed fire activity in those areas during the dormant season, before temperatures trigger emergence in the spring and after turtles go under in the fall. Prescribed fire in areas without known turtle populations can be prioritized outside these recommended conditions. This paper provides the most robust recommendations to date on predicting emergence and submergence dates, giving land managers more power to achieve prescribed fire objectives for the whole ecosystem and avoid turtle injury or mortality.