Mike Saxton – Manager of Ecological Restoration and Land Stewardship – Shaw Nature Reserve – Gray Summit, MO
Stump grinders are one of those tools that you don’t use often and when you do use one…you sometimes have to re-learn your technique if it’s been a couple years since you operated last. If you use them so infrequently, perhaps it’s best to rent or barrow. There are a lot of different models out there and most have a big spinning disk with replaceable teeth. You can picture it.
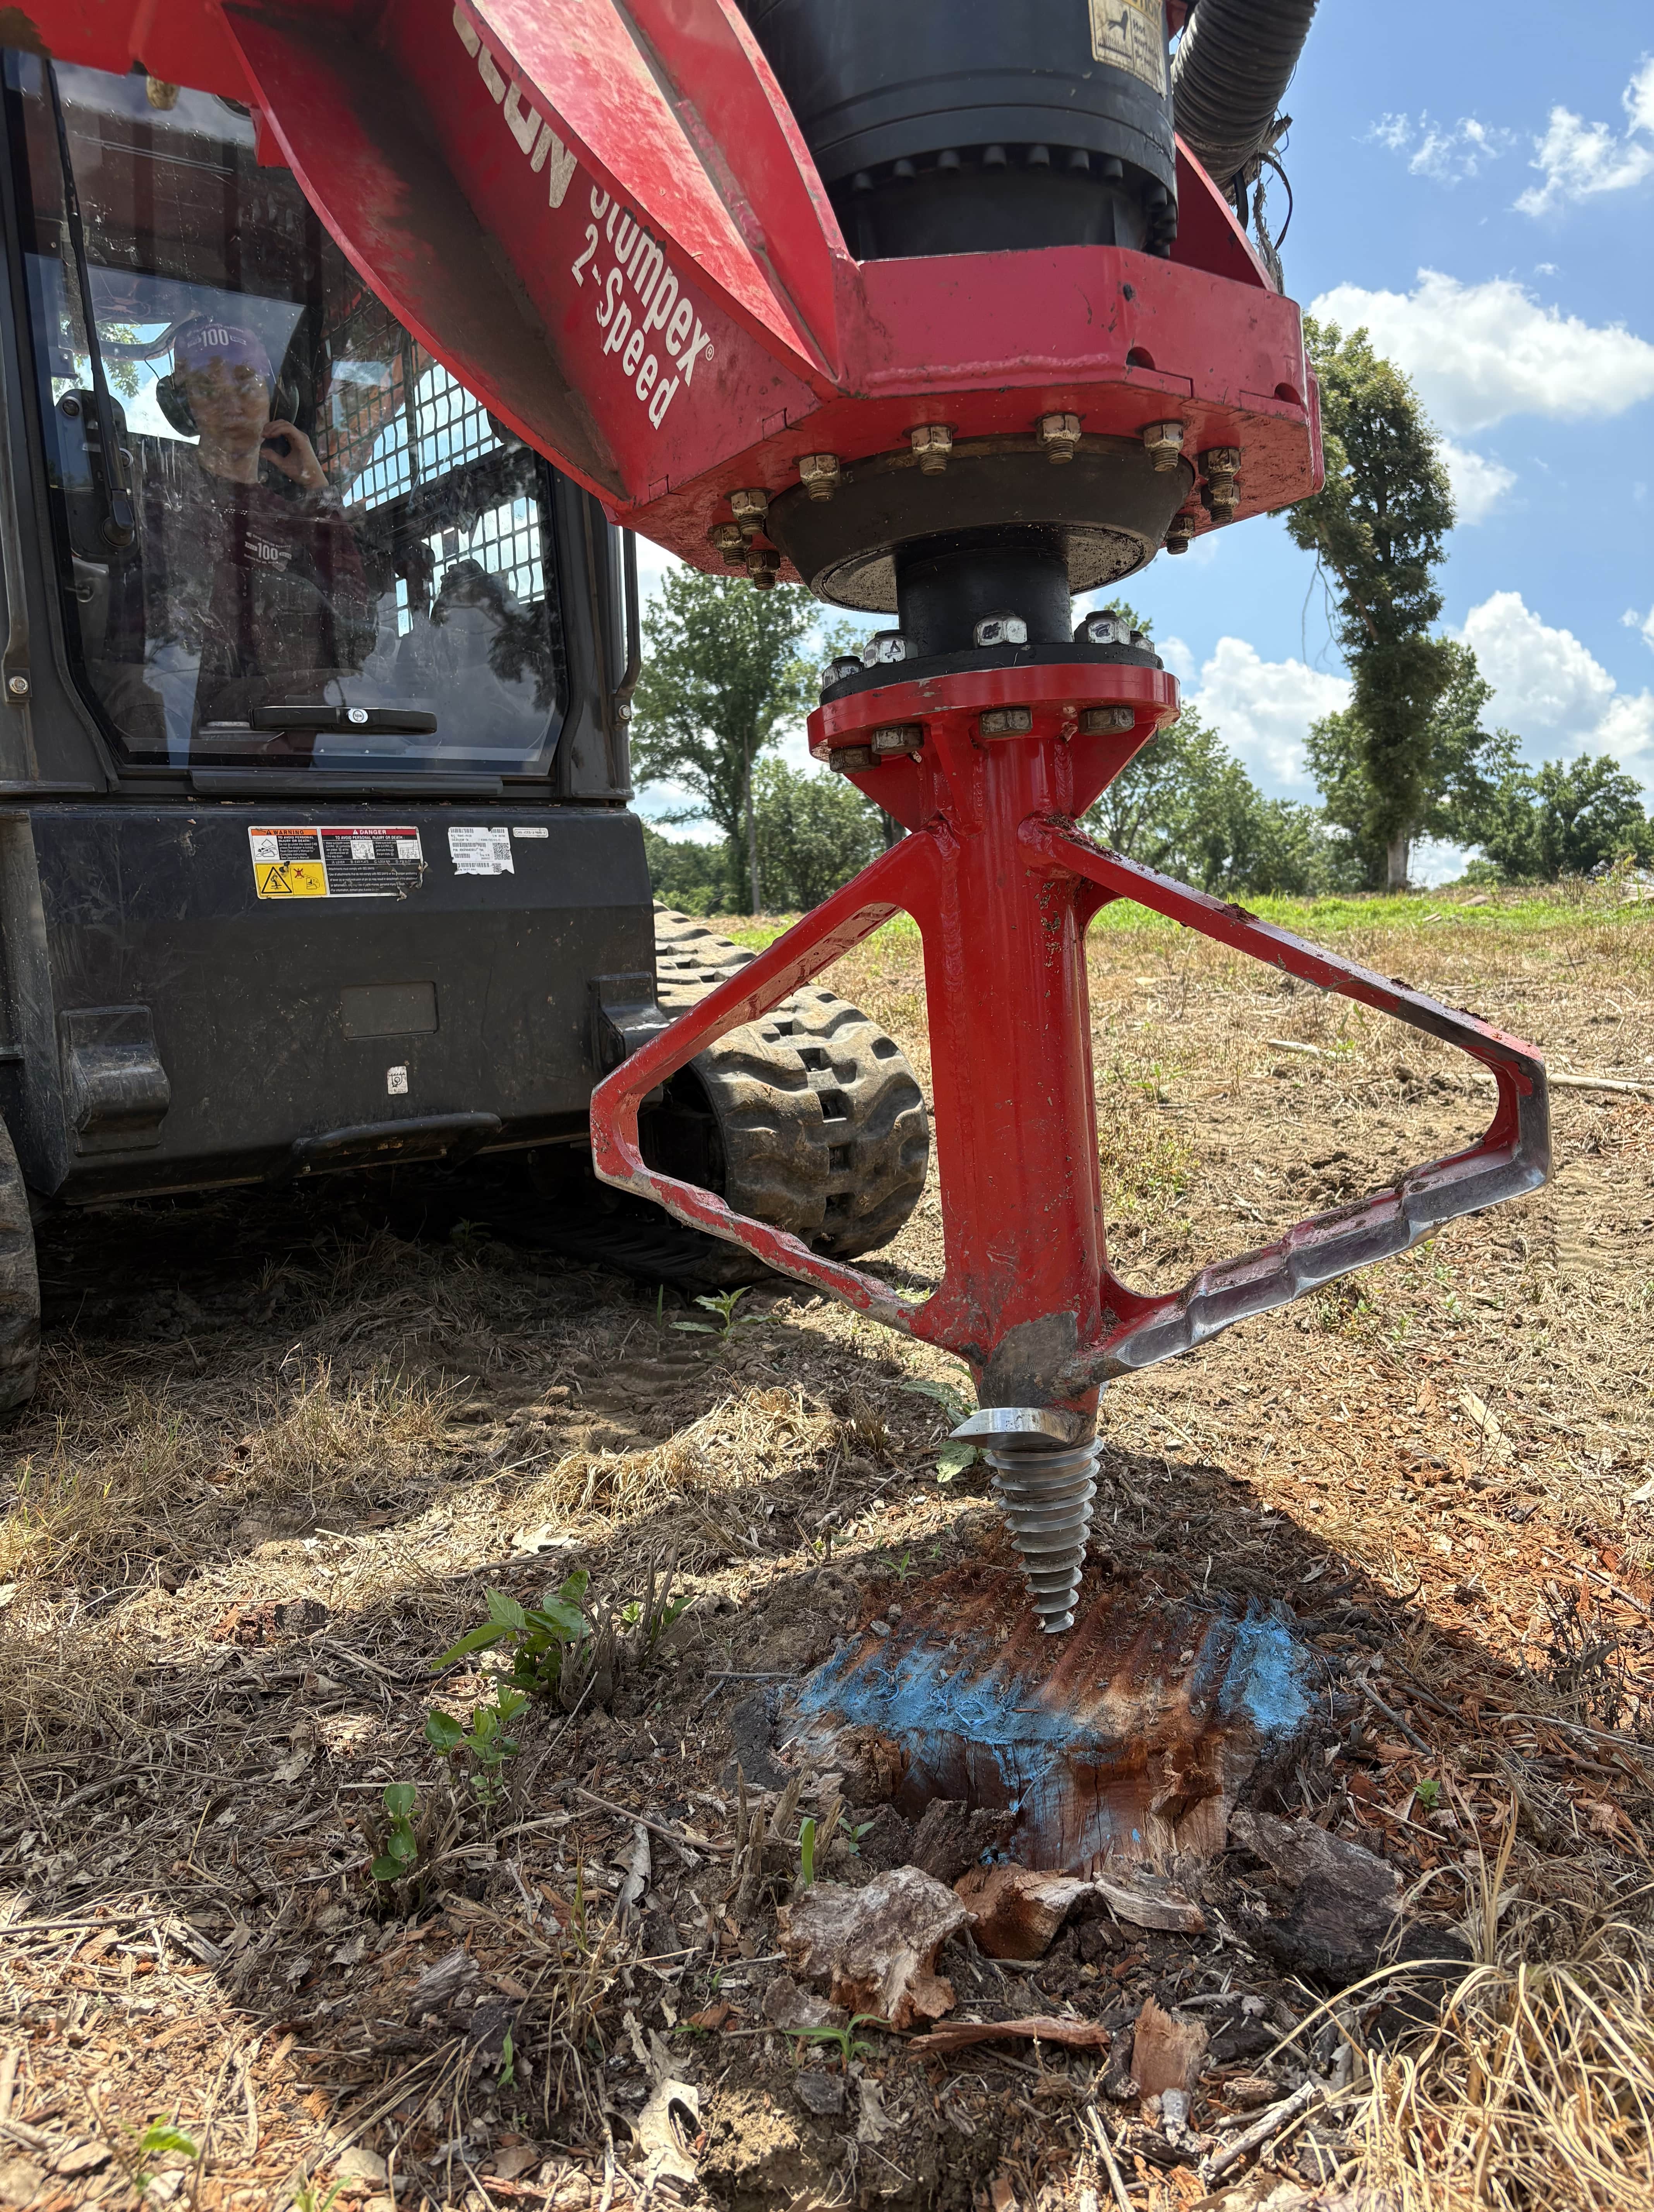
As part of a 120 acre prairie establishment / logging project, we have ground thousandsand thousands of stumps using a Kubota SVL track loader and a Fecon StumpEx stump grinder. I outlined that project in a previous GRN blog post
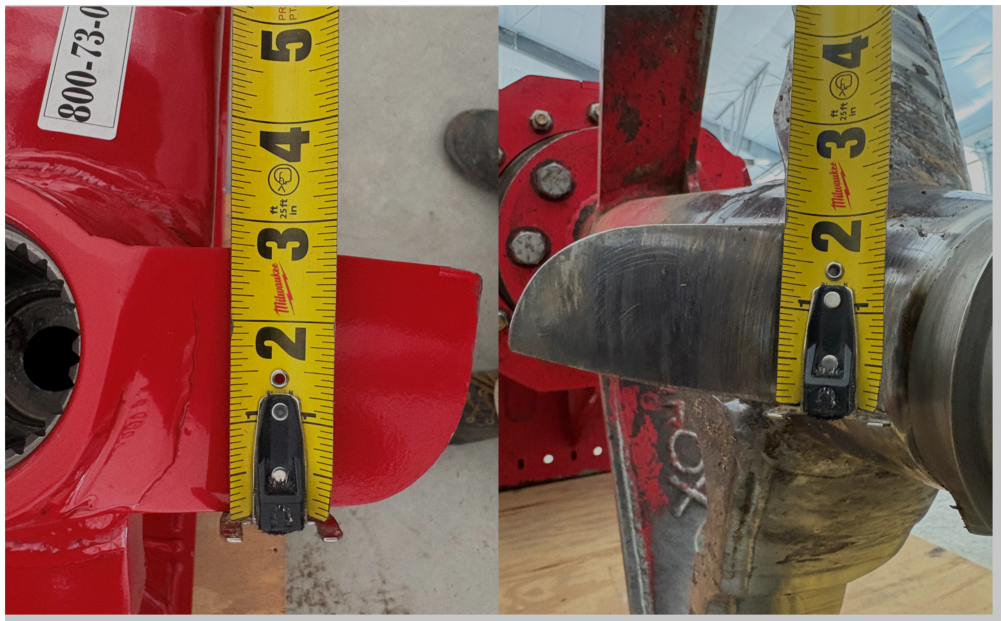
Fecon StumpEx – 1,368 lbs, bit diameter is 32″, requires 20-42 gallons per minute high flow
Kubota SVL loader – we were running the StumpEx on an SVL-90-2 for a couple years. High flow GPM = 36. We are now running it on a new Kubota SVL-97 with a high flow GPM = 40. So we are at the upper end of the StumpEx flow requirements.
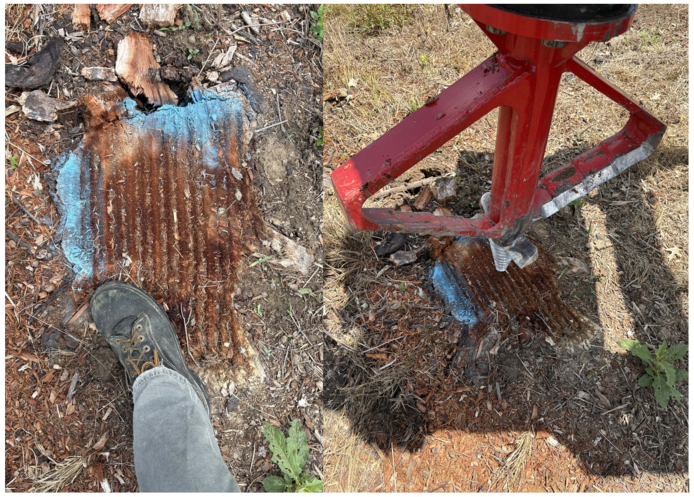
The above stump took about 1 minute to grind below grade. It was roughly 15in diameter and 3in tall.
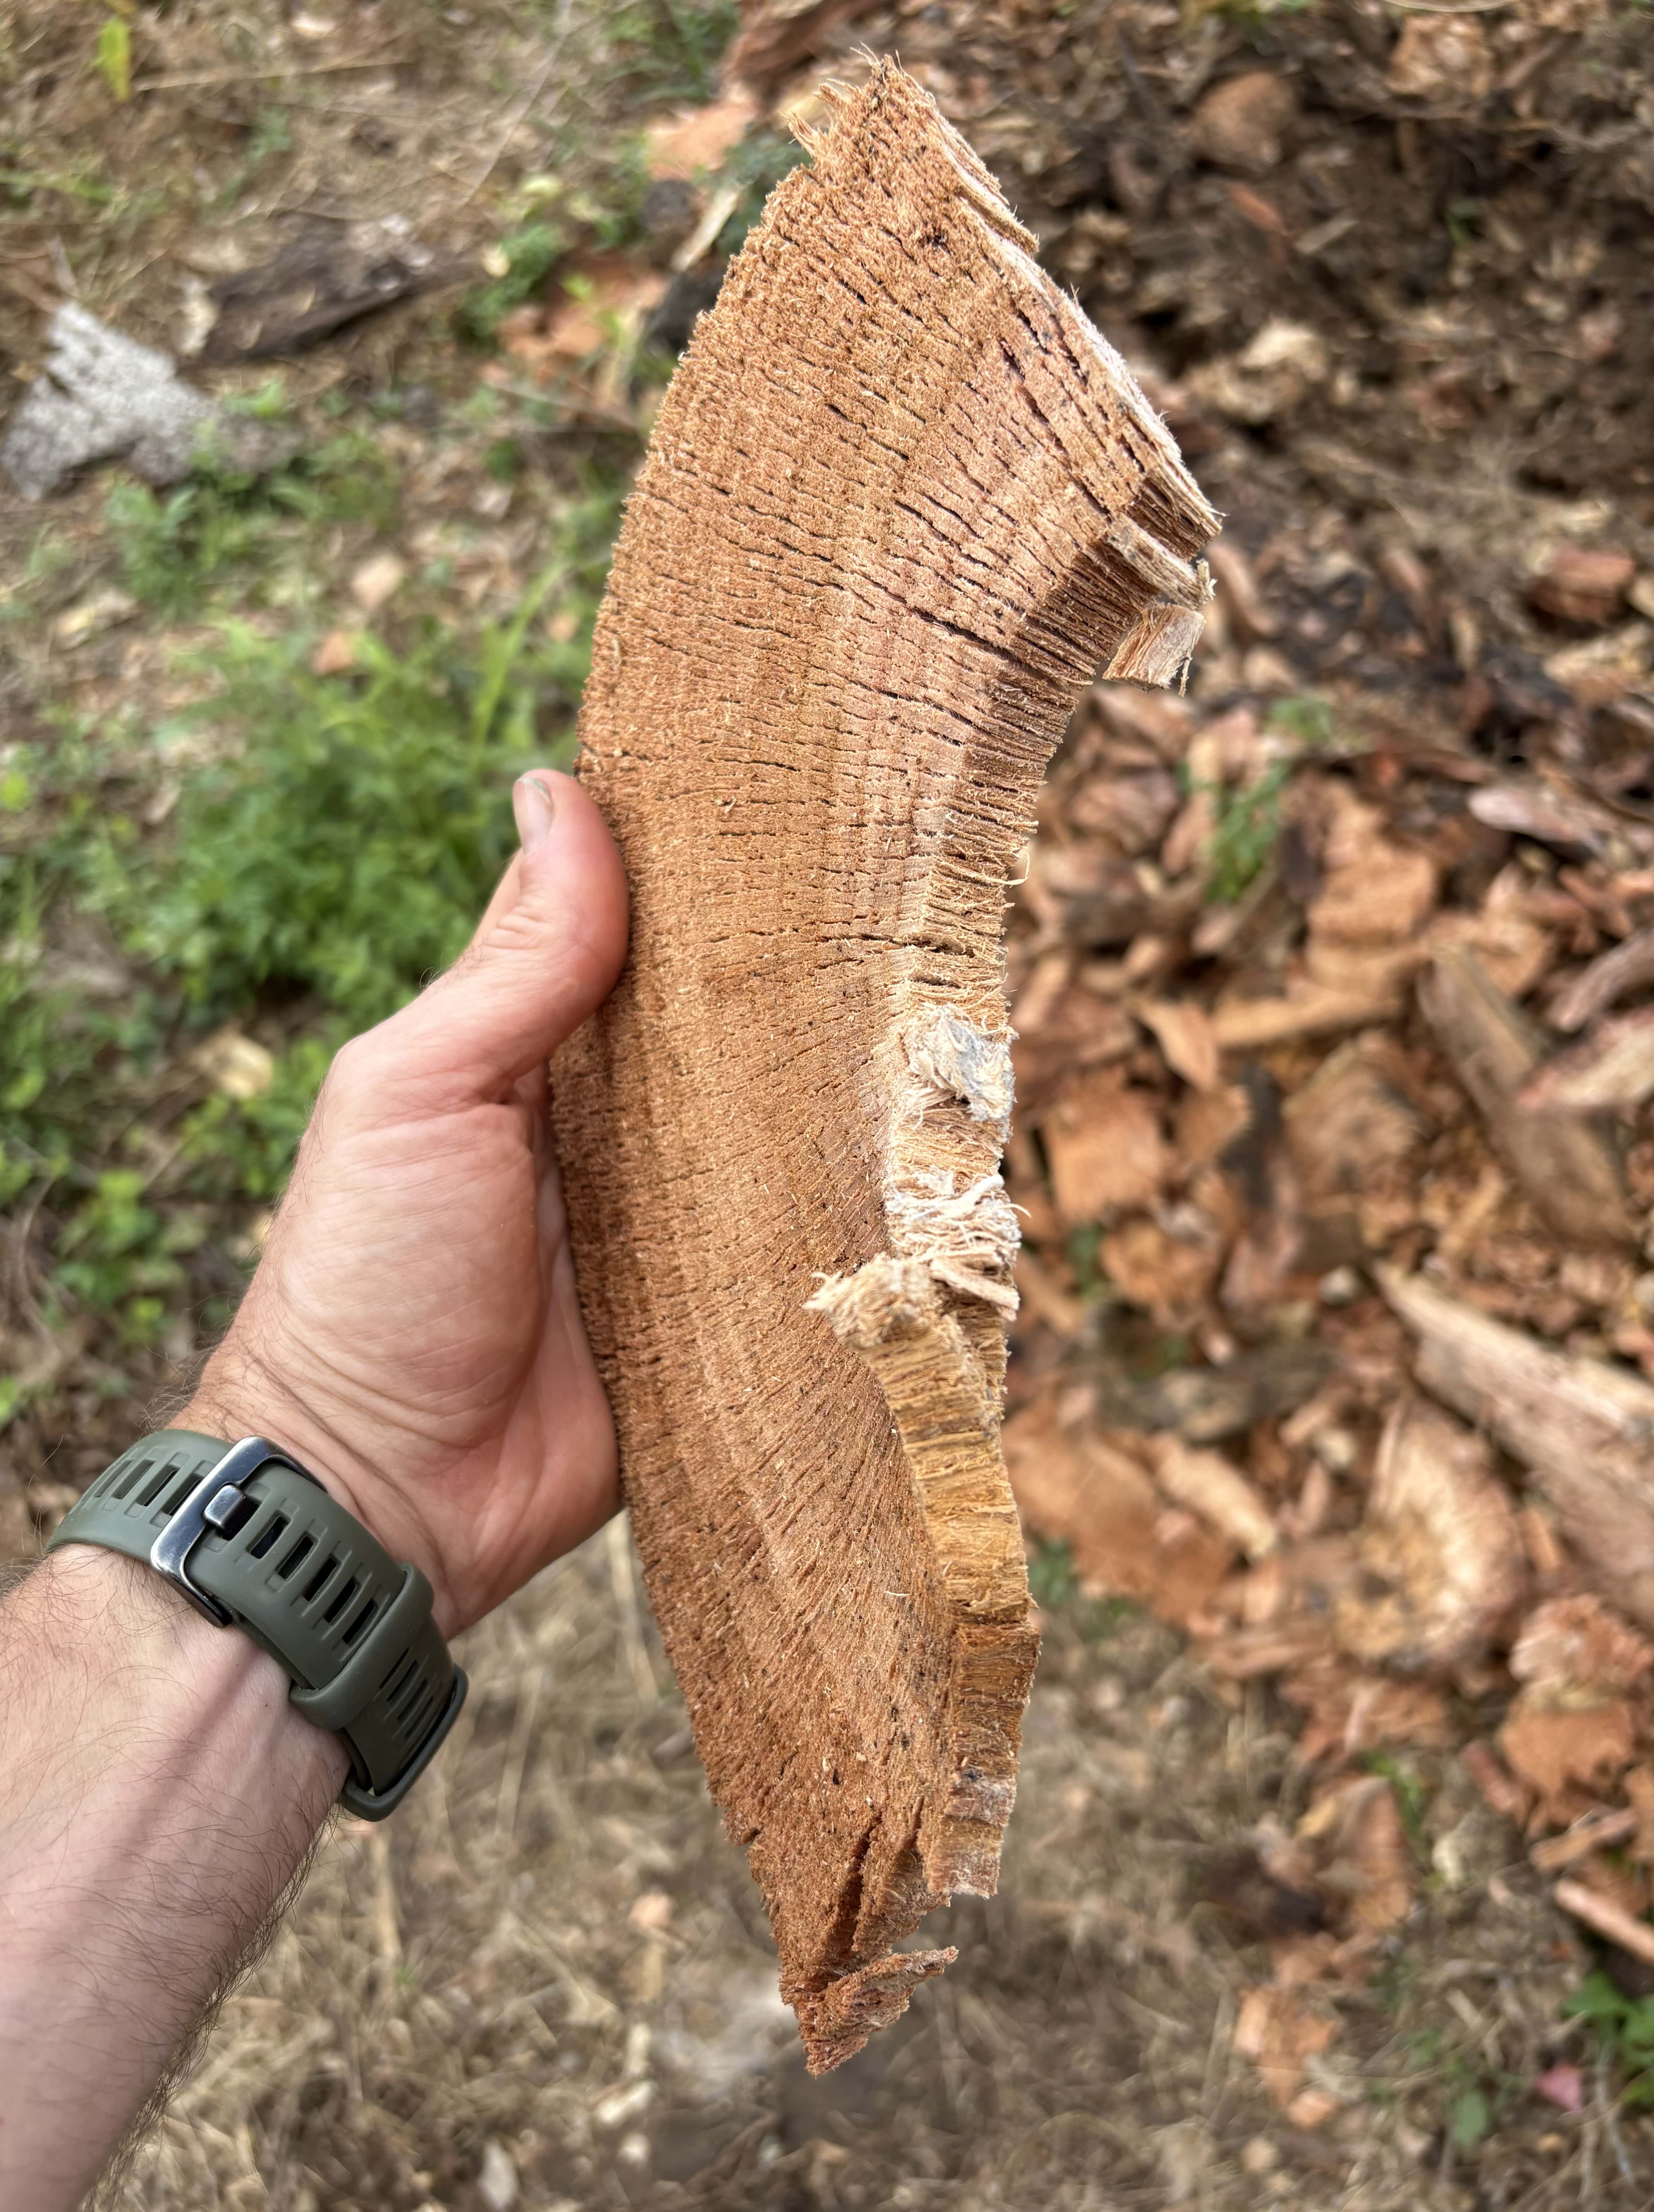
A well-conditioned cutting tooth will peel off large chunks of stump – 3/4in thick in this picture.
New purchase price was $21,000. I’m told the hydraulic pump is $12K to replace. The spiral cone is $1K to replace. And we just found out that the cutting bit is $8K to replace.
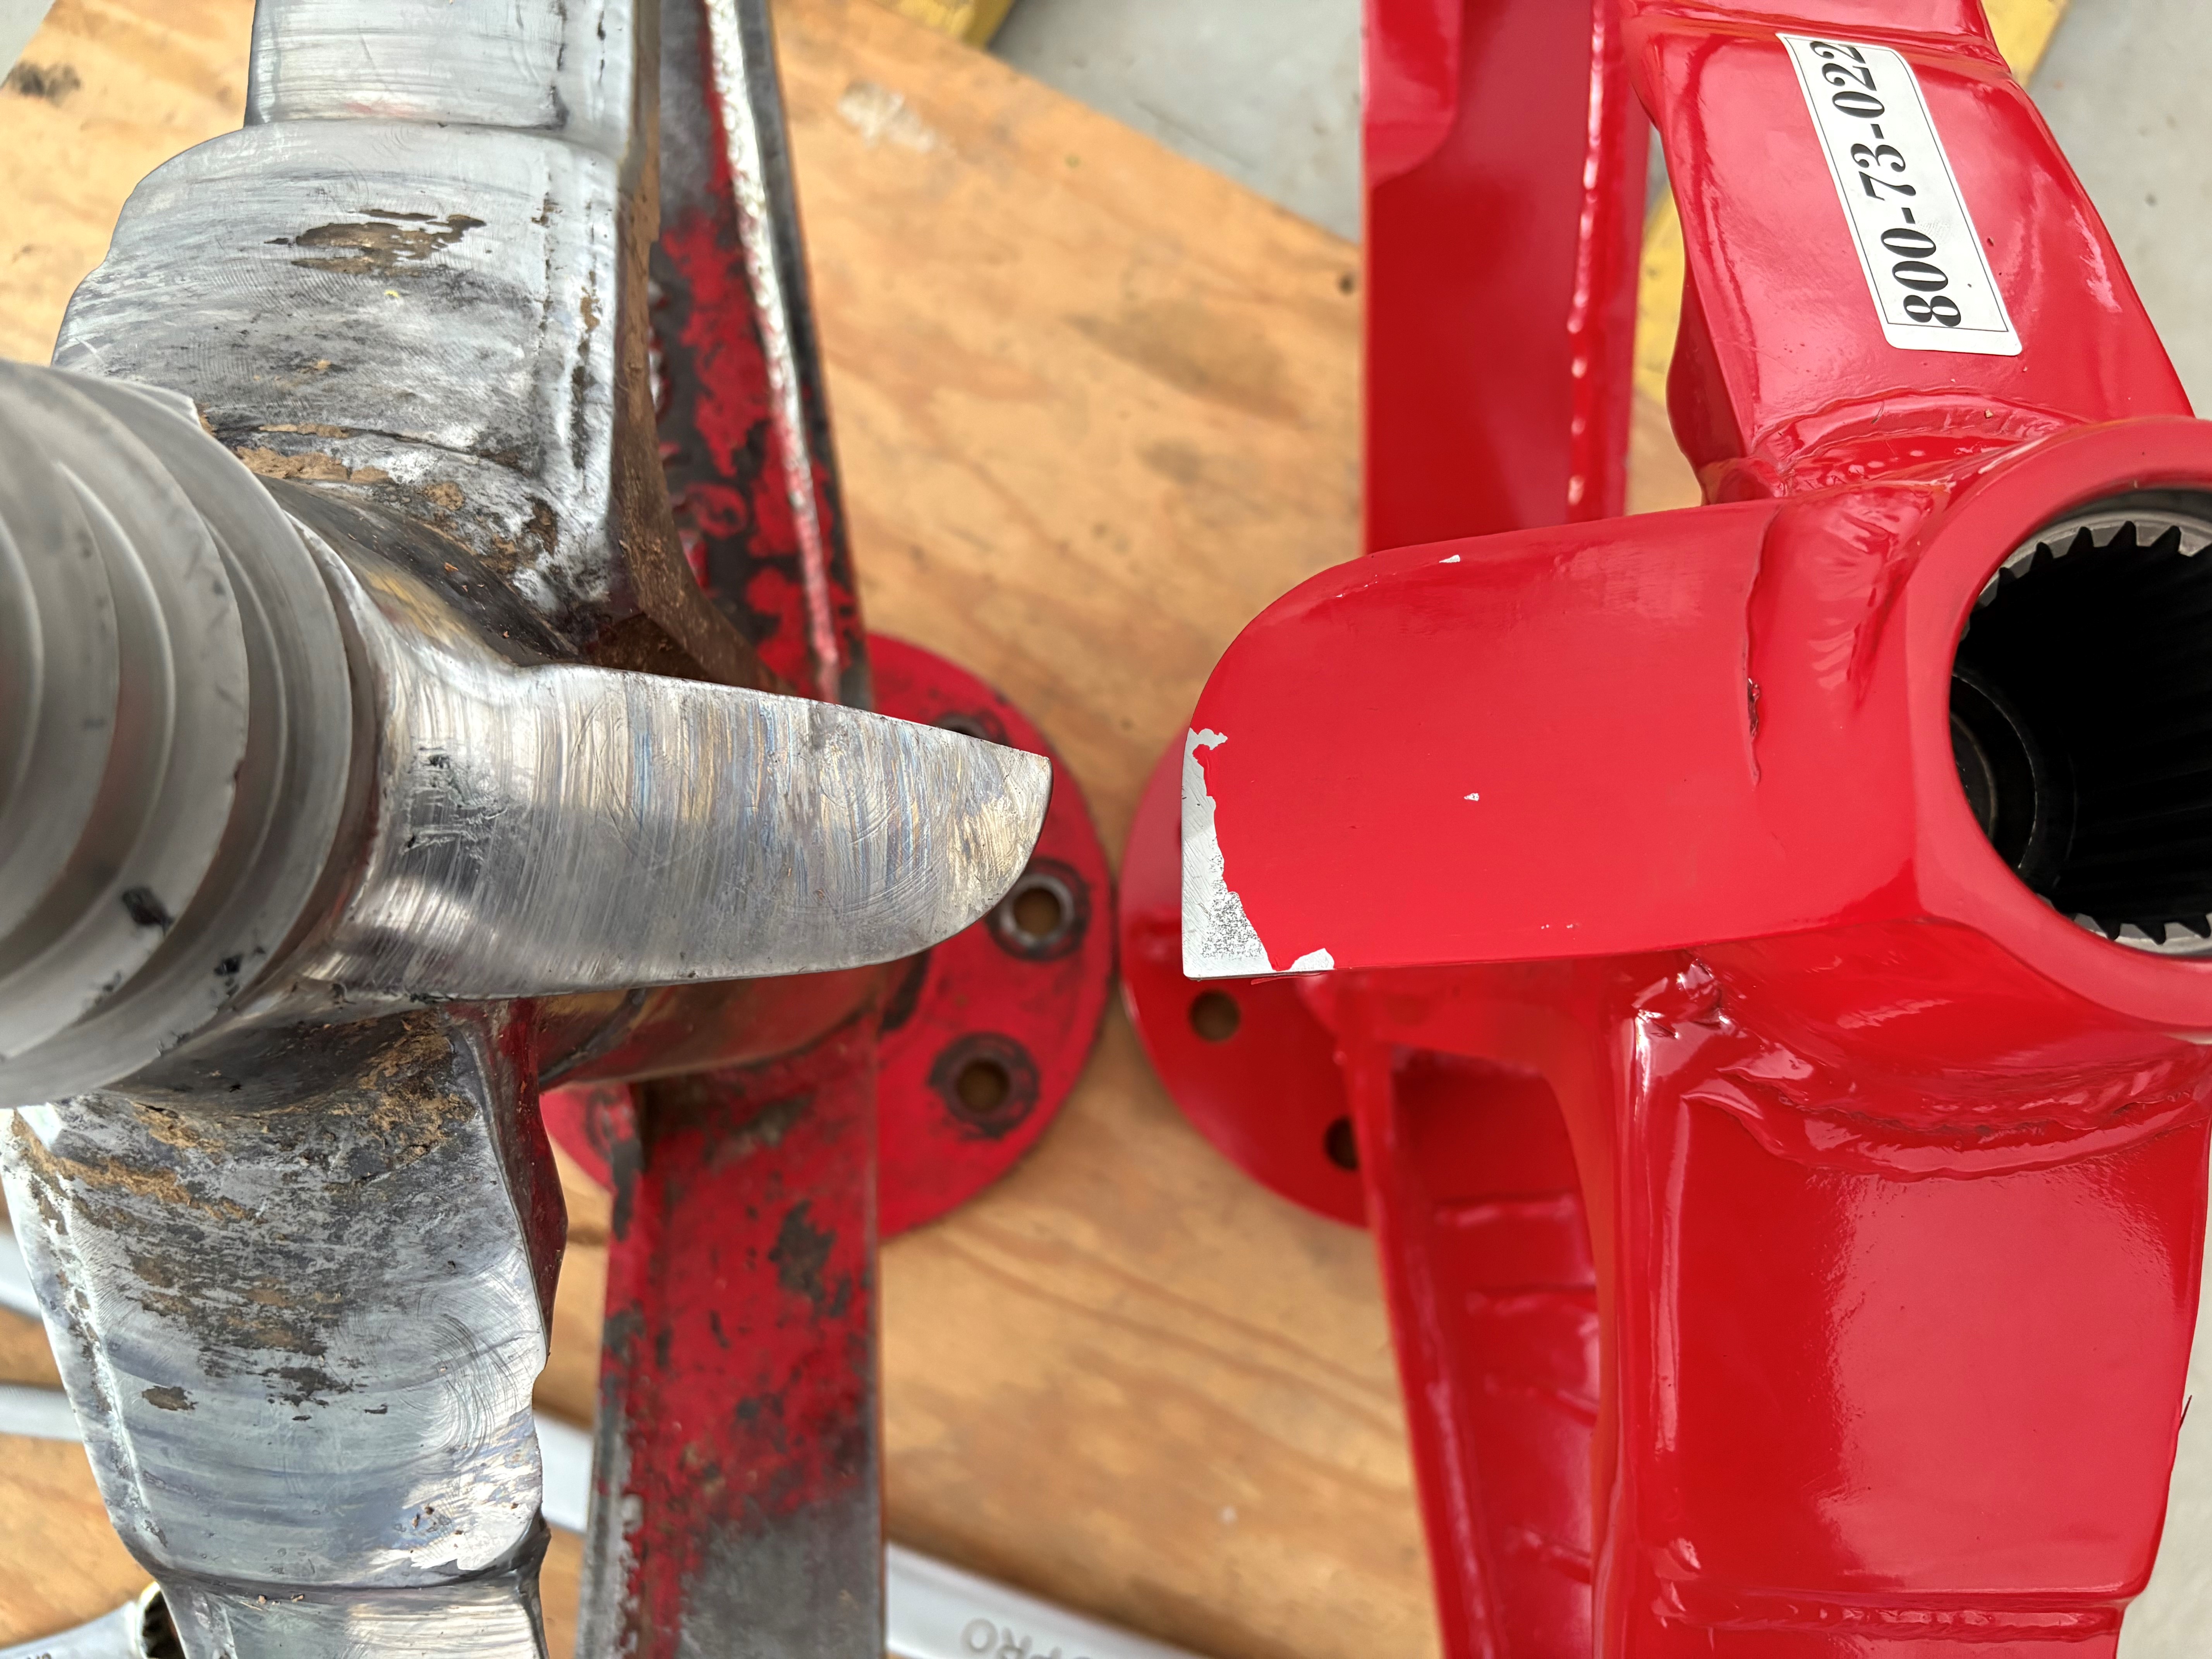
After many thousands of cedar, oak, and ash stumps, we had lost a lot of material both from wear and from conditioning (I hesitate to call it “sharpening” because you don’t want a sharp edge). We had a weld break and while it could be repaired, the writing was on the wall. After a few years of use, thousands of stumps and about 90 acres of stumps clear…we had to replace the bit.
If you grind a few stumps a year, this implement might be overkill. If you remove dozens of stumps each year and will continue to do so for many years, this could be a worth while investment. It’s well built and performs well. Handles large stumps in no time. It is pricey but you get what you pay for with Fecon products.
(yes – we could have dozed or dug out the stumps with an excavator. Thousands of root balls and a pock marked, divoted landscape would have been the result. This was a big commitment but we felt the right choice for the future of this restored prairie.)
By: Bill Kleiman – Director Nachusa Grasslands, Elizabeth Bach – Research Scientist Nachusa Grasslands, Elizabeth Becker – Doctoral Student SDSU / UC Davis Joint Doctoral Program in Ecology
Restoring any ecosystem is extremely difficult and getting it right on the “first try” nears impossibility. For tallgrass prairies, attempts to leap from an abandoned agricultural landscape to a highly diverse prairie are often thwarted by non-native species and an over-abundance of warm season grasses like big bluestem. How then, can we go from an established prairie with moderate forb diversity to a high diversity prairie?
Over a decade ago, Bill Kleiman, the Project Director of Nachusa Grasslands, asked this question and wanted to know if adding seed to an already restored prairie (i.e., overseeding) would increase diversity. He established treatment plots across three sites at Nachusa in 2009 and 2012 that varied in seed inputs and disturbance intensities to test this. The full details of this experiment can be found here, but the abridged version of the treatments is below:
Control plots: no manipulations
Seed: overseeding only
Low intensity disturbance: harrowing and overseeding
Intermediate intensity disturbance: harrowing, overseeding, and additional applications of Poast grass herbicide during the growing season
High intensity disturbance: Disking, harrowing, and overseeding
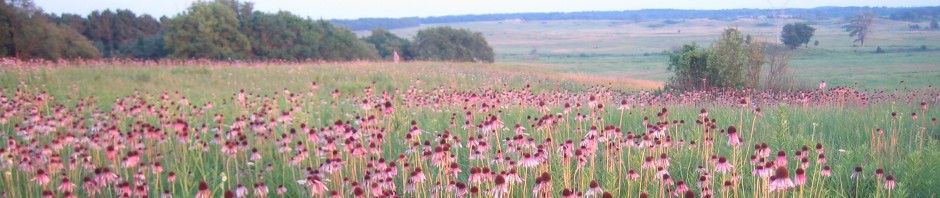
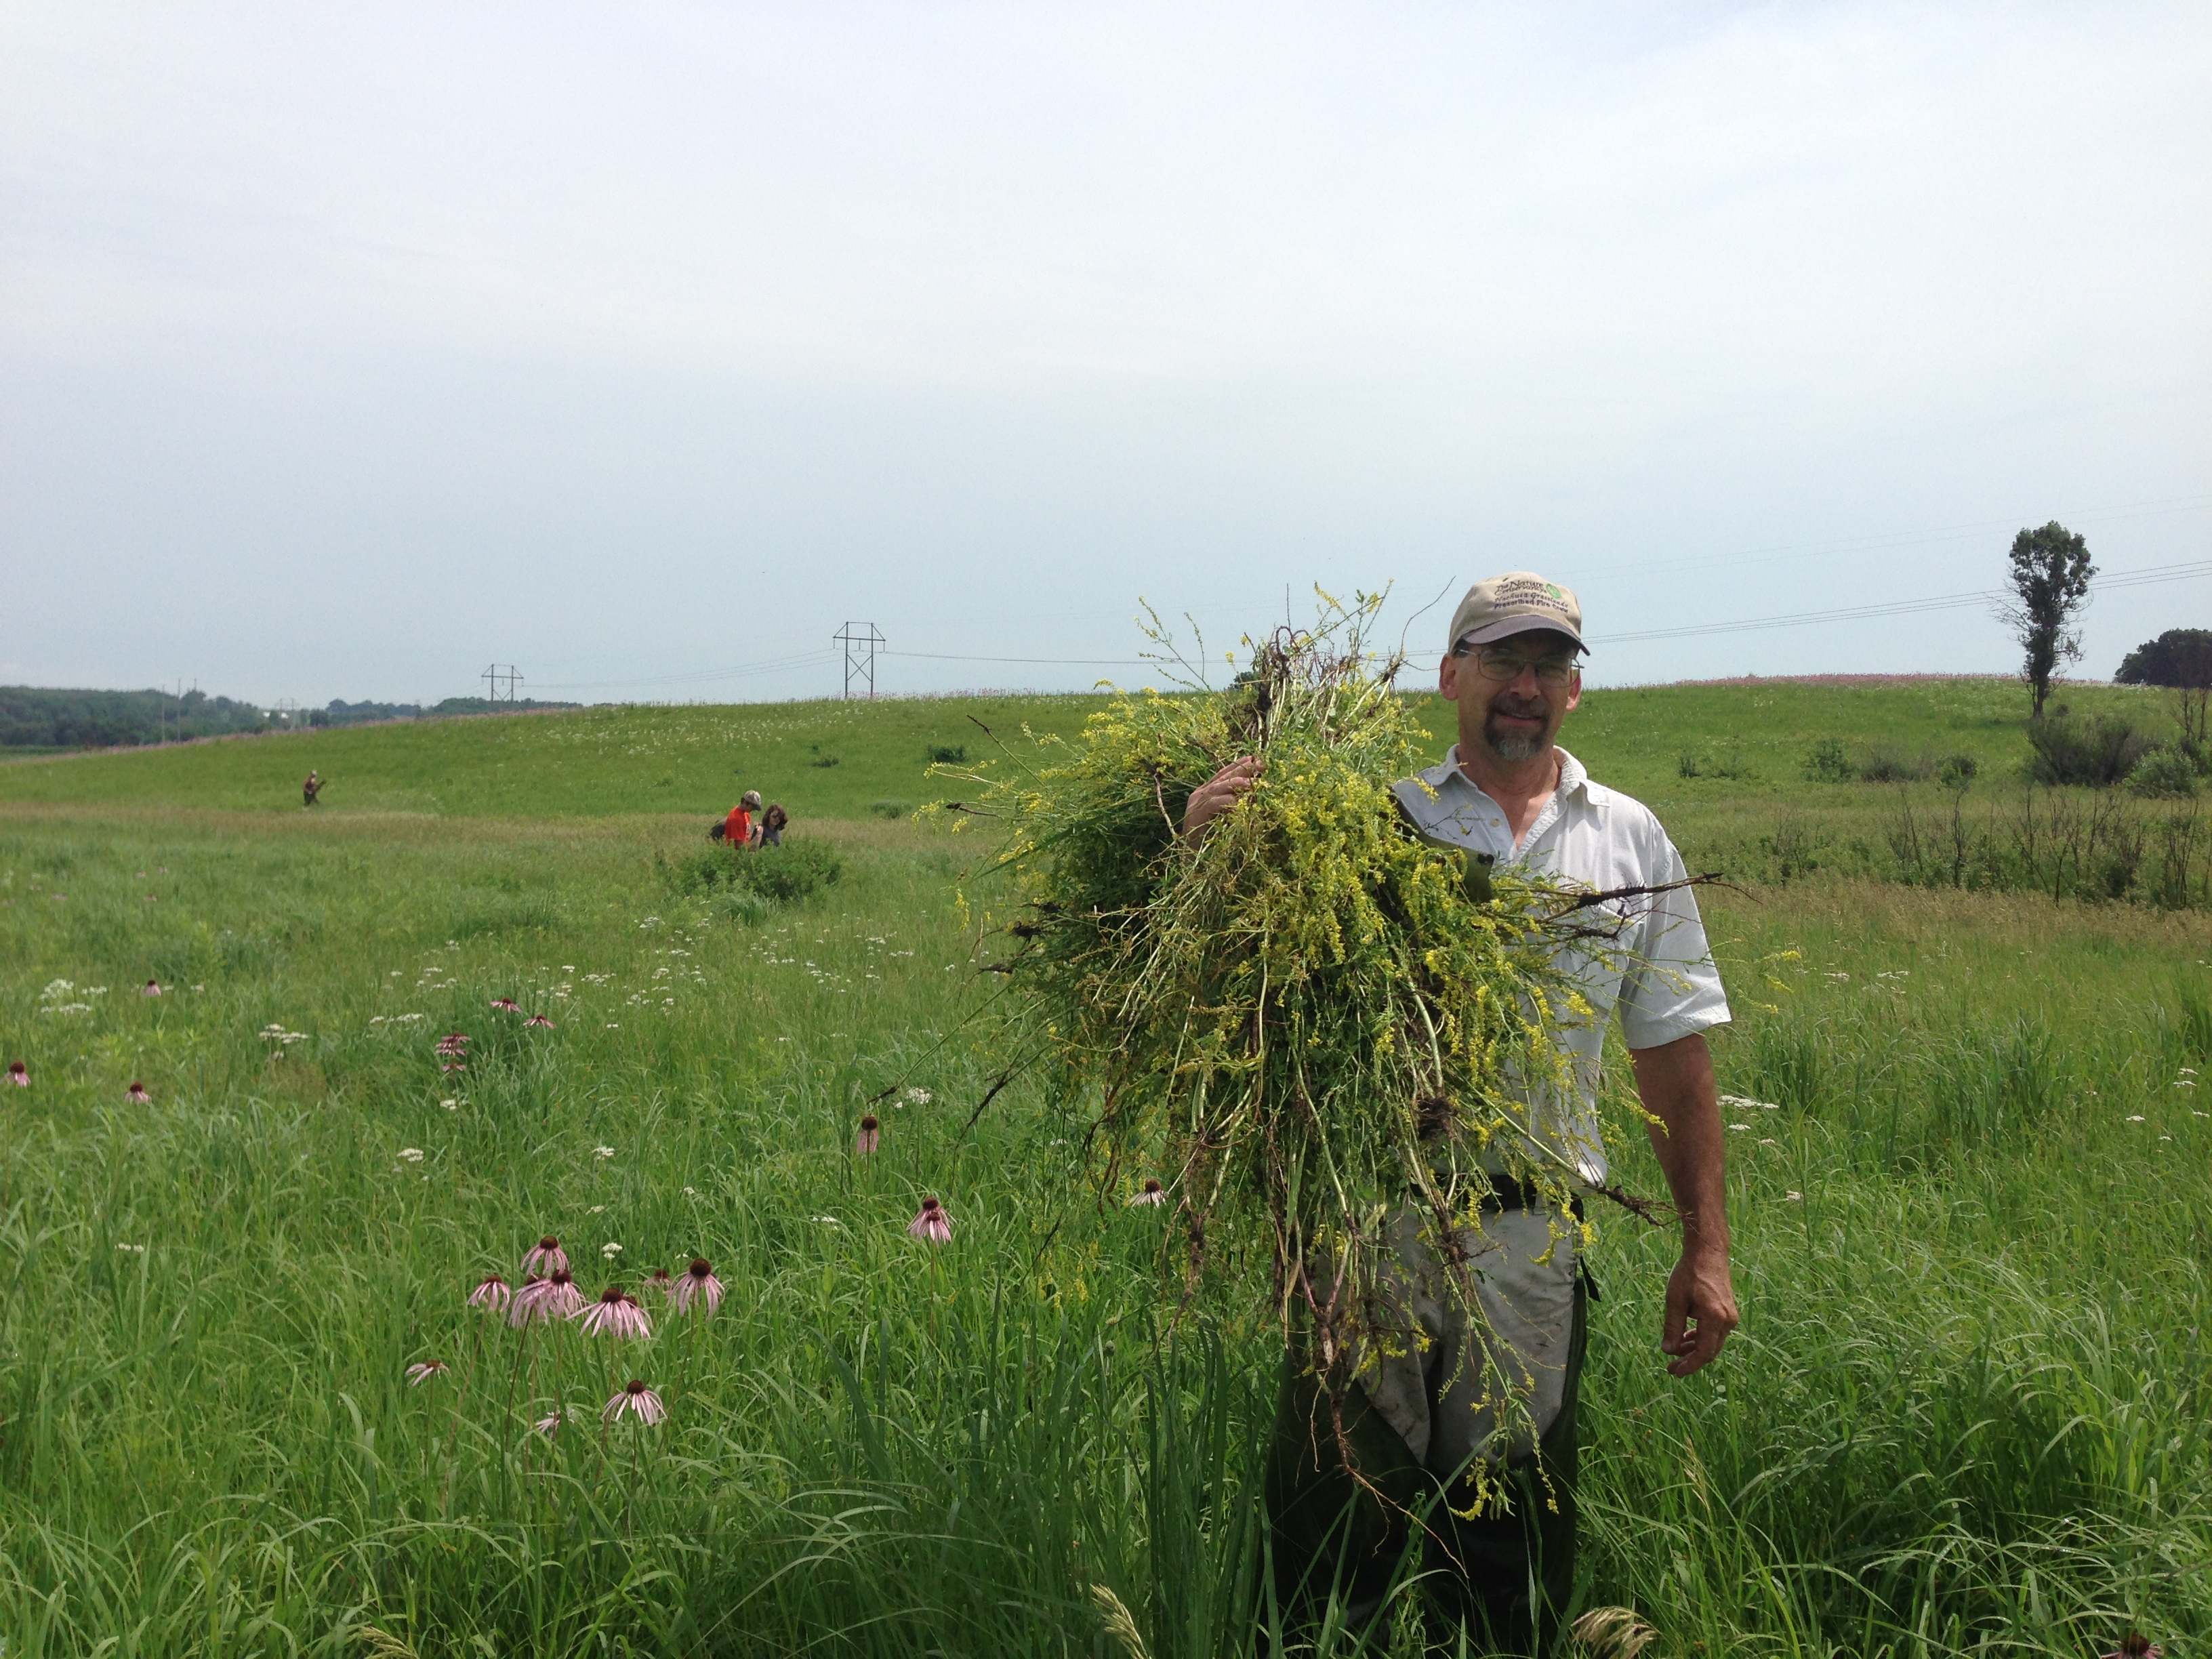
In 2023, species composition and abundance data were collected in each of the treatment plots (photo 1). Data collection consisted of identifying all species and their percent cover in three 1m x 1m quadrats that was then averaged across each treatment plot.
Photo 1: Species composition and abundance data collection in a treatment plot.
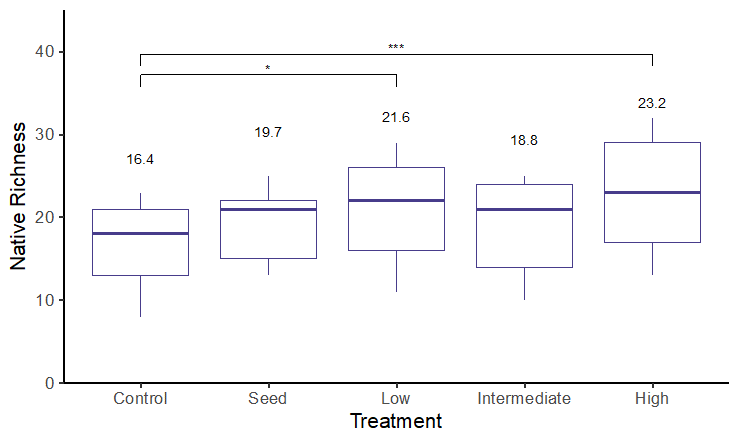
When compared to control plots, it was found that the high intensity disturbance treatments increased native species richness by over 40% and native species diversity by 15%. The low intensity disturbance plots also increased native species richness and diversity by 20% and 12% respectively, when compared to controls. In high intensity plots, we found an average of 23.2 native species averaged across all plots compared to only 16.4 native species in the control plots. In the low intensity plots the average number of native species found was 21.6 native species. This data can be seen in the graph below.
Figure 1. Average native species richness across each treatment. The number of native species is indicated at the top of each box. The stars on the graph indicate the amount of significance compared
In short, we found that overseeding paired with topsoil disturbance is key to increasing plant species richness and diversity in established prairie plantings. Overseeding alone did not seem to result in significant increases in richness or diversity over time in this instance. This could be because this was a singular overseeding event and multiple rounds of overseeding may be needed for it to successfully increase native species richness and diversity.
Disturbance is likely important in this scenario because it disrupted the roots of some established species and reduced competition above- and belowground for newly sown species. Even the low intensity disturbance, which may not have fully disrupted the rooting structures of established species, was likely important for forming microsites in the soil which allowed some seeds to successfully germinate and establish over time.
Contrarily, we found that additional herbicide application may negate the positive impacts of disturbance, inhibiting native species richness and diversity. This is likely due to non-target effects of the herbicide though it is unclear what was driving these non-target effects in this experiment.
Finally, as Bill noted in previous posts, it is difficult to distinguish these treatment differences by just walking through the prairie. Since the treatments can be resource intensive, mangers should weigh these differences with respect to their specific goals before implementation.
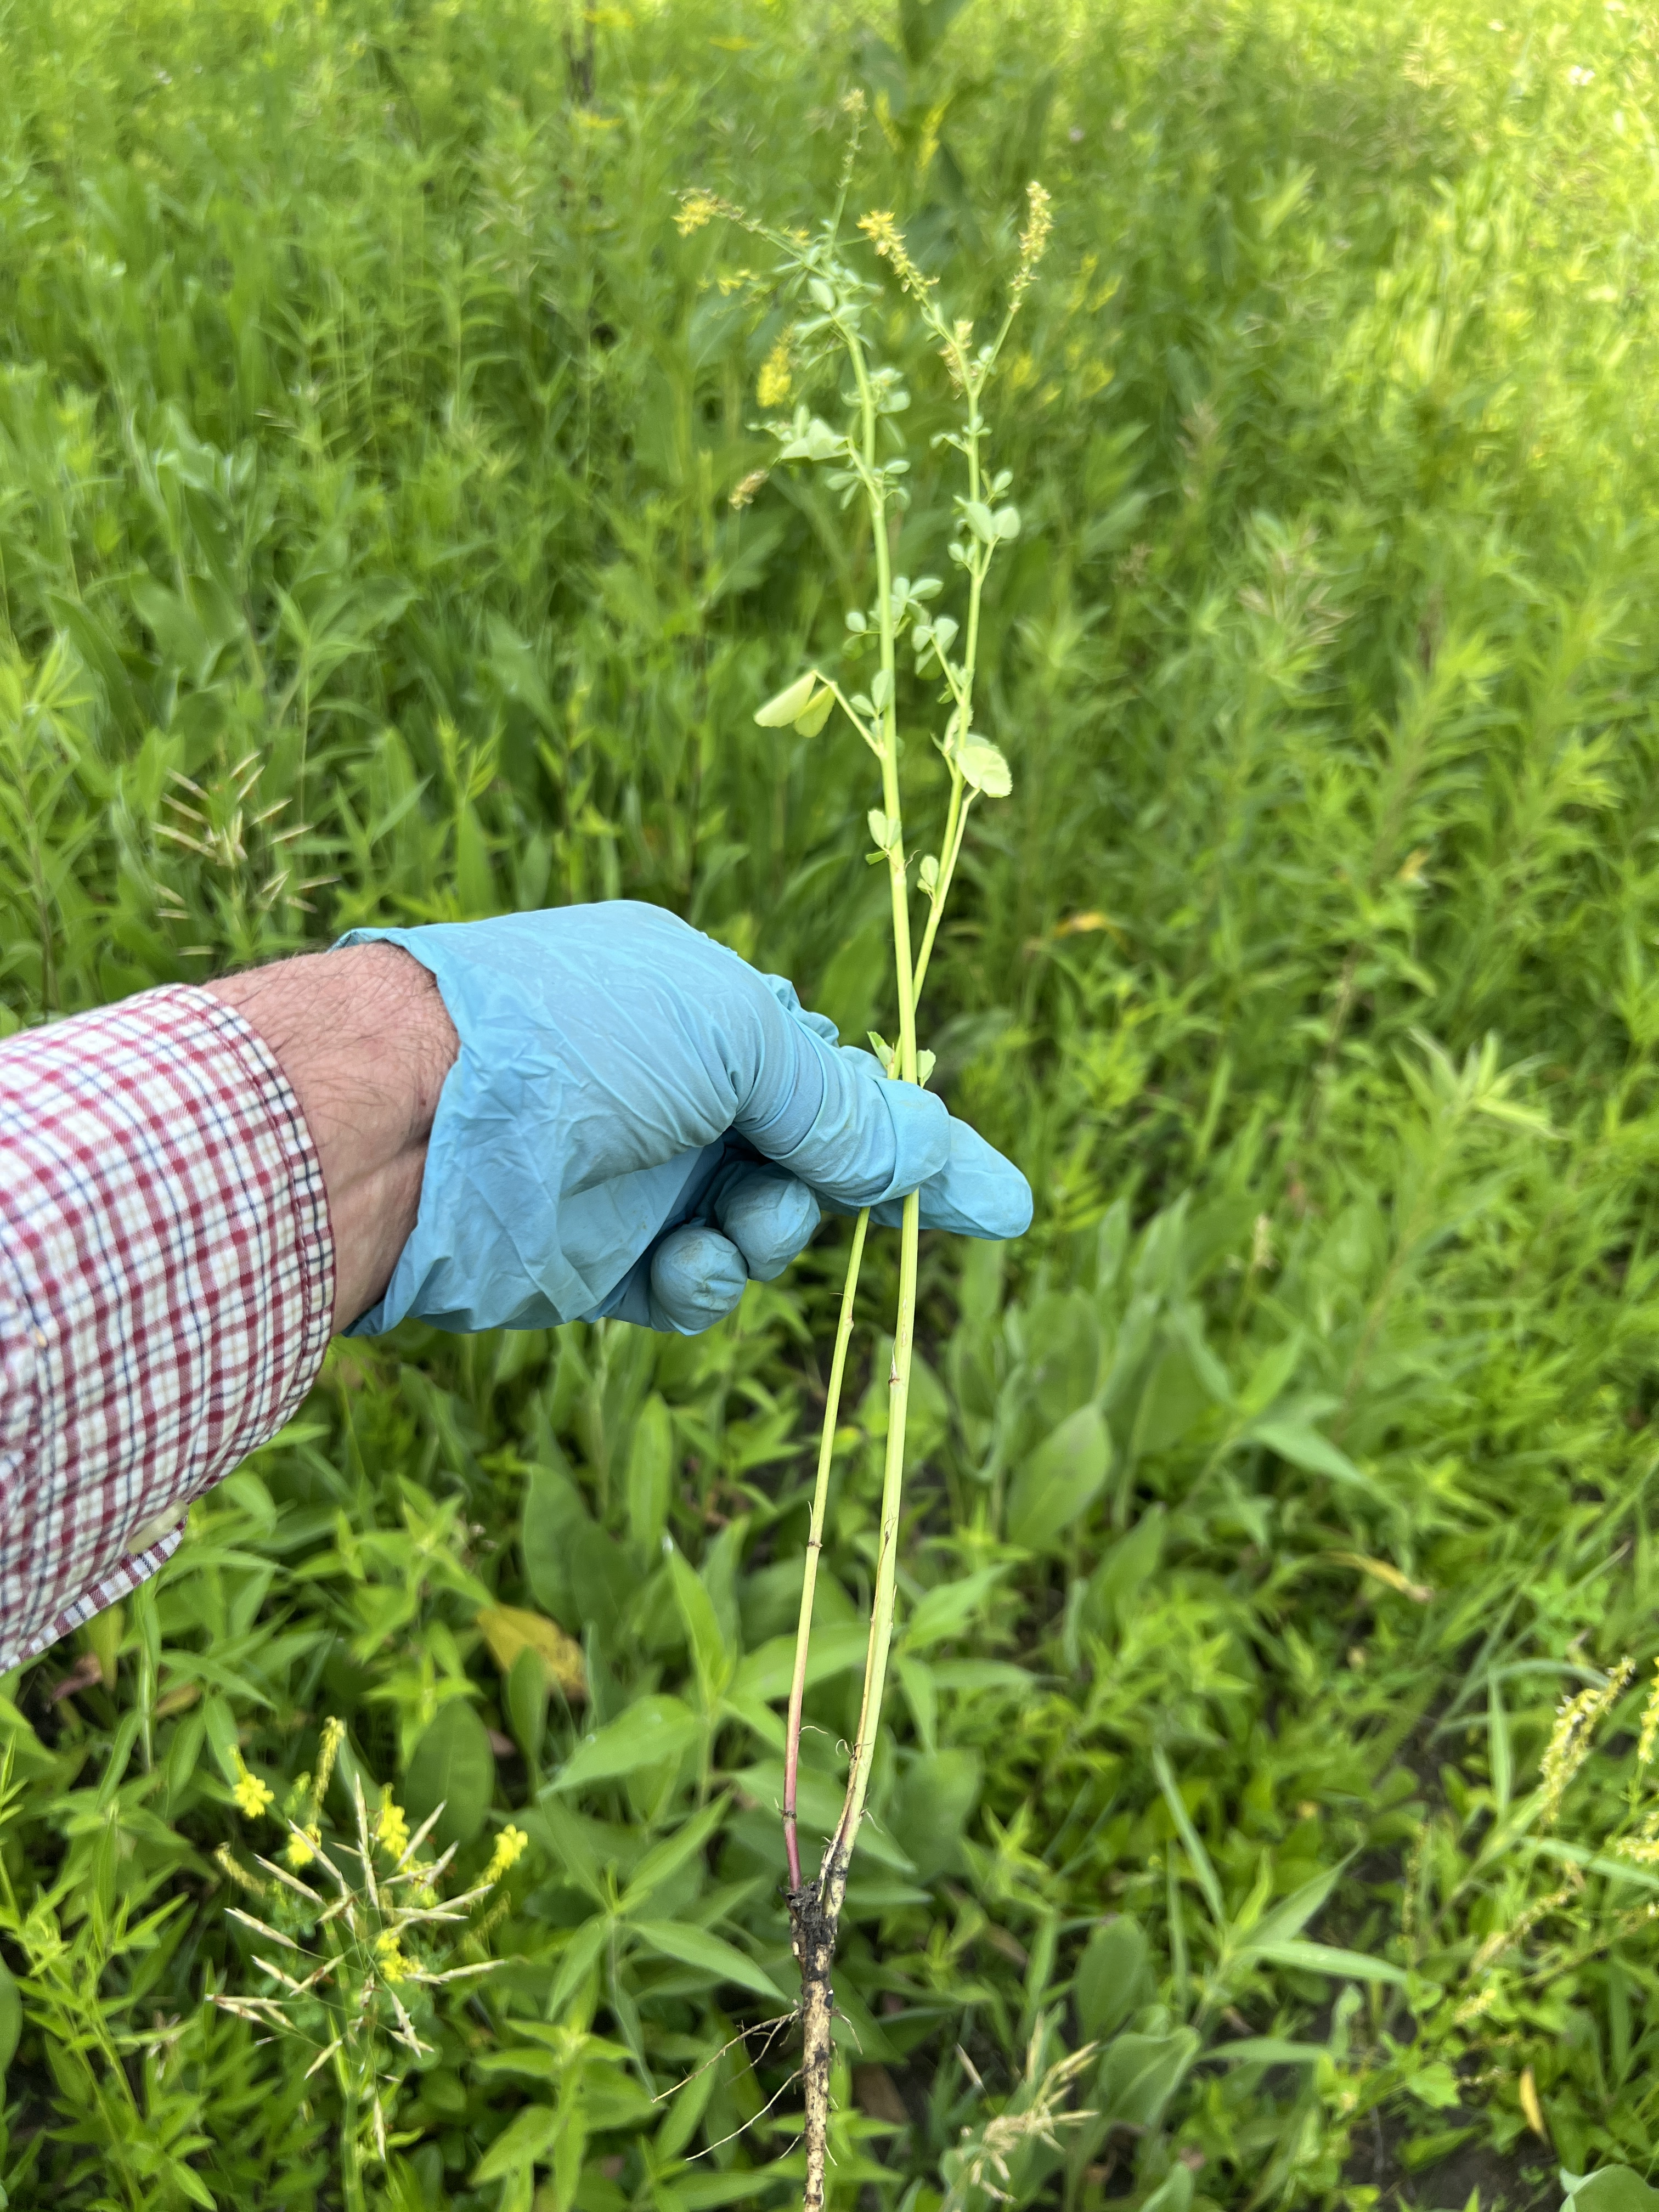
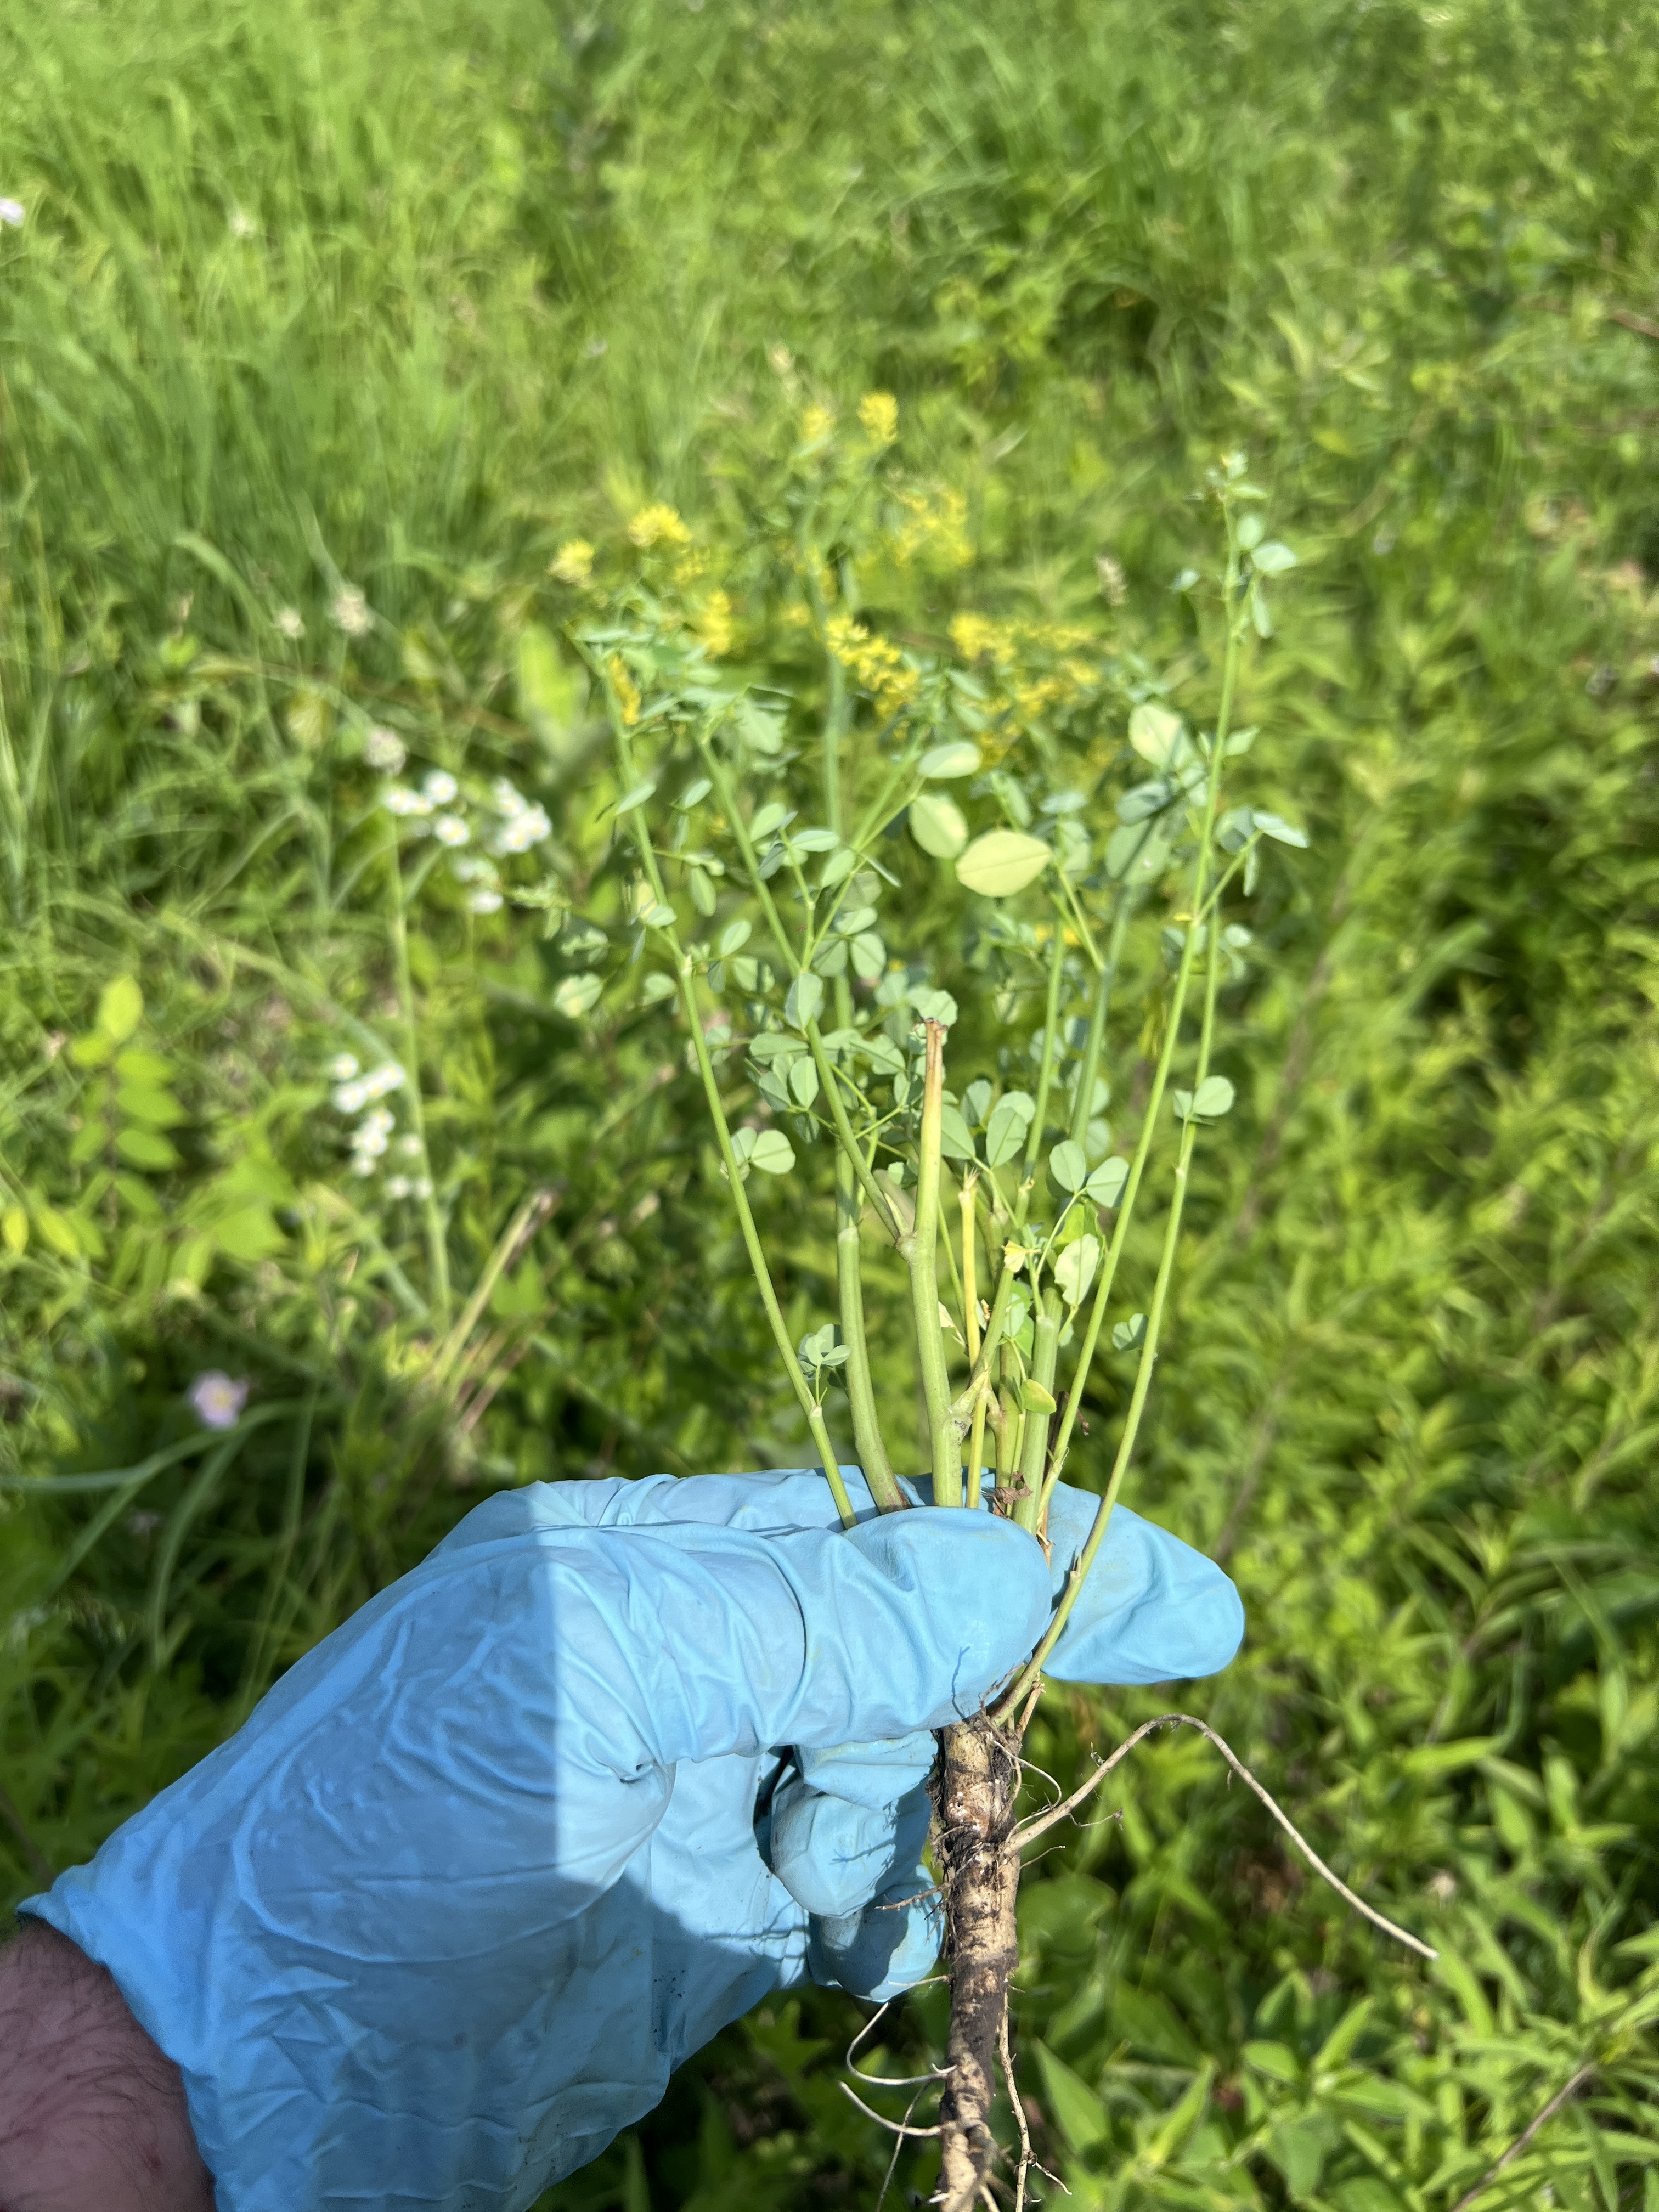
Yellow and white sweet clover (Melilotus officinalis and M alba) are on the invasive weed list of many natural areas managers. The plants are biennial, so on year two they bolt, bloom, and produce a lot of seed. They are a legume and their seed sits in the soil for years, releasing some annually to give you a run for your money.
I bet some insects like the nectar and pollen sweet clover produces, and in a pasture I would think cattle would graze it. It was originally brought to the continent for hay. We managers have seen how sweet clover can form incredible thickets and so we push back when feasible.
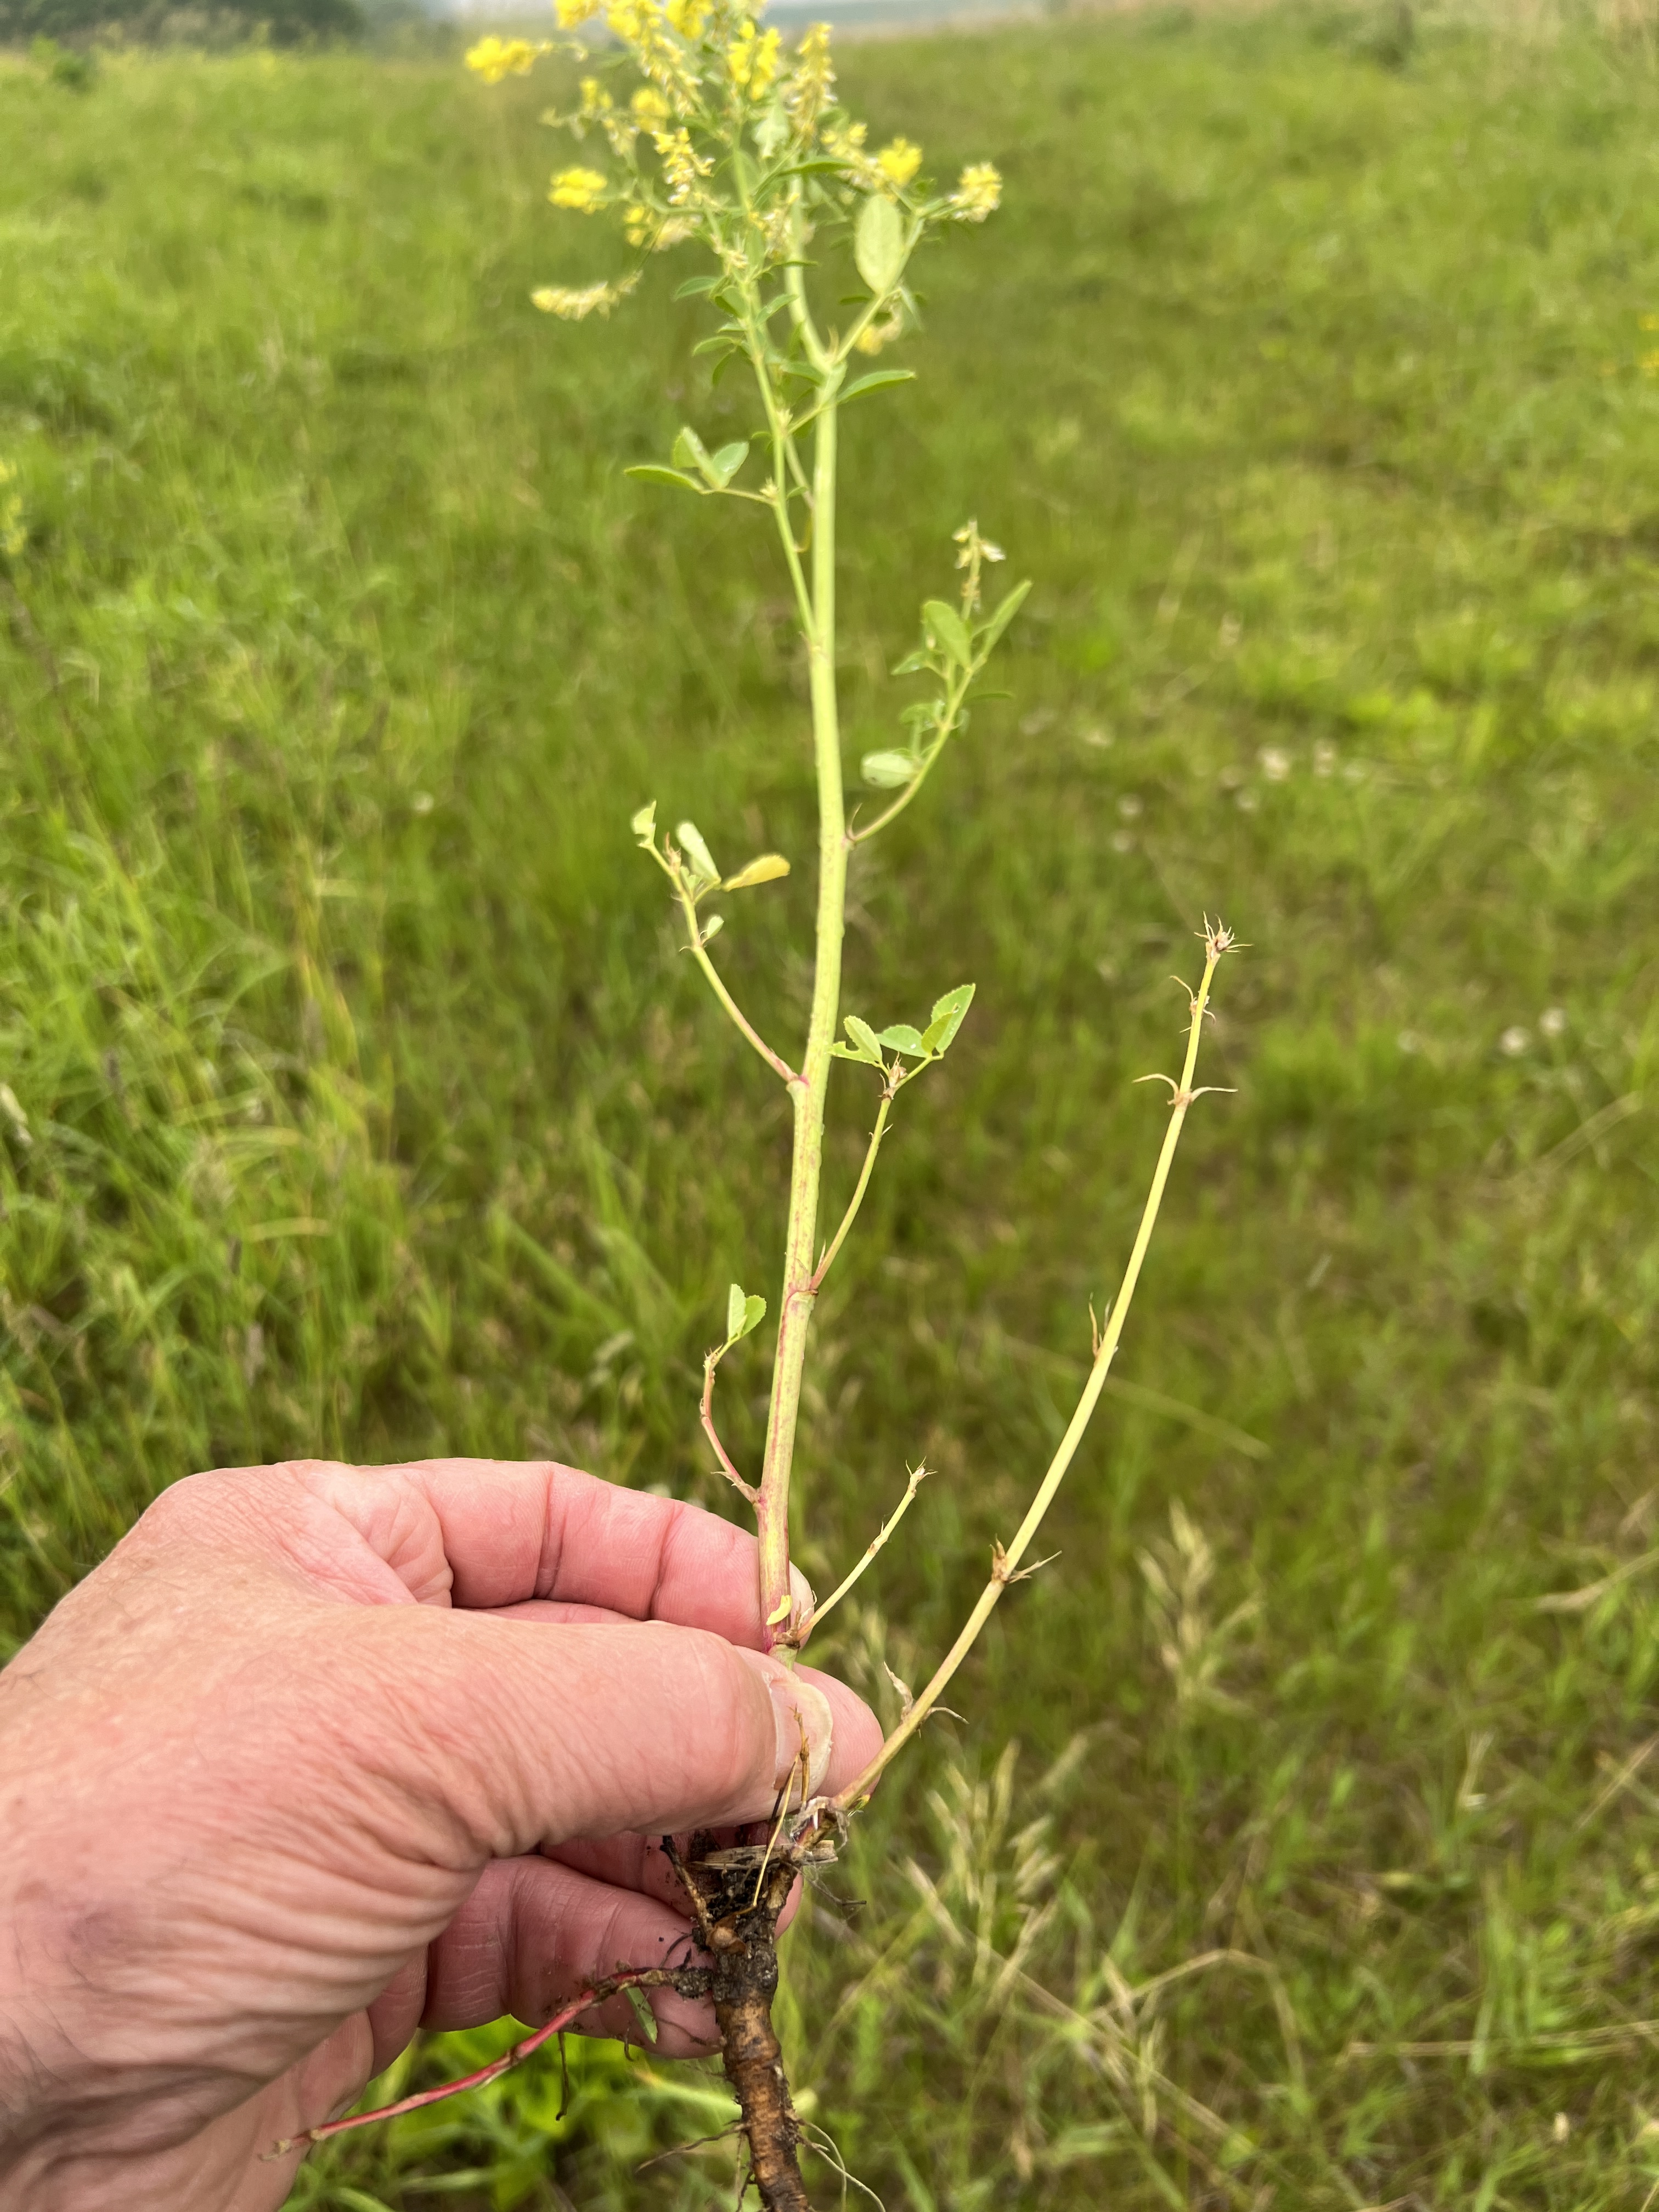
A long time ago my new boss Stephen Packard told me you can mow the sweet clovers to kill them but you have to mow them below the lowest leaves. If you mow above the lowest leaves it will resprout.
As sweet clover matures the leaves die off from the ground up.
A key point here is the longer you wait the higher you can mow.
I have found Stephen’s advice to be solid. Decades back we reduced fields of white and yellow sweet clover with mowing done at the right time. A few years later we only had to spot mow some patches, then later just some backpack spraying of patches, and now just a sprinkling of plants we can spade or spray or cut.
As with all weeds, you have strategies for some areas that are different from other areas. Mowing sweet clover won’t work in rocky areas. If you have thousands of acres to manage you may not have sweet clover on the top of your list of weeds. Like many ecological questions the answer starts with “It depends”.
June 25, 2013: Removing sweet clover. You only need to remove sweet clover if the seeds are forming.
The yellow sweet clover blooms first. Wait to mow it until it is just about to be mature enough to produce seed. At Nachusa this is about June 15 to 20. White sweet clover is ready to mow around the Fourth of July.
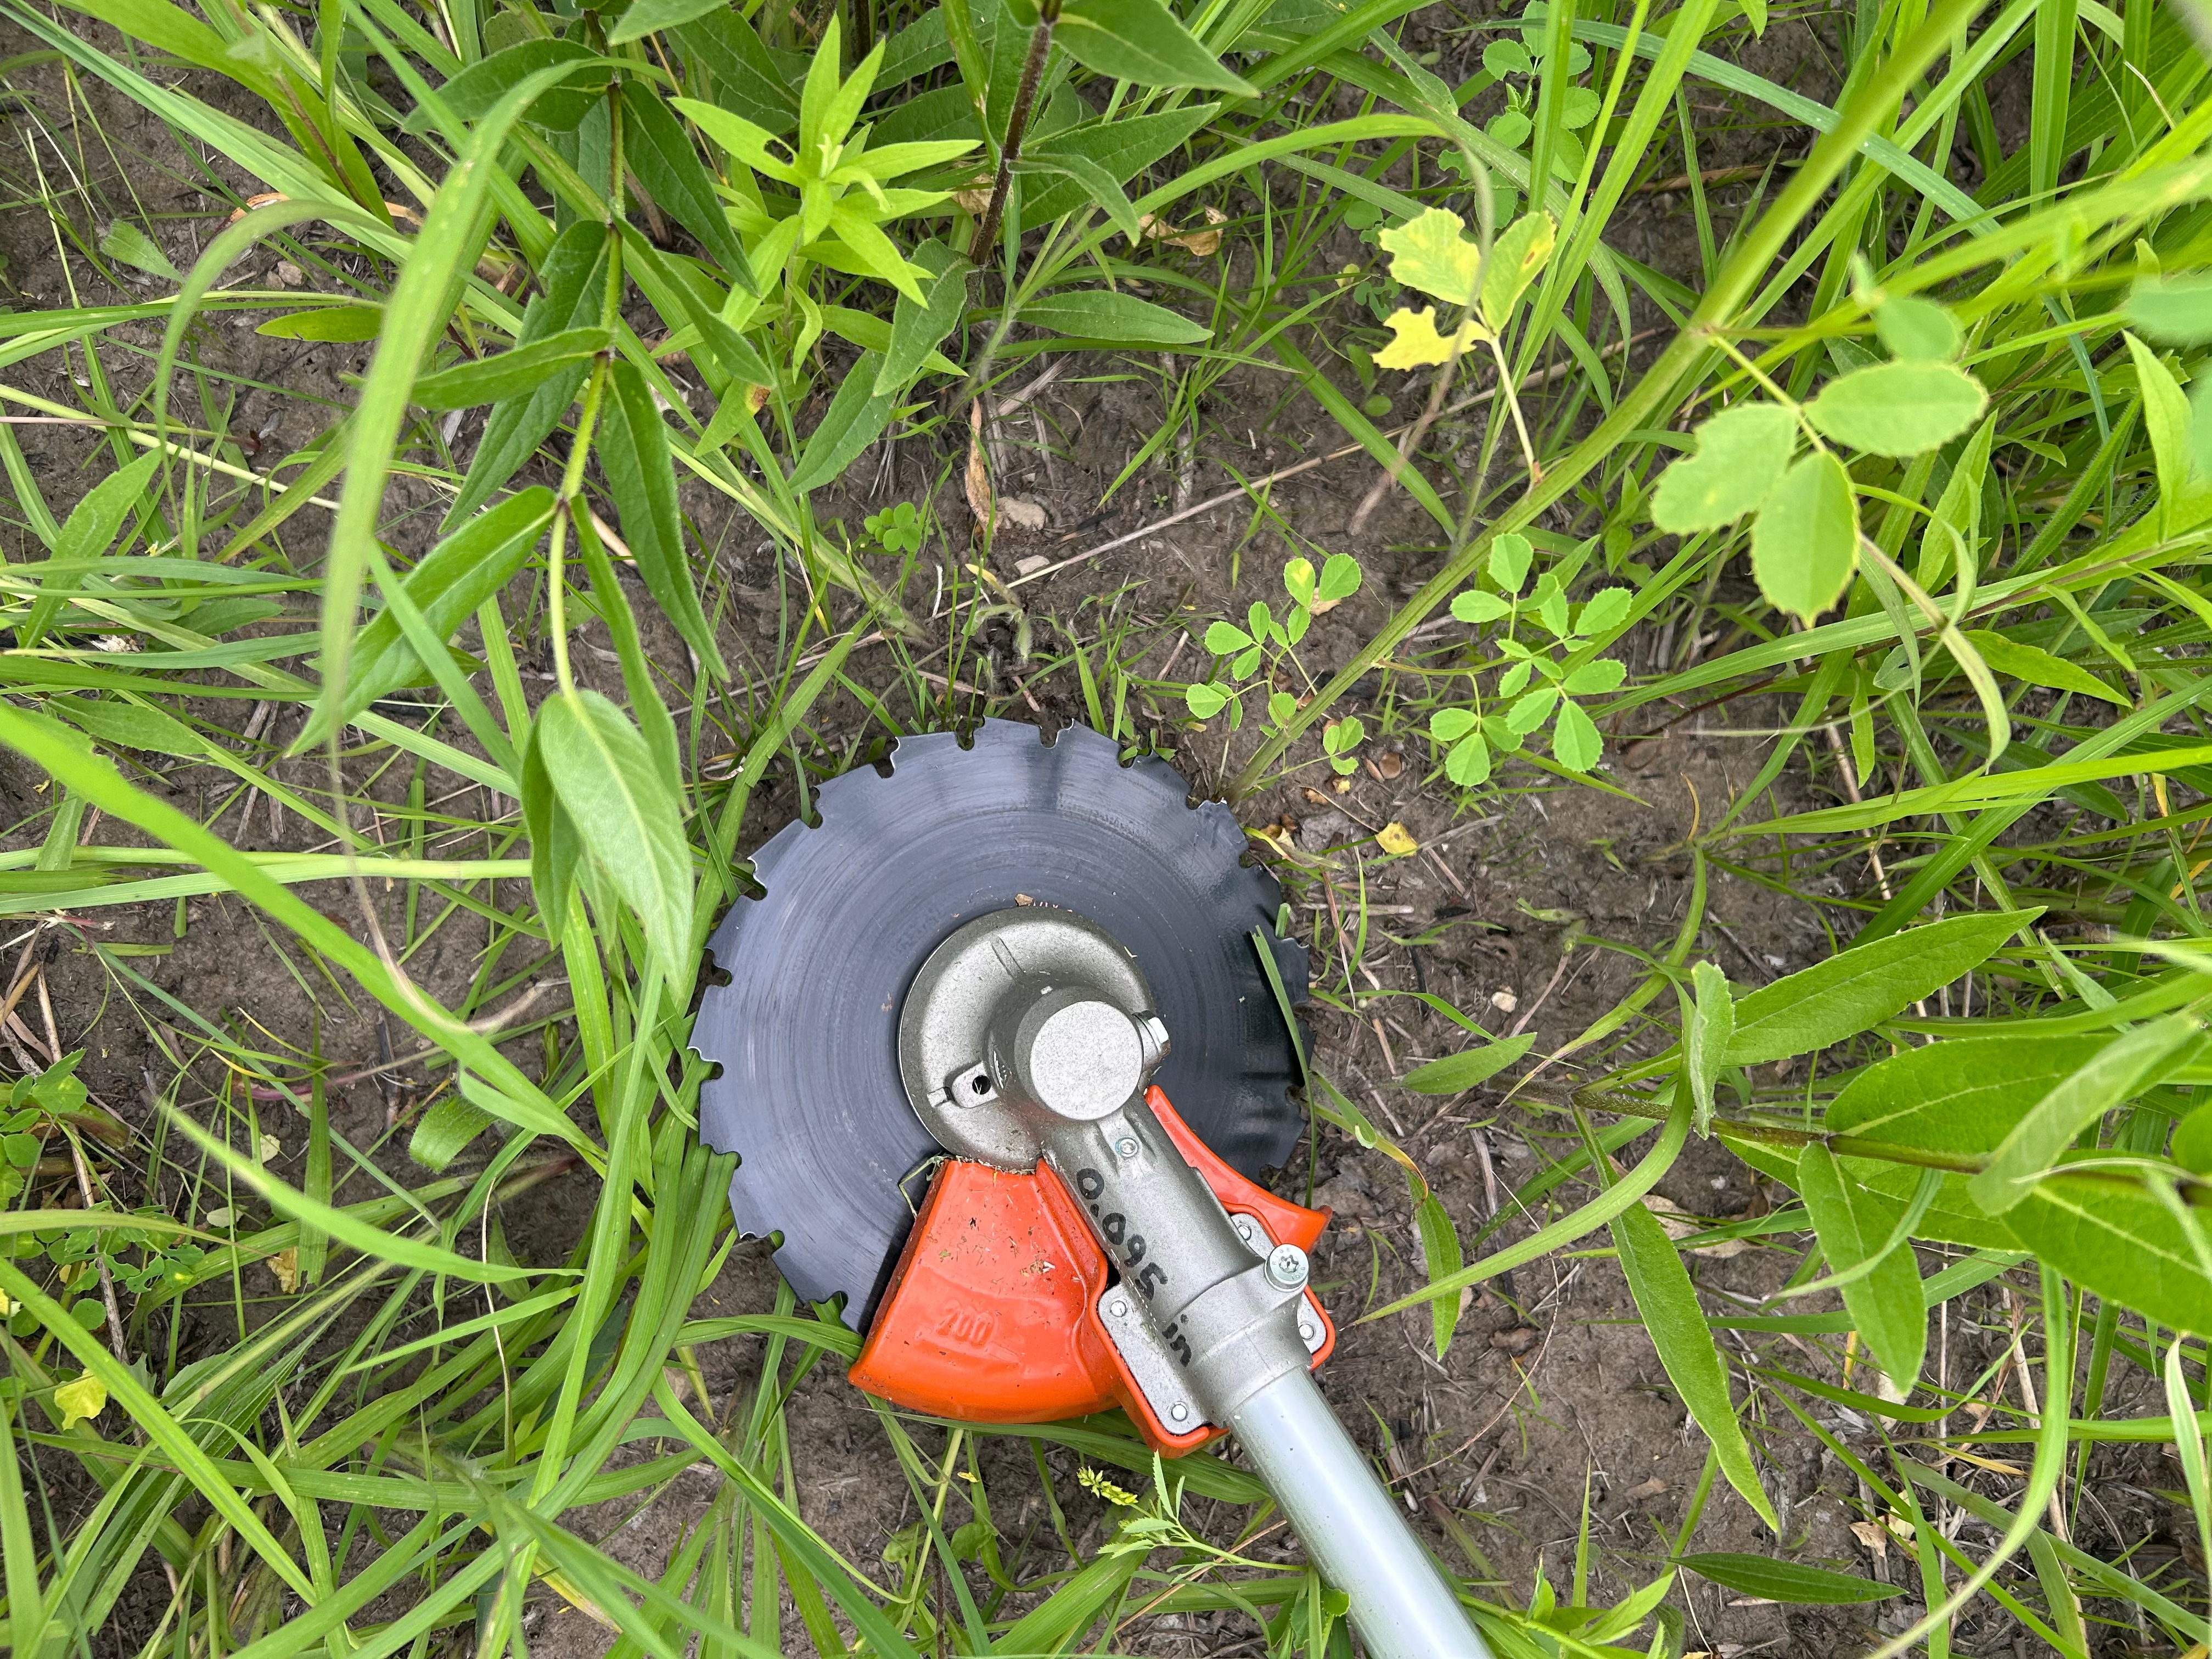
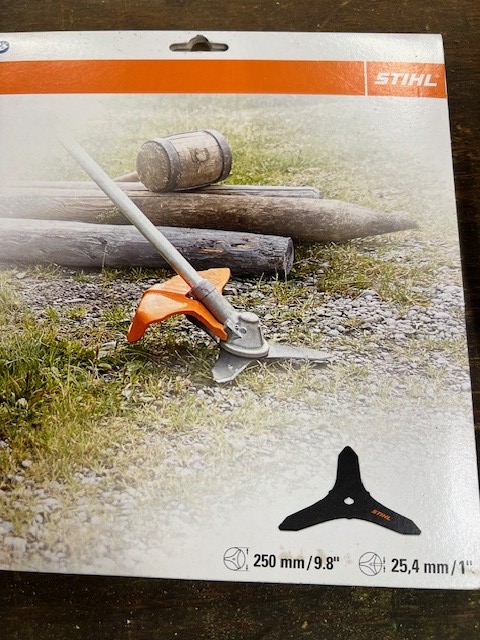
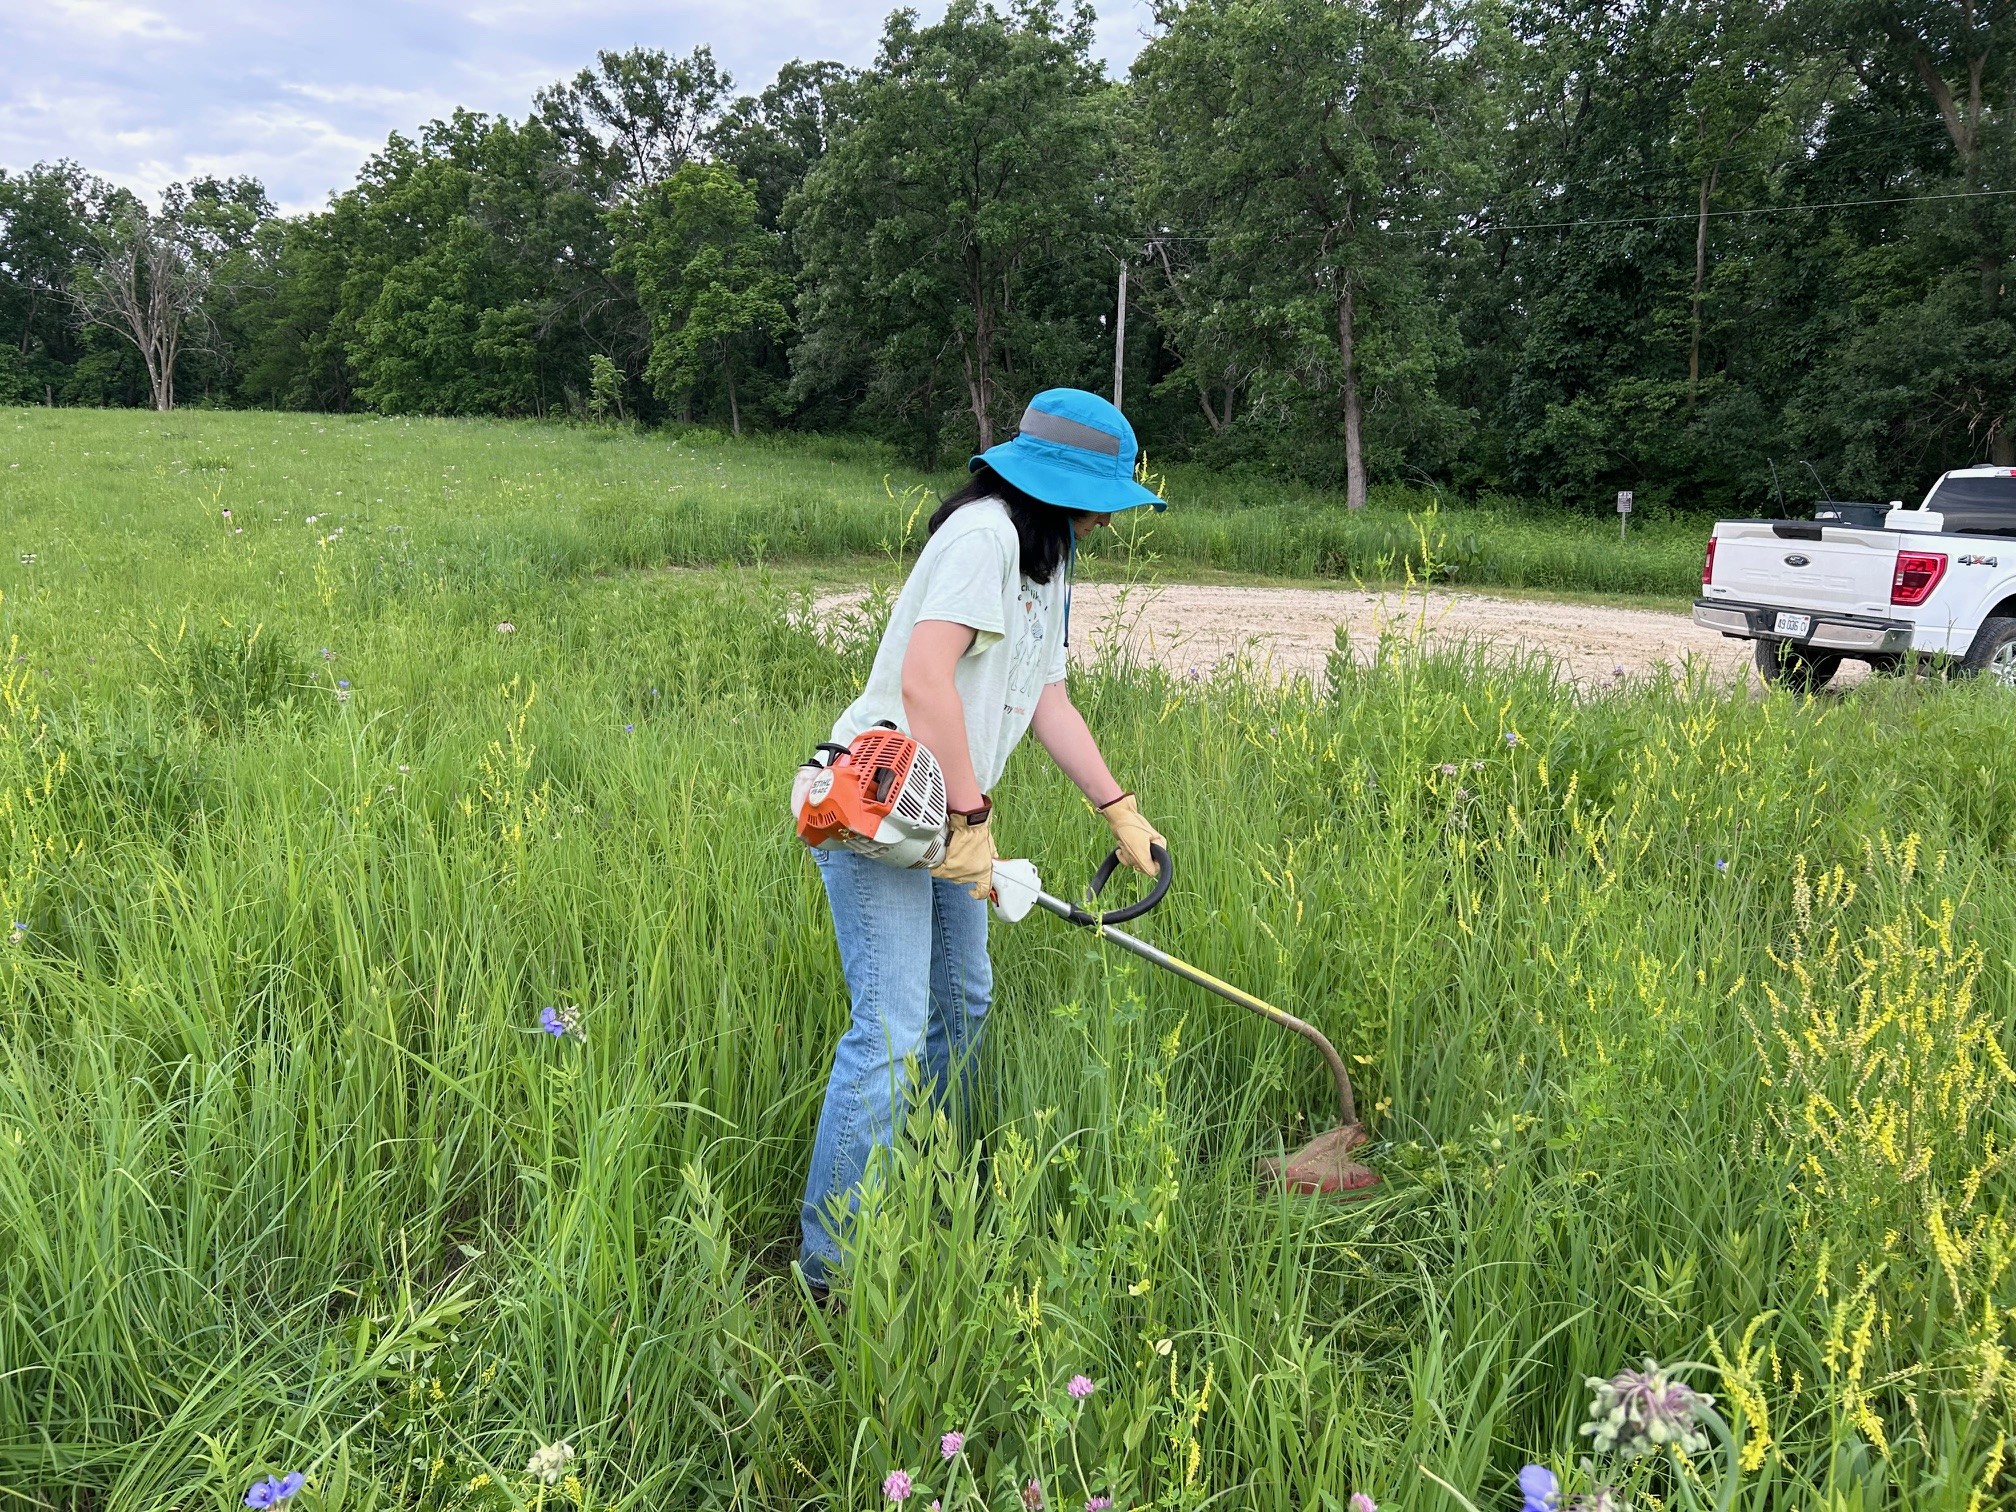
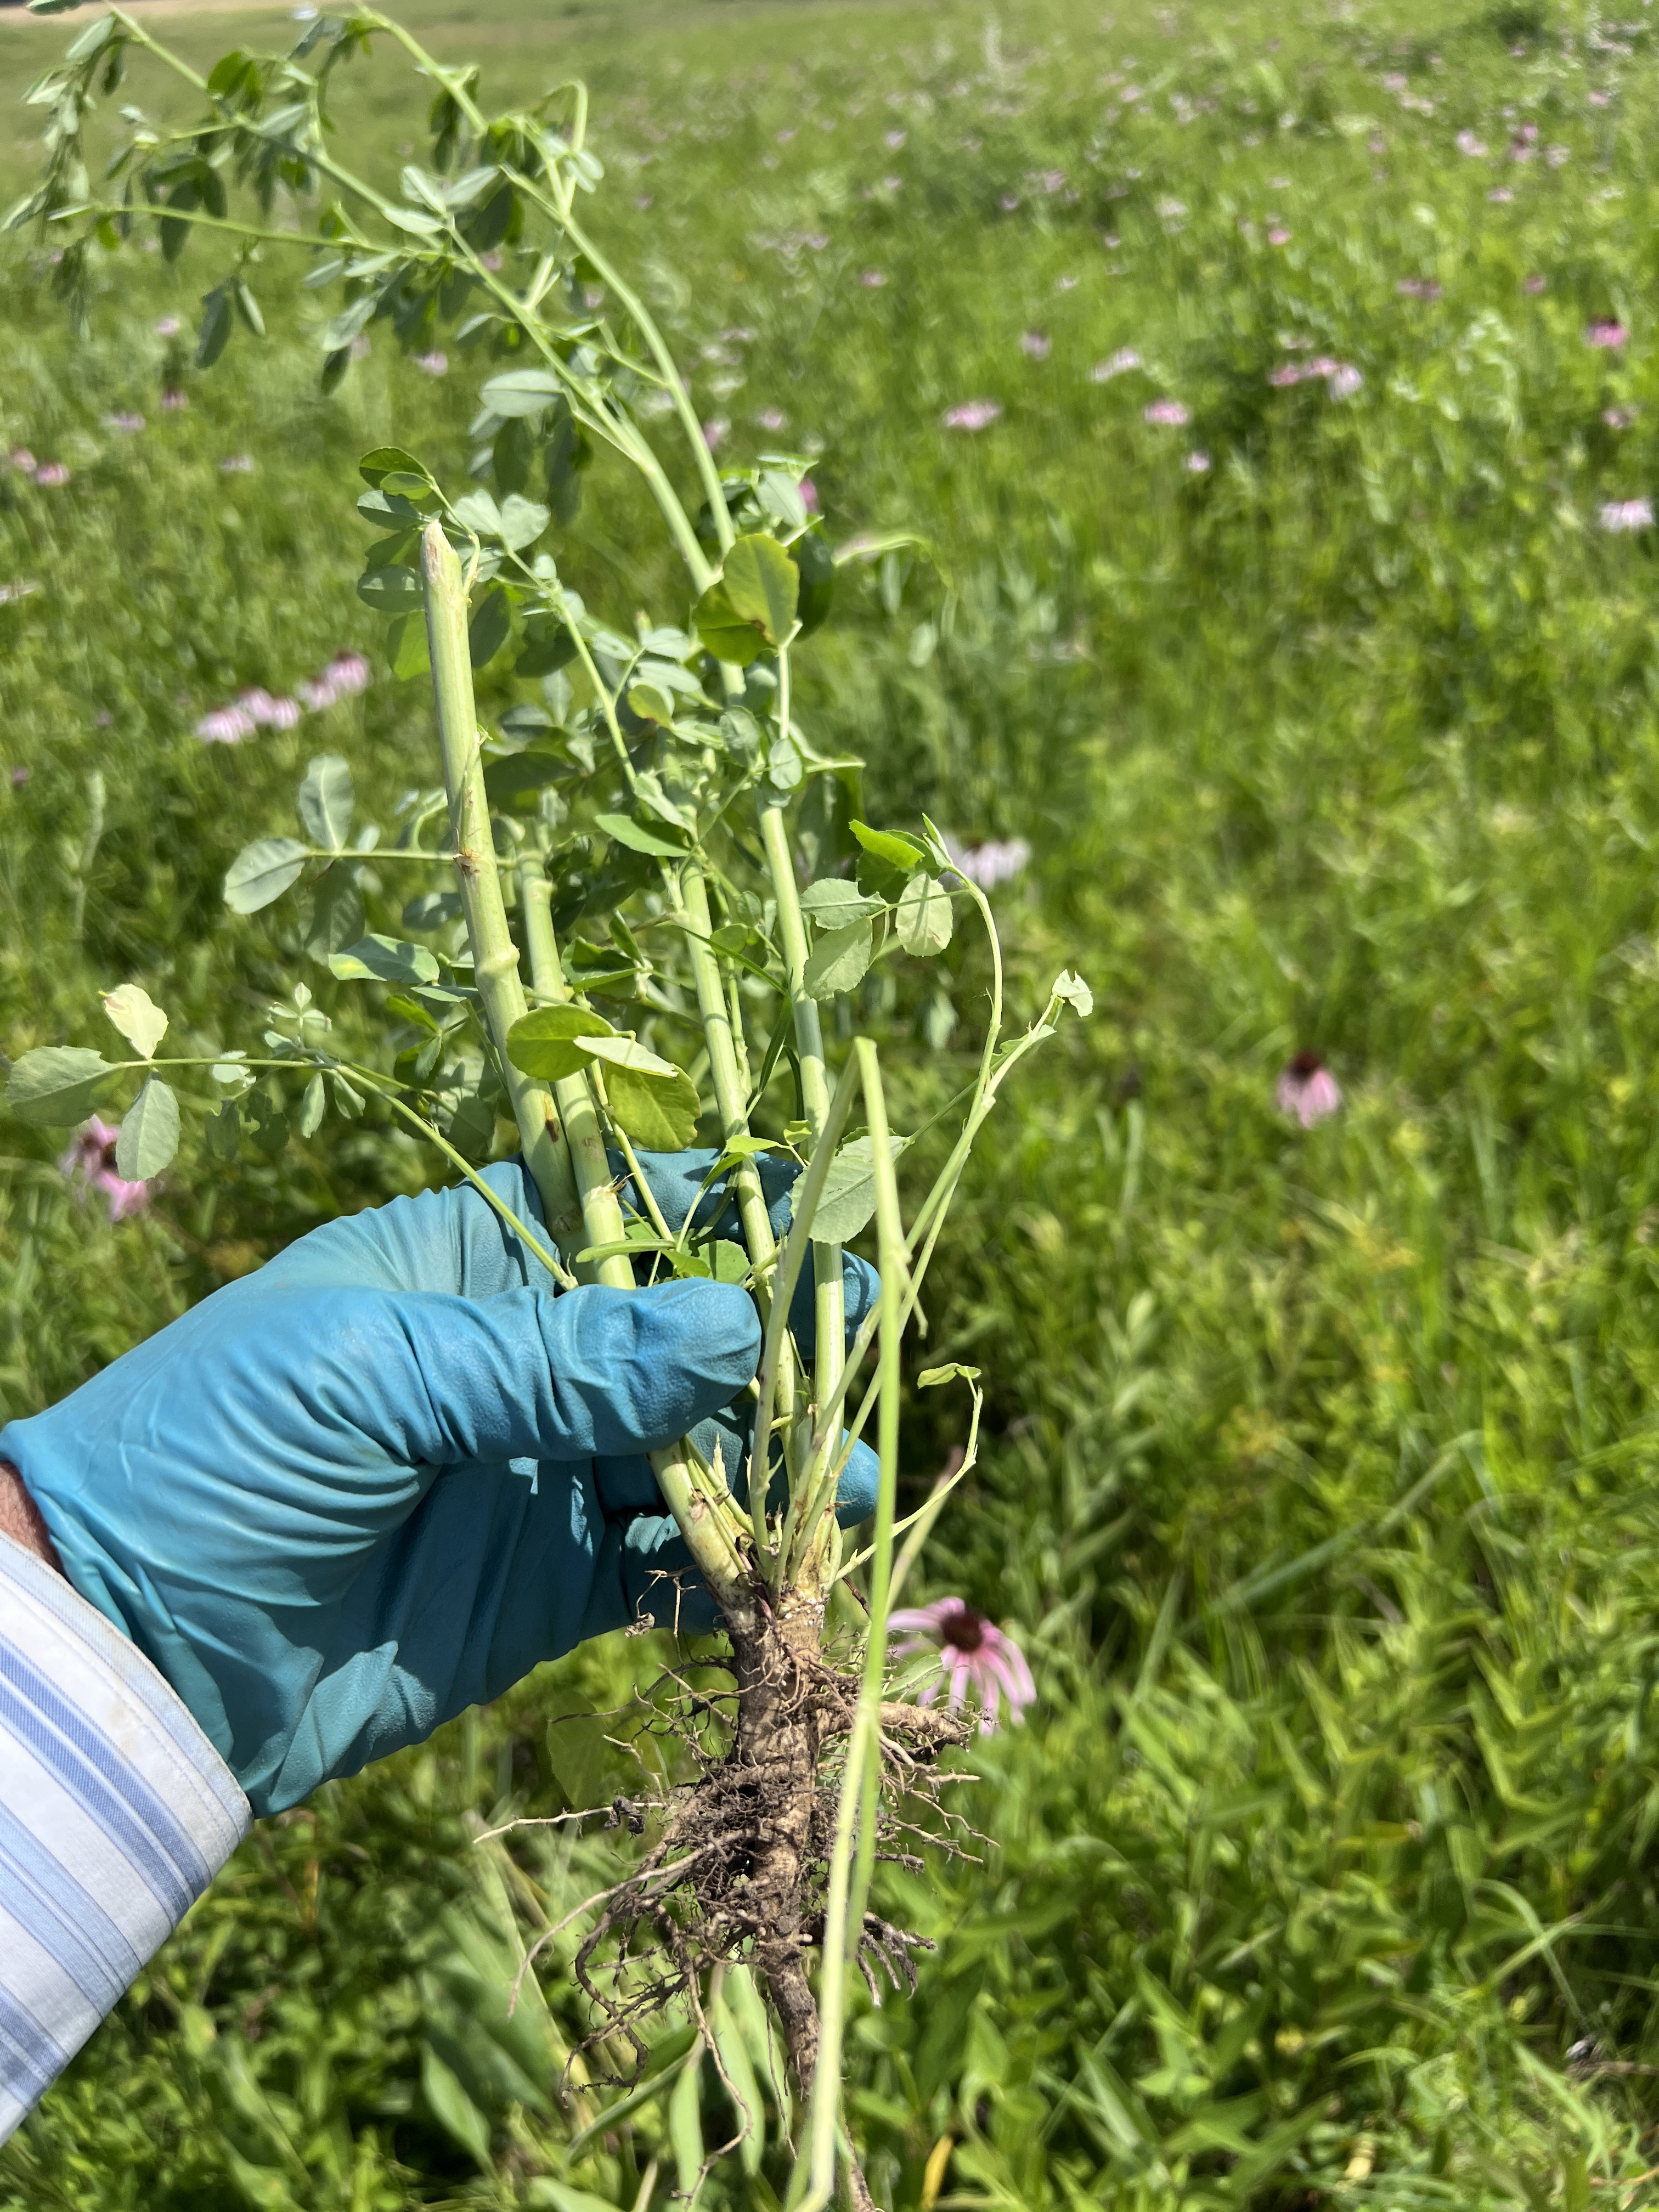
June 18: Stihl FSA 200 electric brush saw cutting a yellow sweet clover. A brush saw can mow nearly flush to the ground so they can be a good choice of a tool. They are faster than spading or hand scything. But we still mostly use a spade as the spade is cheap and effective.We are about to try this tri blade out which comes with its own orange shield. We hear this will work well. Gas string trimmer to cut yellow sweet clover. White sweet clover is too robust for a string trimmer. White sweet clover on June 17. Note that to mow this below the lowest leaf stem you would have to cut flush with the ground. That won’t happen with a mower. Yellow sweet clover on June 15. So this could be mowed at the height where I hold the plant, perhaps 5 inches. Many mowers can do this. June 15: Yellow sweet clover. You would need to mow at the height I am holding it, essentially flush with the ground. A mower can’t do this. You could cut it with a spade flush with the ground, but we tend to use the “Parsnip Predator” weed spade to loosen the soil and then pull it up with the roots. If the plants are in seed when cut then they need to be removed from the field. June 14: Yellow sweet clover. That stem with leaves on it means you can’t mow this plant yet. June 7: So how low do we have to mow this one?June 5: A yellow sweet clover that was mowed June 5. Too early is what I concluded. It is a macerated mess but there were a few leaves below the cut.
Patience is a prairie word: A key point here is the longer you wait the higher you can mow sweet clover.
June 16: Yellow sweet clover in early seed. I would haul this one out if you can.
It is good to do simple monitoring or testing to see if a weed treatment you are using works. I will describe the simple way I tested a herbicide treatment. I retreated this patch and found it did work. Read on.
On May 30, 2024 I sprayed eight distinct mature patches of reed canary grass (Phalaris arundinacea) with clethodim herbicide. Each patch of reed canary was about six feet in diameter, the plants 3 to 4 foot tall, and in flower. So their big growth spurt was done for the season.
As I have read, it is recommended to apply clethodim when the plants have emerged several inches and are actively growing. I have tested this and it works. I was hoping for a longer application window by spraying more mature plants. Would that work?
The herbicide mix was 1.5% Intensity (clethodim), ammonium sulfate crystals (three cups added to a 50 gallon mix), and a half ounce per gallon of methylated seed oil. Maybe I needed more AMS and MSO.
In each of the eight patches I drove in a four foot tall fiberglass rod. The rod could withstand a fire and be noticeable a year later.
I sprayed the patches so the milky herbicide mix was starting to drip off.
I recorded this information into Field Maps.
I made a calendar reminder for a year later to look at the results.
Yesterday I looked, May 28 2025, and all eight patches looked very healthy. The clethodim did not control reed canary grass that was applied when the plants were mature.
One of the 8 patches treated a year previously with clethodim. They looked like this last year when I sprayed them. And they look fine a year later after clethodim. This suggests clethodim applied to mature reed canary grass in late spring does not work.
But then again. I try a second application. The next day, May 29, 2025, I did make a new clethodim mix and re-sprayed the same 8 patches of reed canary to see what happens. Below are two photos of those patches about six weeks later on July 19, 2025. They are clearly top killed. I was surprised. Top killed but are the roots dead? I will leave the fiberglass rods in them and check back in May of 2026 and report back.
Top killed reed canary grass treated with clethodom six weeks previously.
I encourage managers to test out their treatments. It was not hard. It was also not rigorous enough to publish a scientific paper or get a degree.
By: Julianne Mason, Forest Preserve District of Will County, Illinois
For the past decade or so, I have had a slow-burn obsession with tracking the outcomes of spring treatments of clethodim herbicide, to reed canary grass (Phalaris arundinacea). It is a Top 5 invasive plant in our wetlands in northeastern Illinois, and we spent 4,000 hours and 6,000 gallons of herbicide in 2024 to combat it across 3,200 acres. Given the amount of effort, it is important to make sure that the treatments are as effective as possible!
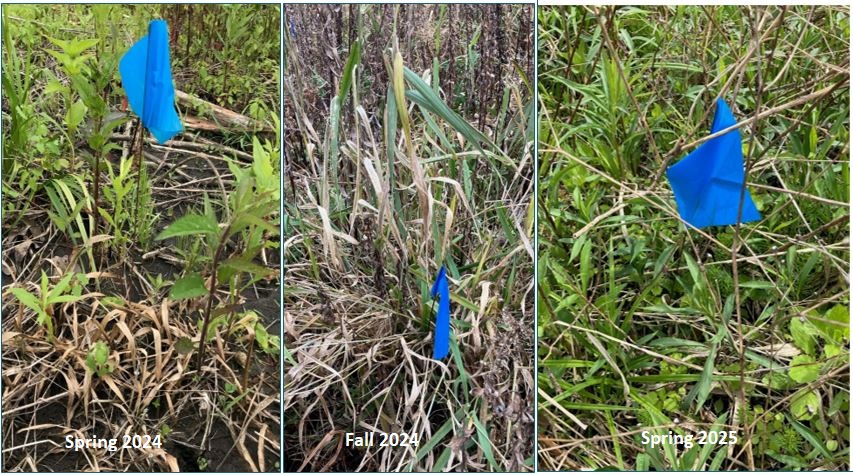
Fall treatments of clethodim, a grass-specific herbicide, are fairly consistently effective on reed canary grass – see previous study here and follow-up observations here. However, it’s desirable to treat invasives before they go to seed, and as natural area managers, we generally want to kill reed canary grass in the spring before it goes to seed. Spring clethodim treatments to reed canary grass have seemed to be more variable in results. To try to figure out why some treatments are more effective than others, I marked individual reed canary grass plants from ten different clethodim treatments between April and July, 2024, and tracked their outcomes the following spring (2025).
Why clethodim? For the past decade, we have used clethodim as our herbicide of choice to combat reed canary grass because it does not kill native sedges and forbs. This makes it different than using a non-selective herbicide like glyphosate or imazapyr, which leave “holes” in the vegetation because they kill everything in the overspray zone. Over the course of a decade, sites that we consistently used glyphosate to spray reed canary grass in the spring became weedier as reed canary grass and other invasives recolonized the glyphosate “holes”, necessitating more herbicide treatments in a downward spiral. In contrast, sites that we consistently used clethodim on the reed canary grass became more dominated by natives and had less invasives over time. Note that we are working in remnant and restored natural areas where there are native species present to reclaim a competitive advantage once the reed canary grass is selectively targeted.
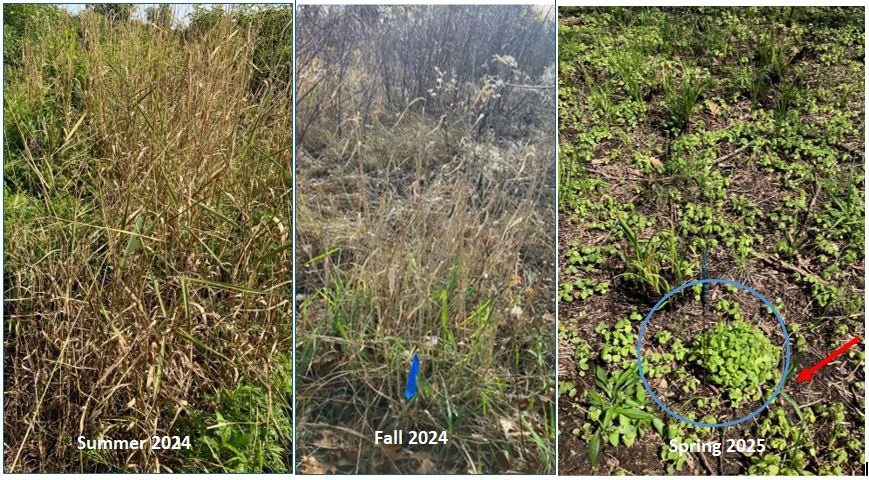
Bare areas left from glyphosate herbicide application to reed canary grass the previous year. Reed canary grass had been sprayed with clethodim herbicide (red circle – browned vegetation). Yellow circle was a missed patch of reed canary grass. Native bulrushes and sedges were unaffected by the herbicide treatment.In my 2016 study, comparison of two adjacent plots where the reed canary grass was treated with clethodim and glyphosate herbicide, viewed two years after the treatment.
Despite its advantages over time, individual clethodim treatments are often underwhelming. Although it does not happen too often, I have witnessed treatments with nearly magical effects, where the reed canary grass is selectively killed and rich, diverse, native-dominated sedge meadows are released. This usually happens after a prescribed burn, when the grasses are treated when they are 3-4 inches tall. However, this timing is difficult to achieve because clethodim and other grass-specific herbicides are not aquatic approved, and wetlands tend to be wet in the spring. Oftentimes, the reed canary grass treatments must be delayed until the wetlands dry out, and the grasses are then 6” + tall. Many of the treated reed canary grasses just appear stunted by the clethodim herbicide treatment. Although they generally appear affected – the leaves become chlorotic, and they don’t flower or produce seed – they also don’t die. At least not that season.
Perhaps there may be a delayed effect going on. In my 2016 study, individual reed canary grass plants were marked and treated with clethodim in the fall. For the next several years, I recorded them as being “stunted but alive”. Then, when I found the marking flags five years later, the reed canary grass plants had died and were gone. Maybe they were selectively weakened by the clethodim treatment and eventually outcompeted by the natives that were not impacted by the herbicide.
To look at the outcomes of spring clethodim herbicide treatments, I marked 10 individual reed canary grass plants in 10 different clethodim treatments between April – July, 2024, and tracked their outcomes the following spring (2025). Here are some of the (still preliminary) results. All treatments were made with 1.5% clethodim (v/v) and using a surfactant containing ammonium sulfate. However, the treatments were made by five different crews, each using different brand names and products in their herbicide concoction.
Reed canary grass was sprayed with 1.5% Intensity herbicide on 4/8/2024, after the area had received a prescribed burn. The herbicide concoction included Choice WeatherMaster AMS (0.5%) and Activator 90 surfactant (1%). The grasses were about 4” tall when they were sprayed. A month after treatment (left), it looked very effective. However, many of the marked individuals re-grew during the fall of 2024 (center). An herbicide crew was in the area spraying reed canary grass during the fall of 2024, and the marked plants may have gotten a second treatment. In the spring of 2025 (right), the marked reed canary grass plants were dead and native forbs and sedges had filled in.
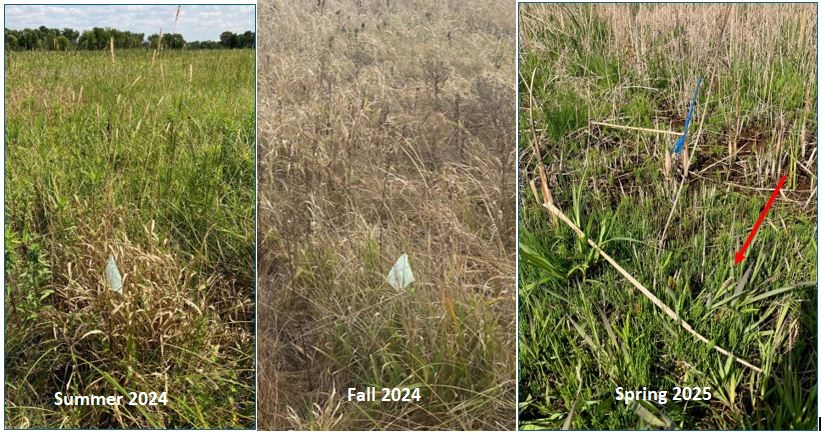
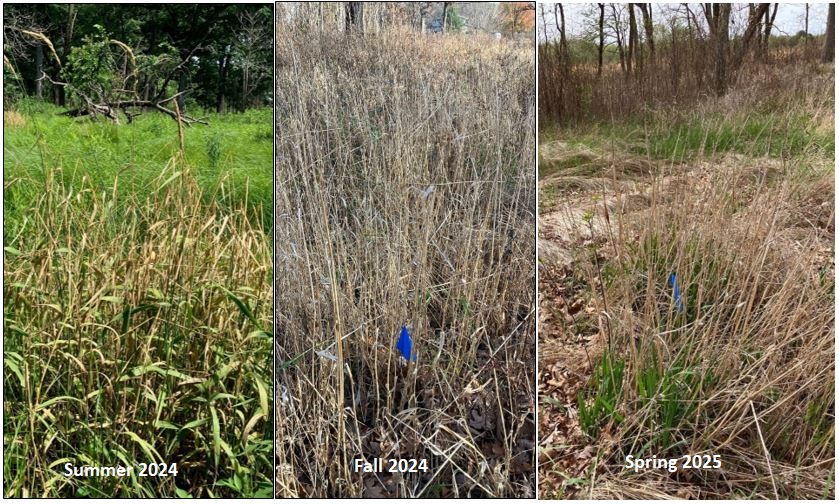
This wetland area stayed wet for the entire spring in 2024, and didn’t dry out until July. The reed canary grass was sprayed with 1.5% clethodim herbicide on 7/2/2024, when the plants were well past seed-set (left). The herbicide concoction also included 2% Surfate AMS, 1% MSO, and 0.2% PenATrate Eco surfactant. During the fall of 2024, the treated plants re-grew considerably (center). The herbicide crew was in the area spraying reed canary grass again during the fall of 2024, and the marked plants may have gotten a second treatment. In the spring of 2025 (right), the reed canary grass was mostly dead but some of the marked plants were re-sprouting weakly from the edge of the former clump.This treatment of 1.5% Intensity (clethodim) to reed canary grass was done on 6/19/2024, when the grasses were setting seed (left, view a few weeks after treatment). The herbicide concoction included Choice WeatherMaster AMS (0.5%) and Activator 90 surfactant (1%). During the fall of 2024, most of the marked grasses had re-grown (center). The herbicide crew was in the area spraying reed canary grass during the fall of 2024, and the marked plants may have gotten a second treatment. In the spring of 2025, many of the marked plants were re-sprouting weakly but were still alive.Reed canary grass in this wetland area was sprayed with 1.5% clethodim on 5/17/24, when the plants were in flower (left, view a few weeks after treatment). This crew’s herbicide concoction included 1.5% FS AMS Max DR surfactant, but did not include methylated seed oil (MSO). There was some regrowth during the fall of 2024, primarily in the top of the plants (center). This area did not receive a second treatment during the fall of 2024. During the spring of 2025, the marked plants were re-growing vigorously and appeared unaffected by the previous year’s treatment (right). This treatment appears to have been unsuccessful.
In general, the spring clethodim treatments that were more successful in reducing reed canary grass and increasing native coverage had some of these traits:
Post-burn treatment when the grasses were 3-4 inches tall,
Treatment to younger/smaller reed canary grass newly invading a natural area, not an established stand,
Received a follow-up treatment during the fall, and
The herbicide concoction contained a surfactant with ammonium sulfate and MSO, in addition to the clethodim herbicide.
After tracking the spring 2024 clethodim treatments to reed canary grass, it seems that the two best windows for effective treatments are: 1) in the spring after a prescribed burn when the reed canary grass is short, and 2) during the fall (late October – November) when the reed canary grass is green but other vegetation has started to senesce. Treatments during the late spring or early summer are useful to target smaller, scattered reed canary grass that are difficult to find until they send up their flowering stalks. Using a combination of fall treatments (for effectiveness) followed by spring treatments (for visibility of missed or young individuals) may be the best option for reducing reed canary grass and allowing the native matrix to recover.
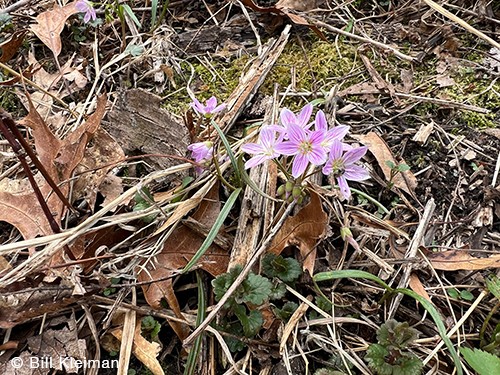
Spring beauty are one of the early wildflowers to come up in our oak woods. They are crazy beautiful making us thankful for spring.
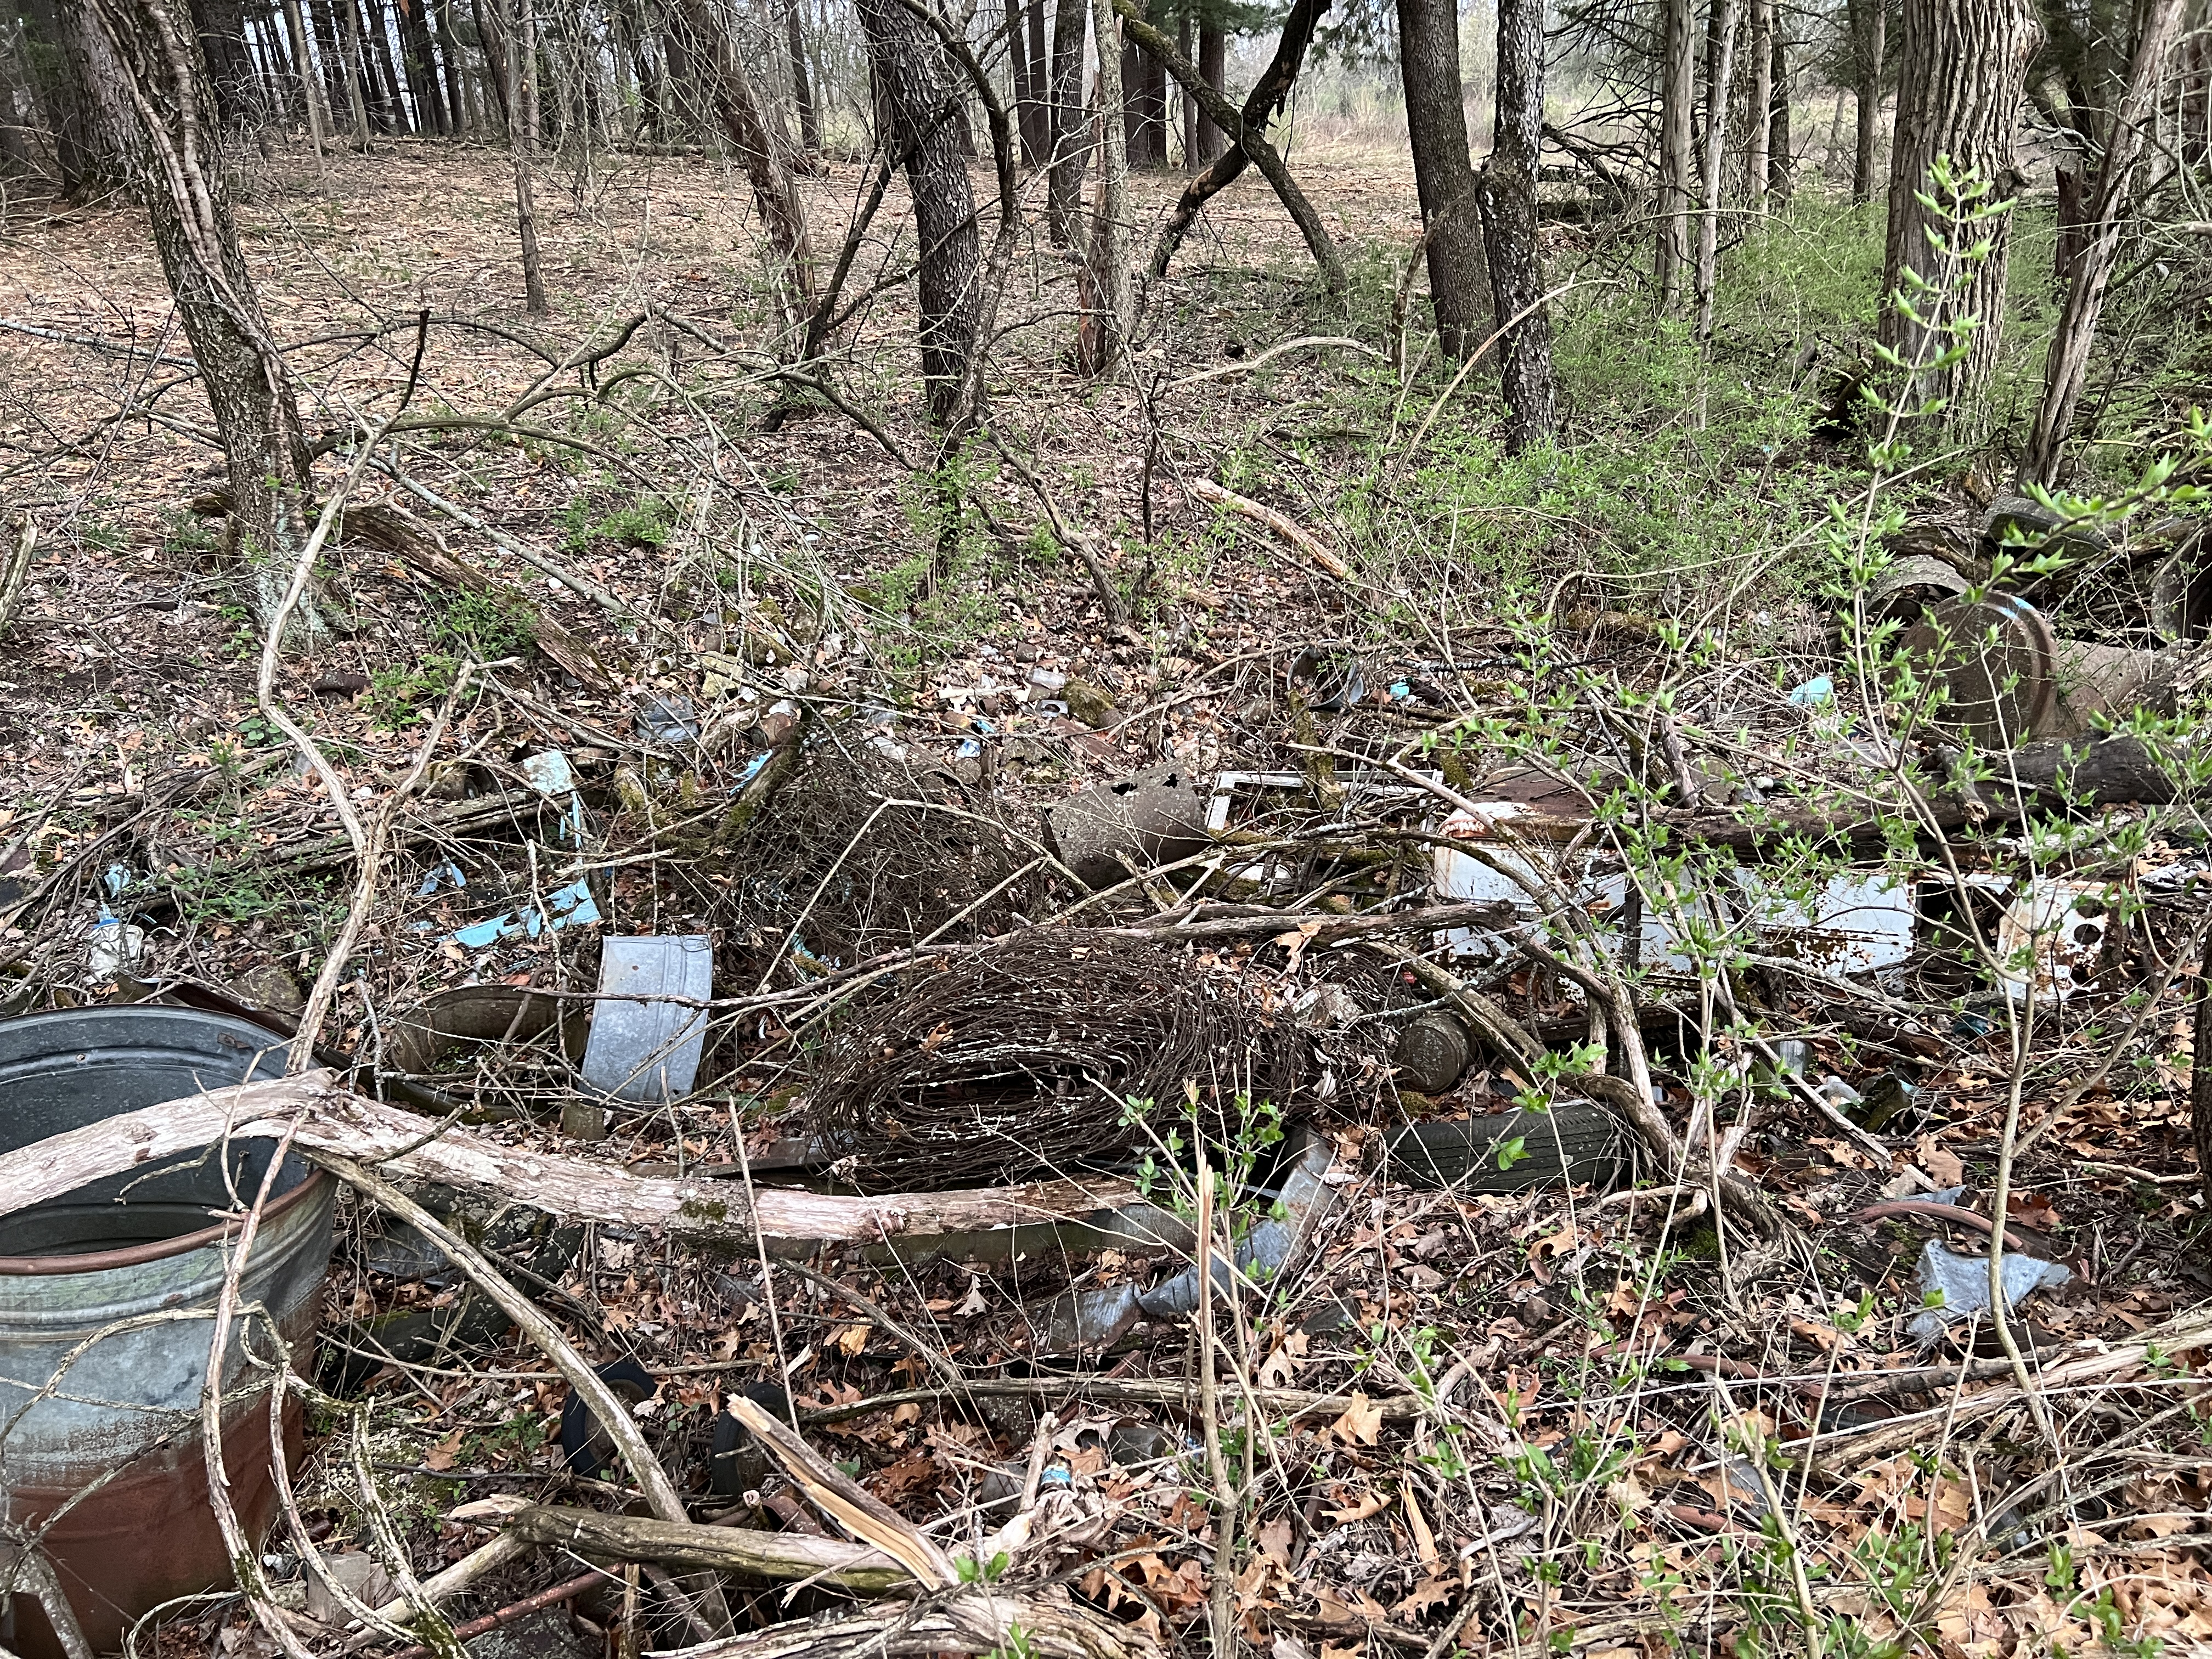
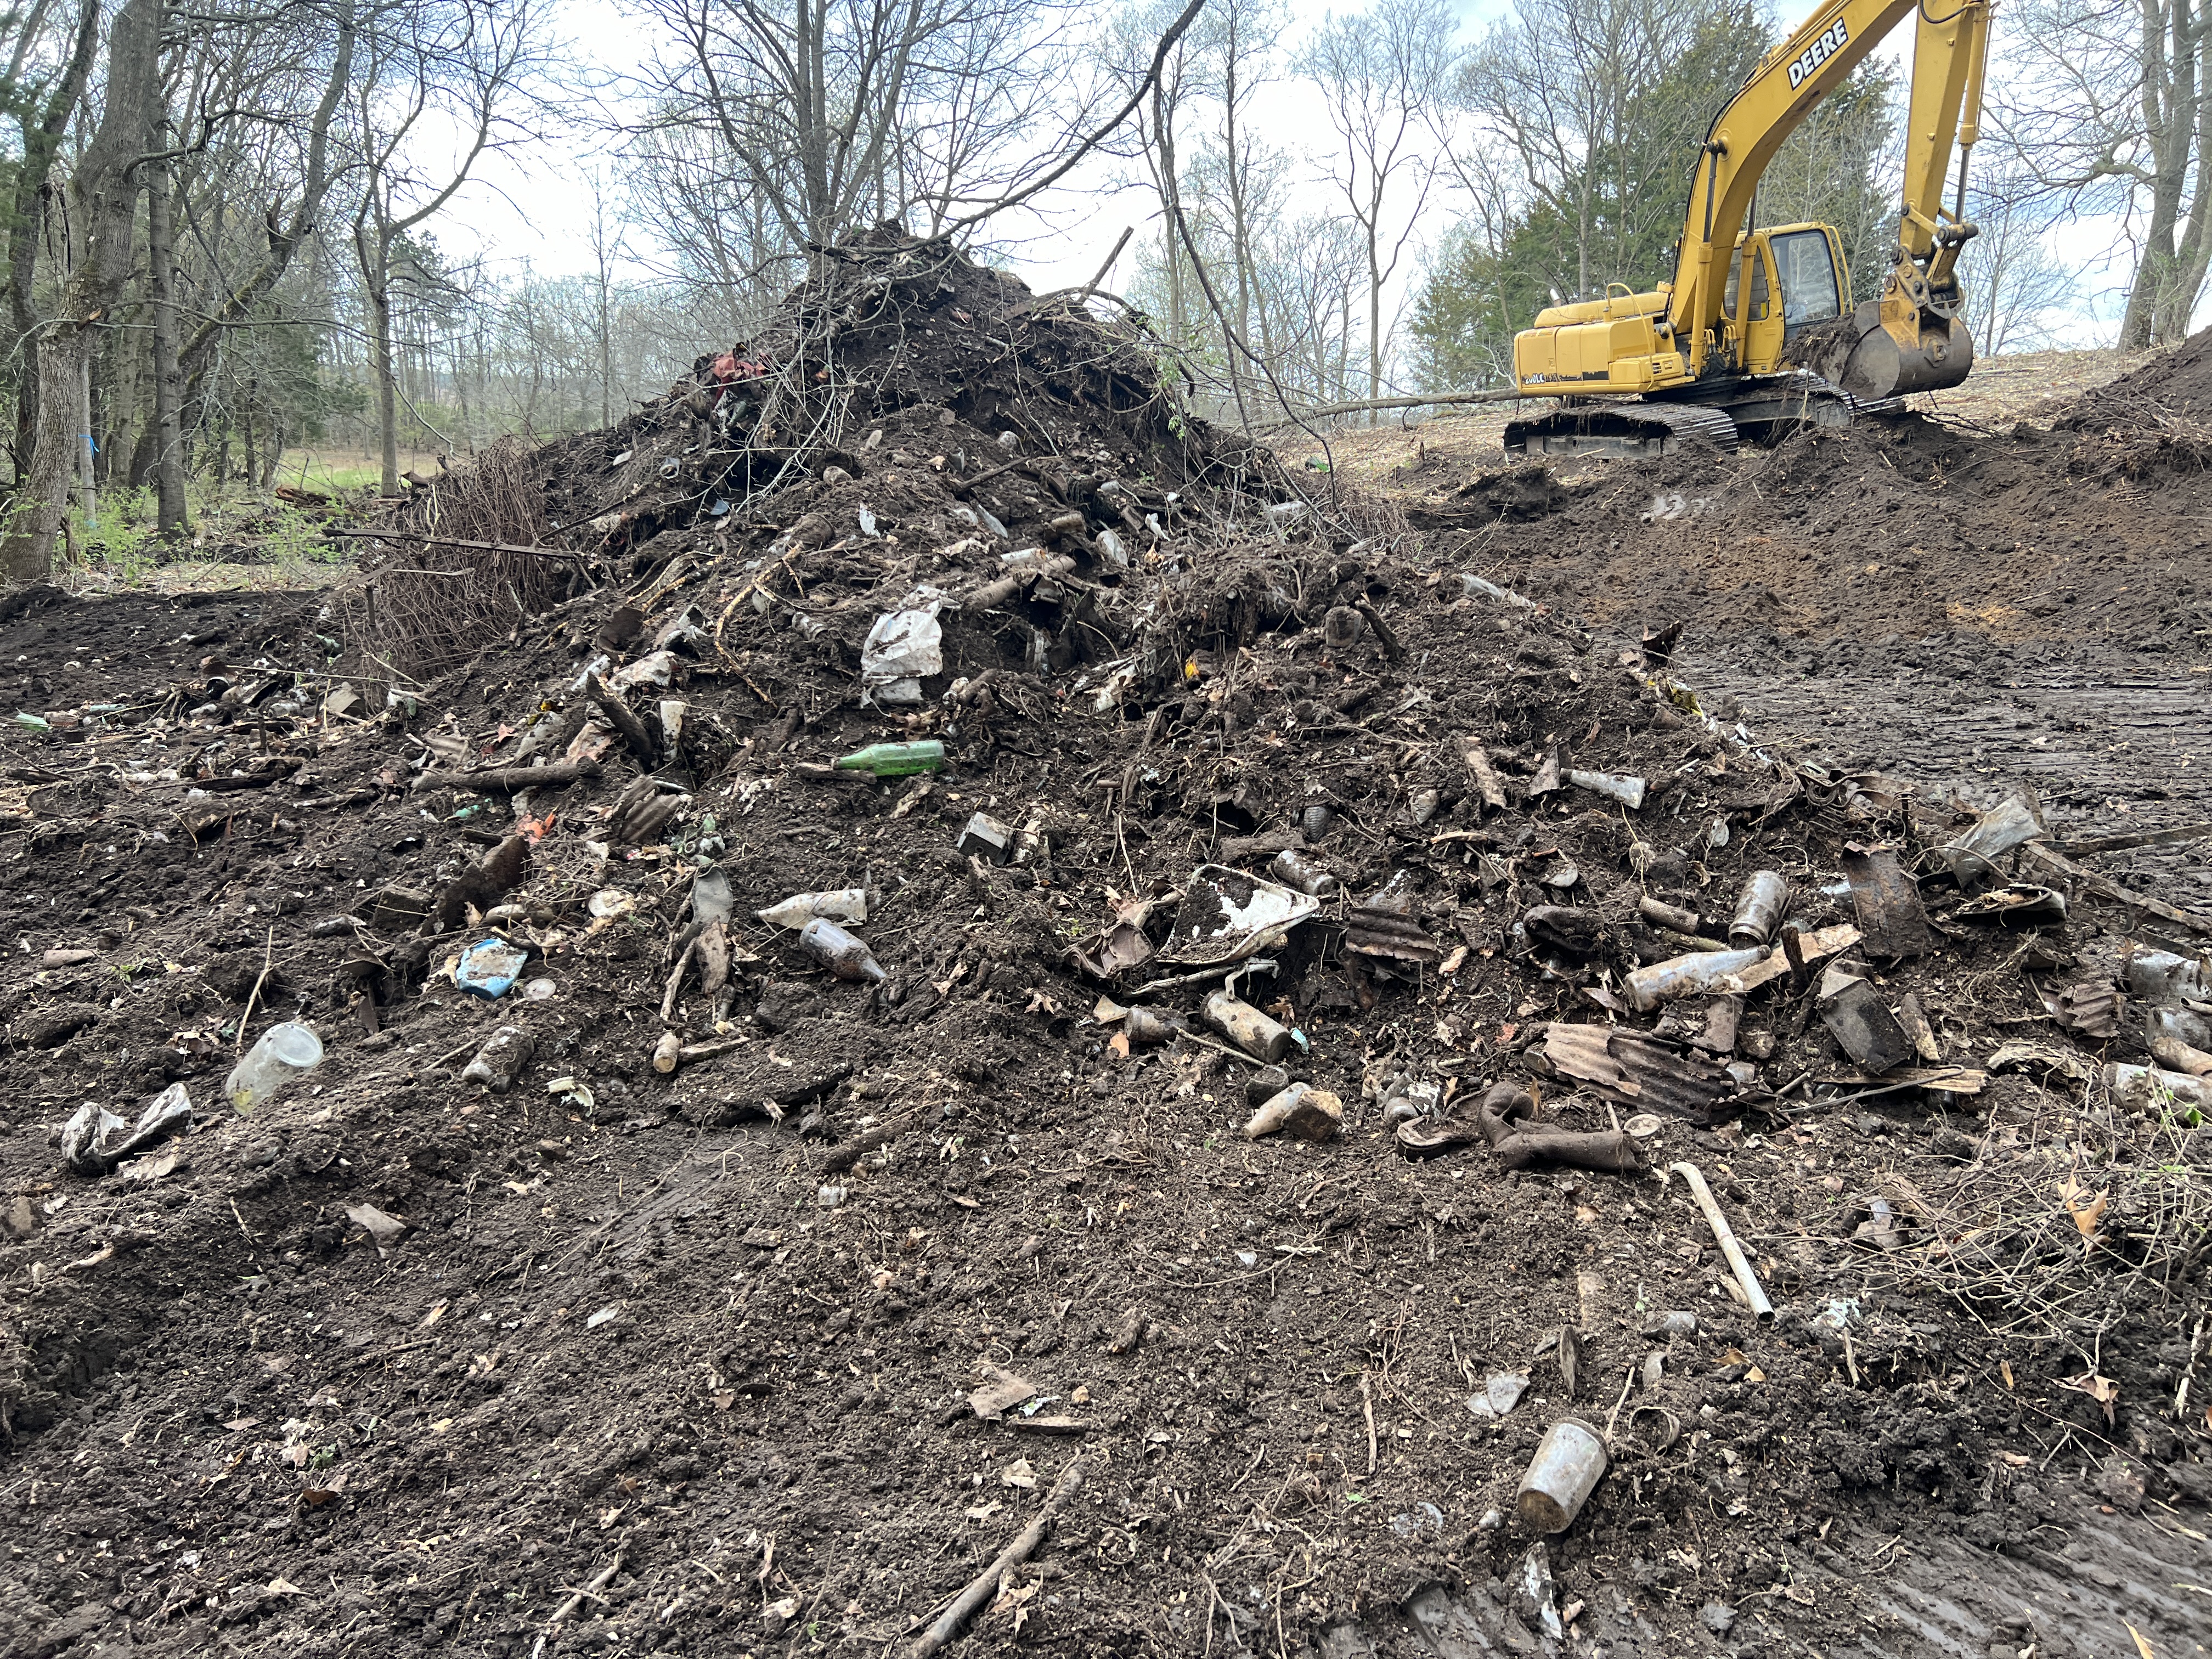
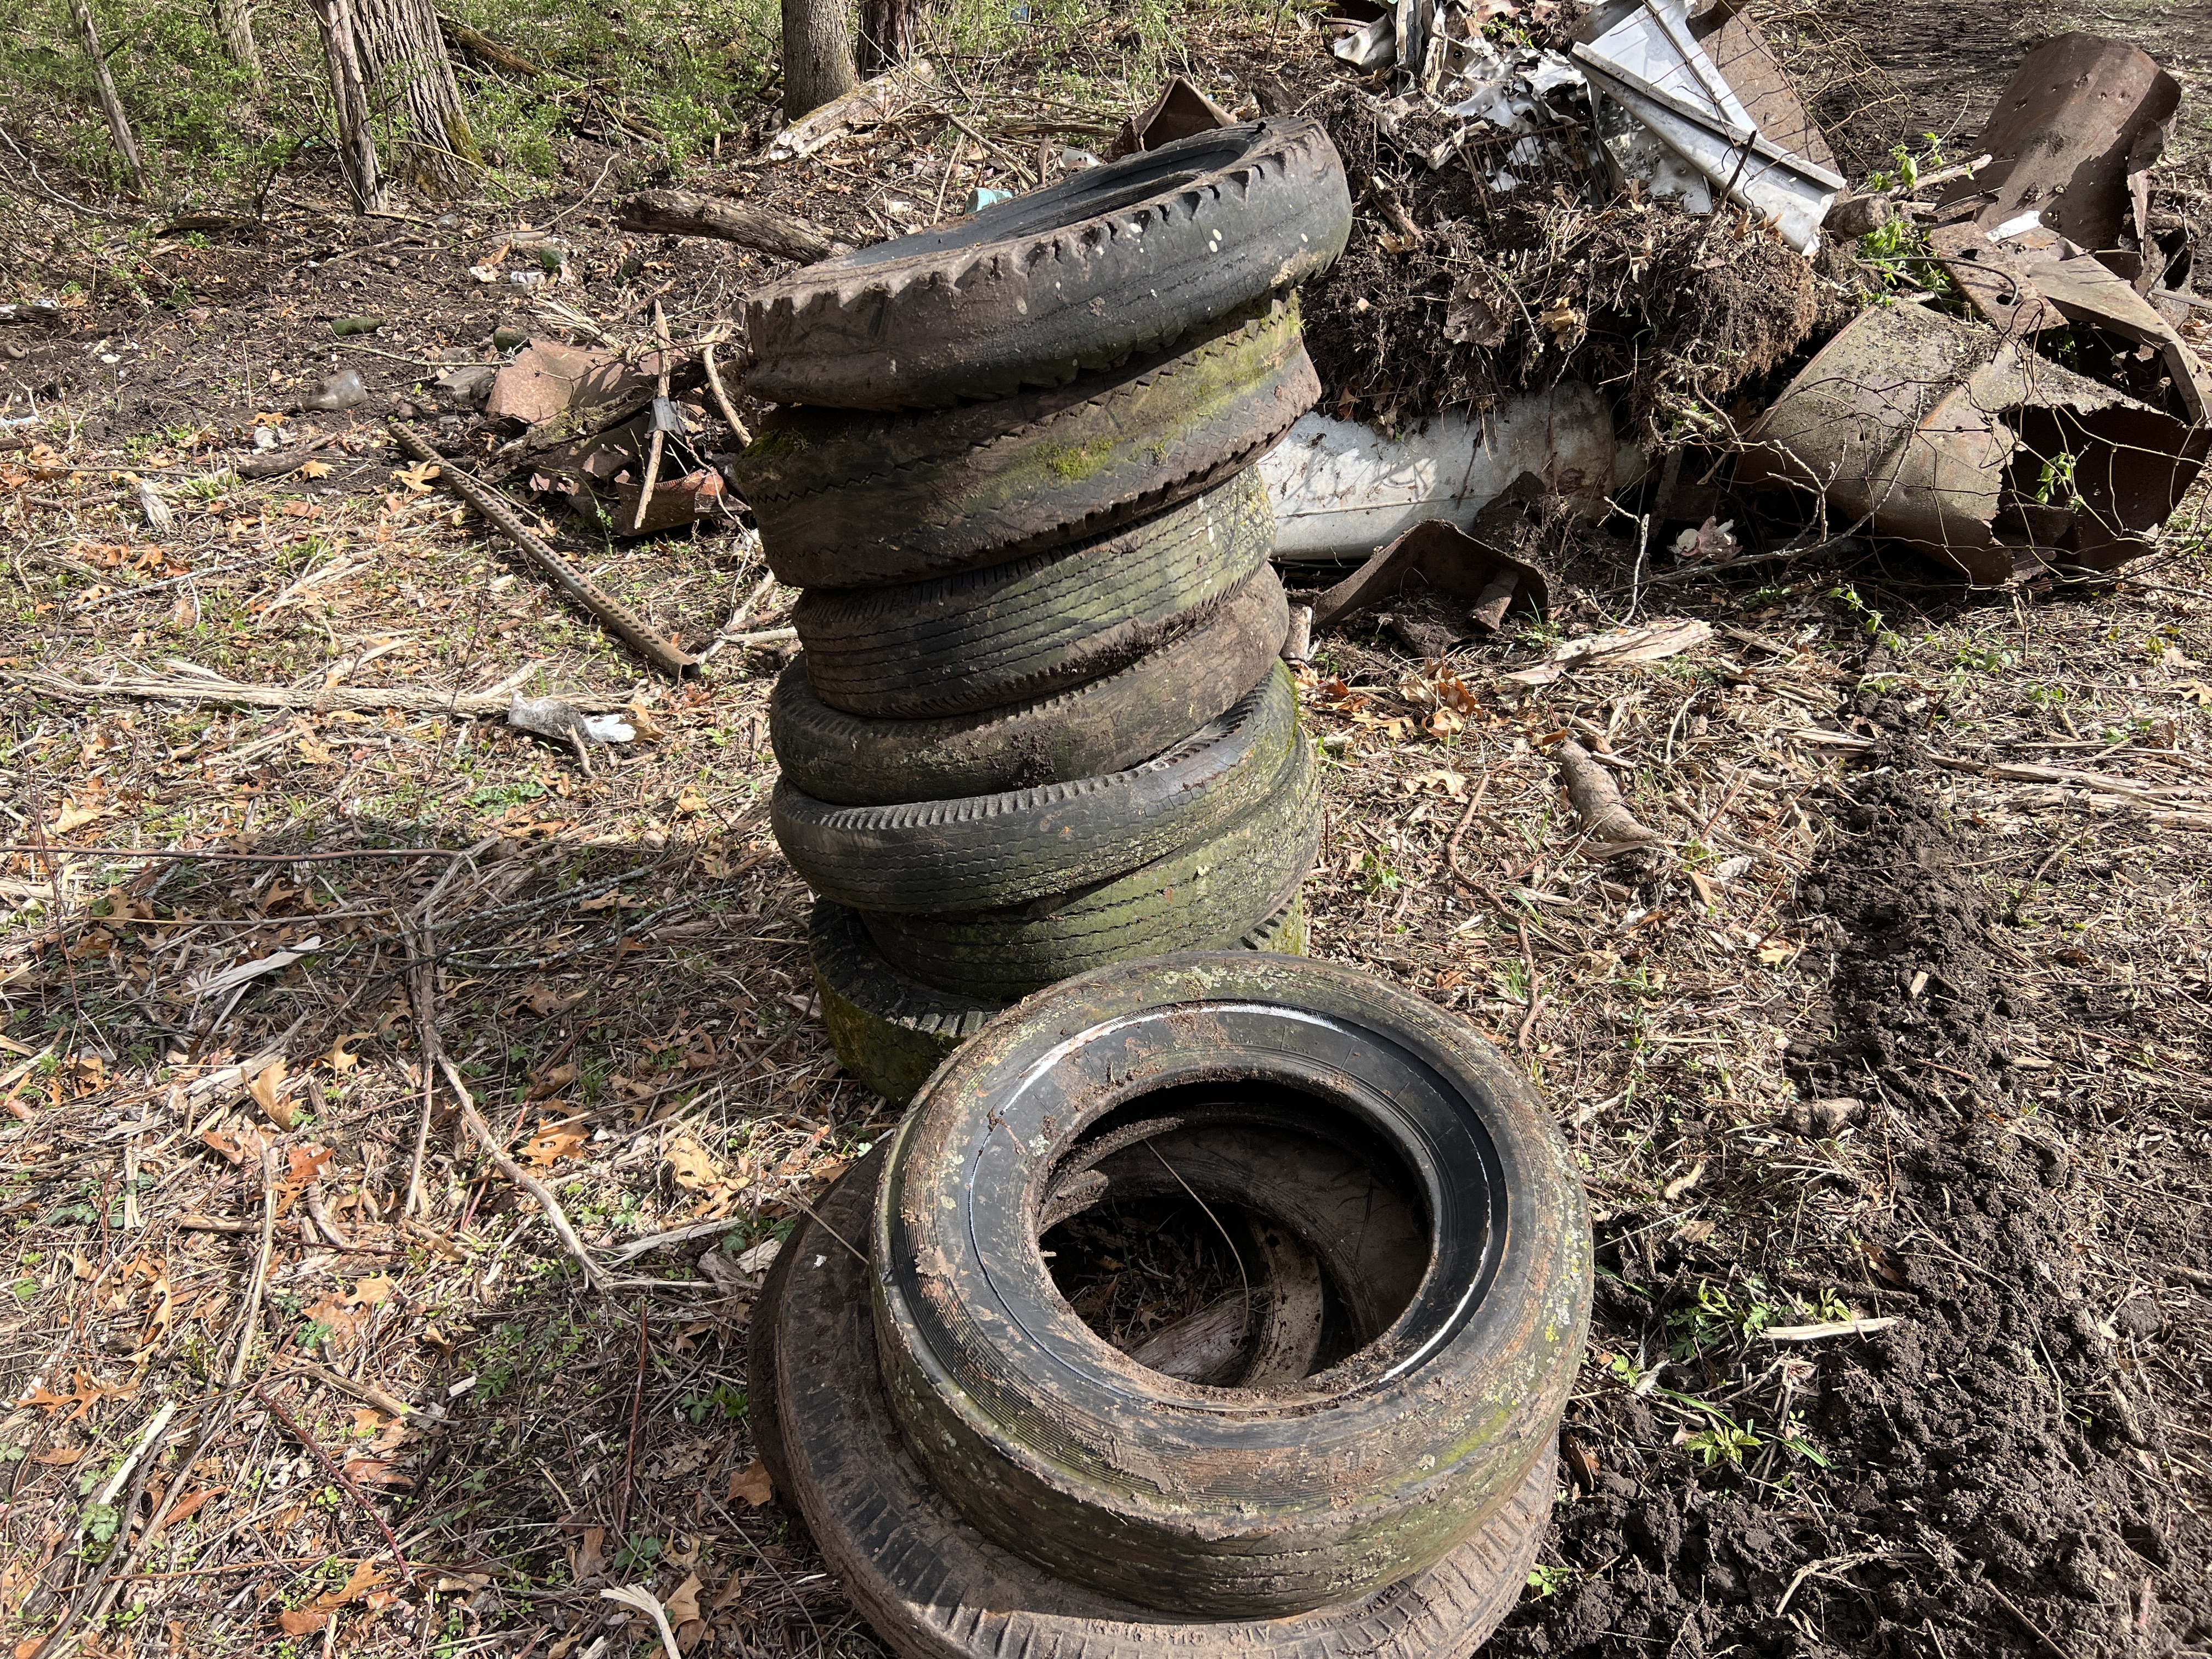
Spring cleaning. Above is old junk dumped in a ditch that we are cleaning up this week. In our grandparents time it was common to have a ditch on the back acreage to dump your abandoned old fence wire, broken implements, household appliances, tires, and in this case thousands of bottles and cans. We shun this dumping today, but we have sanitary landfills and recycling services our grandparents did not have.
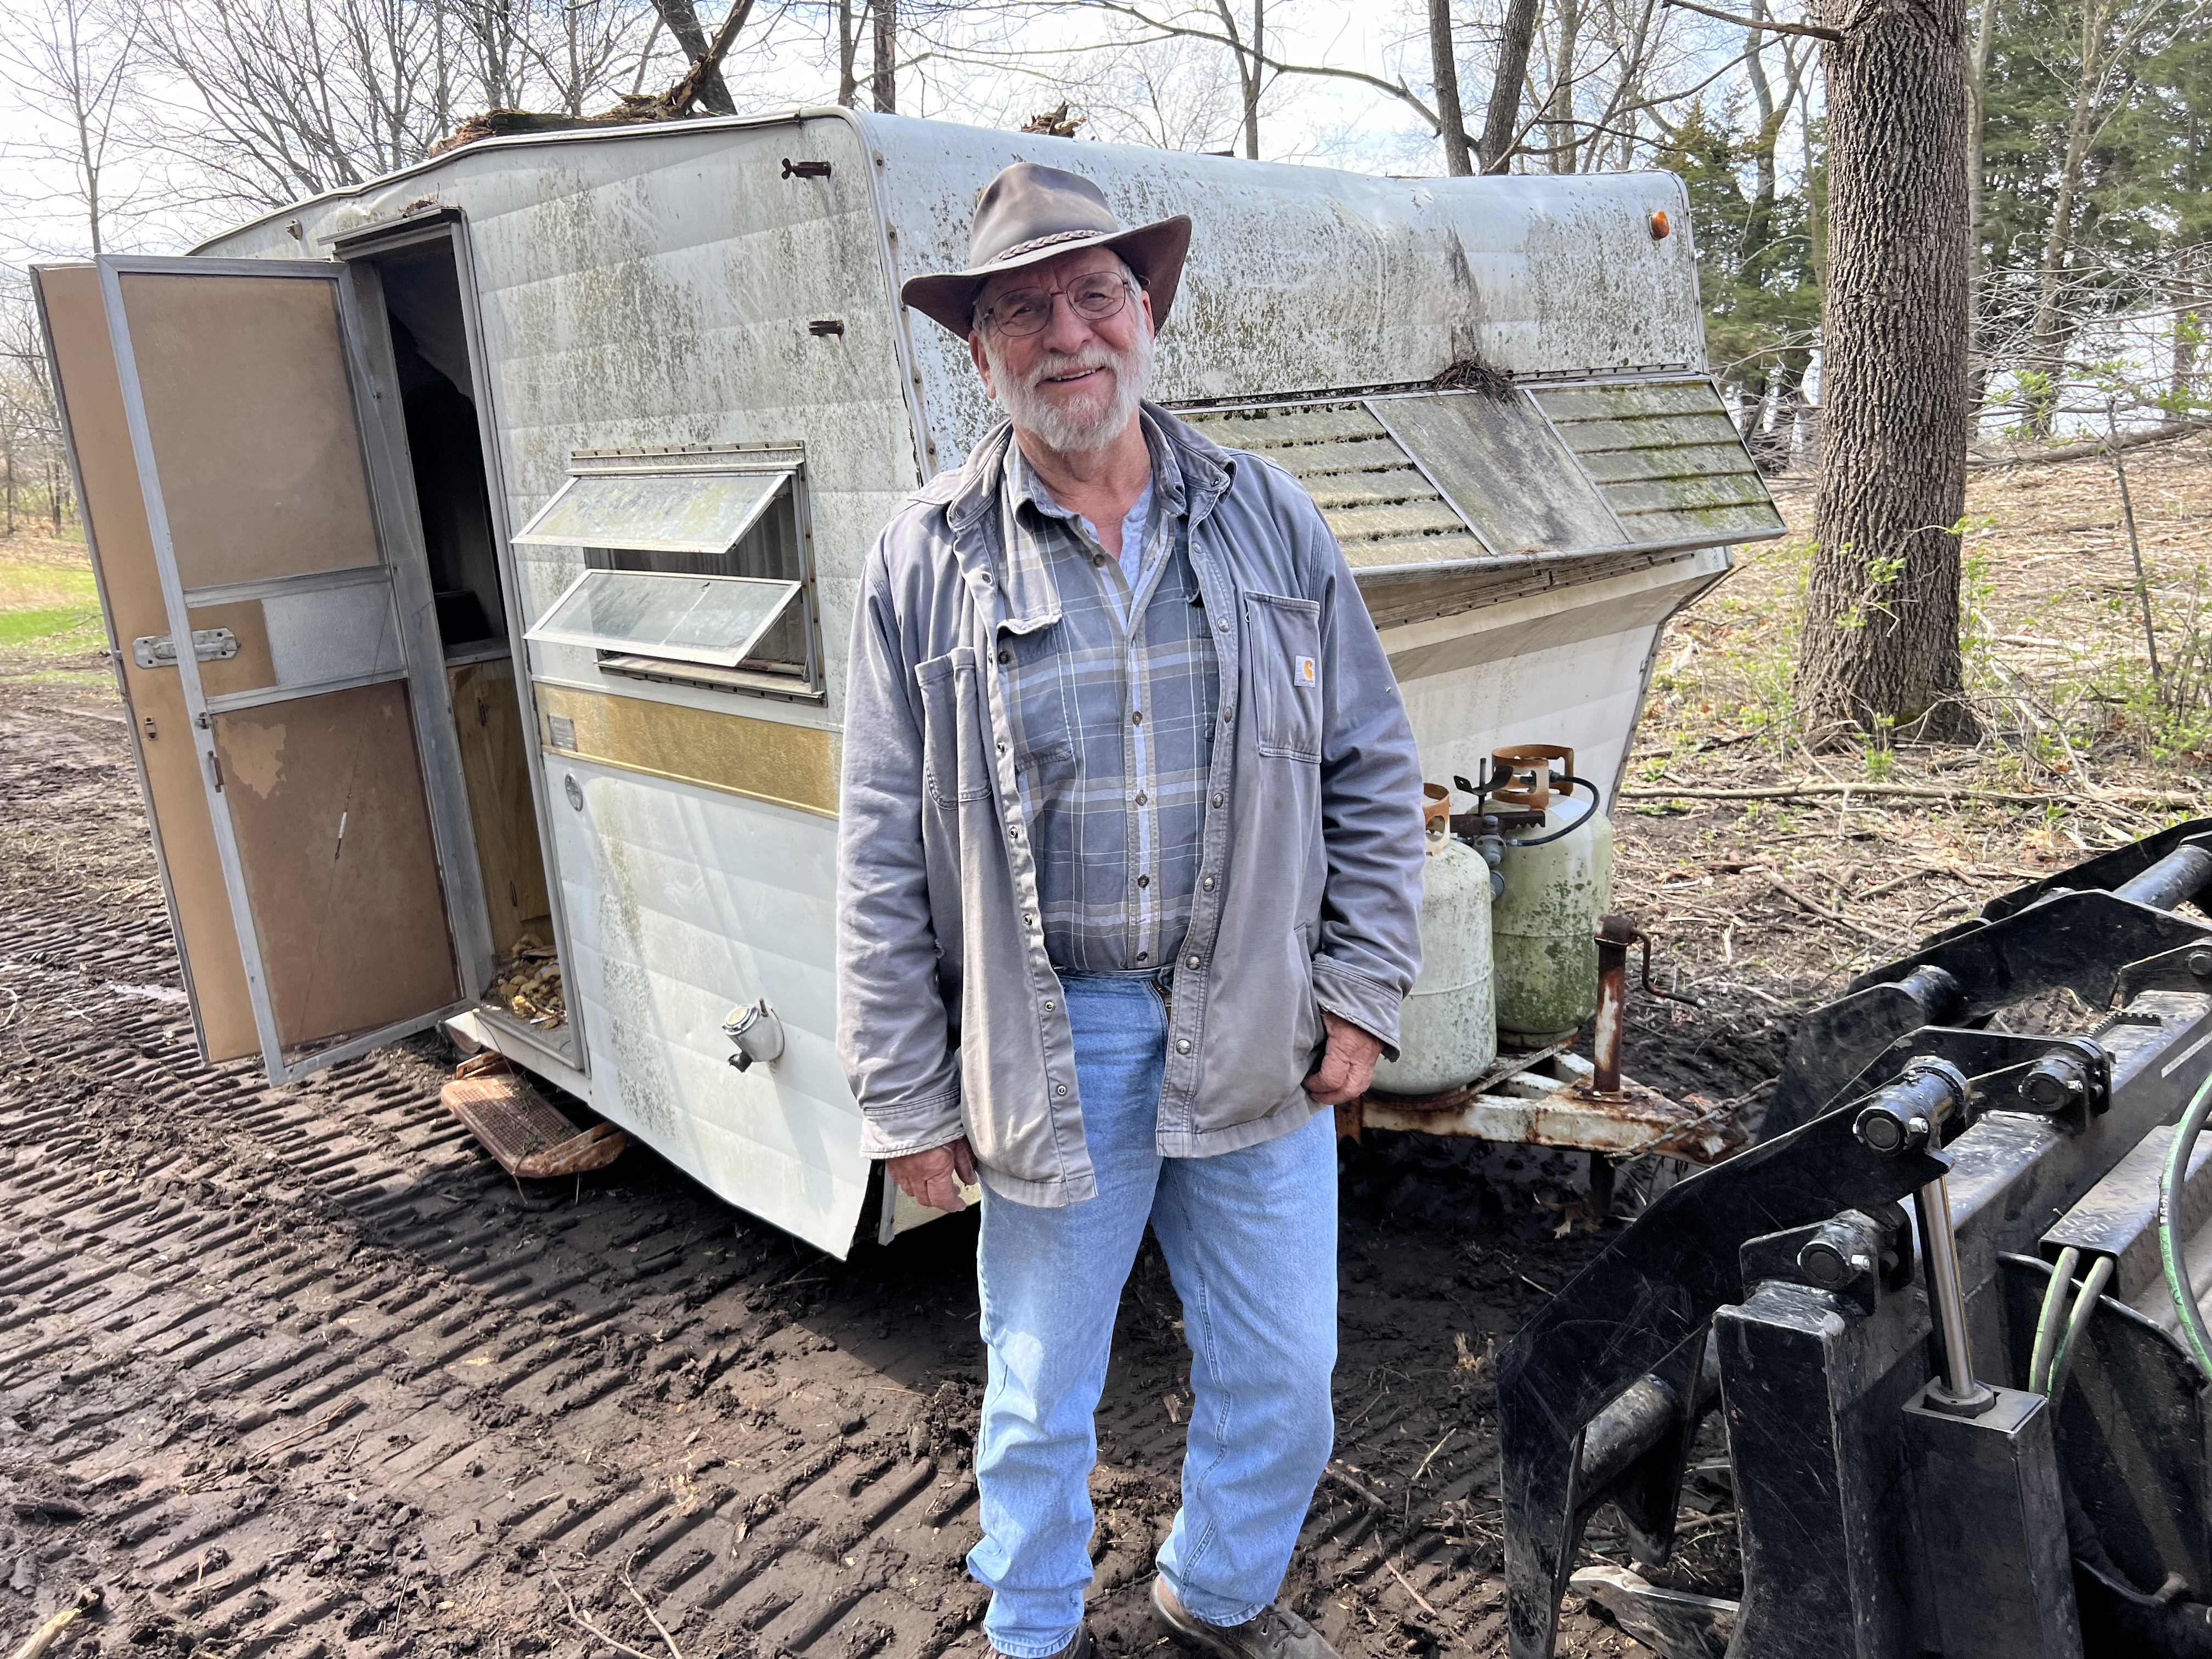
Bill Nordman worked wonders with his excavator to pull all the big stuff out of the ditch. We set aside tires to have ground up. We scrap ironed what steel we could. Some junk went to the landfill, and some was buried. This old trailer could have been yours.
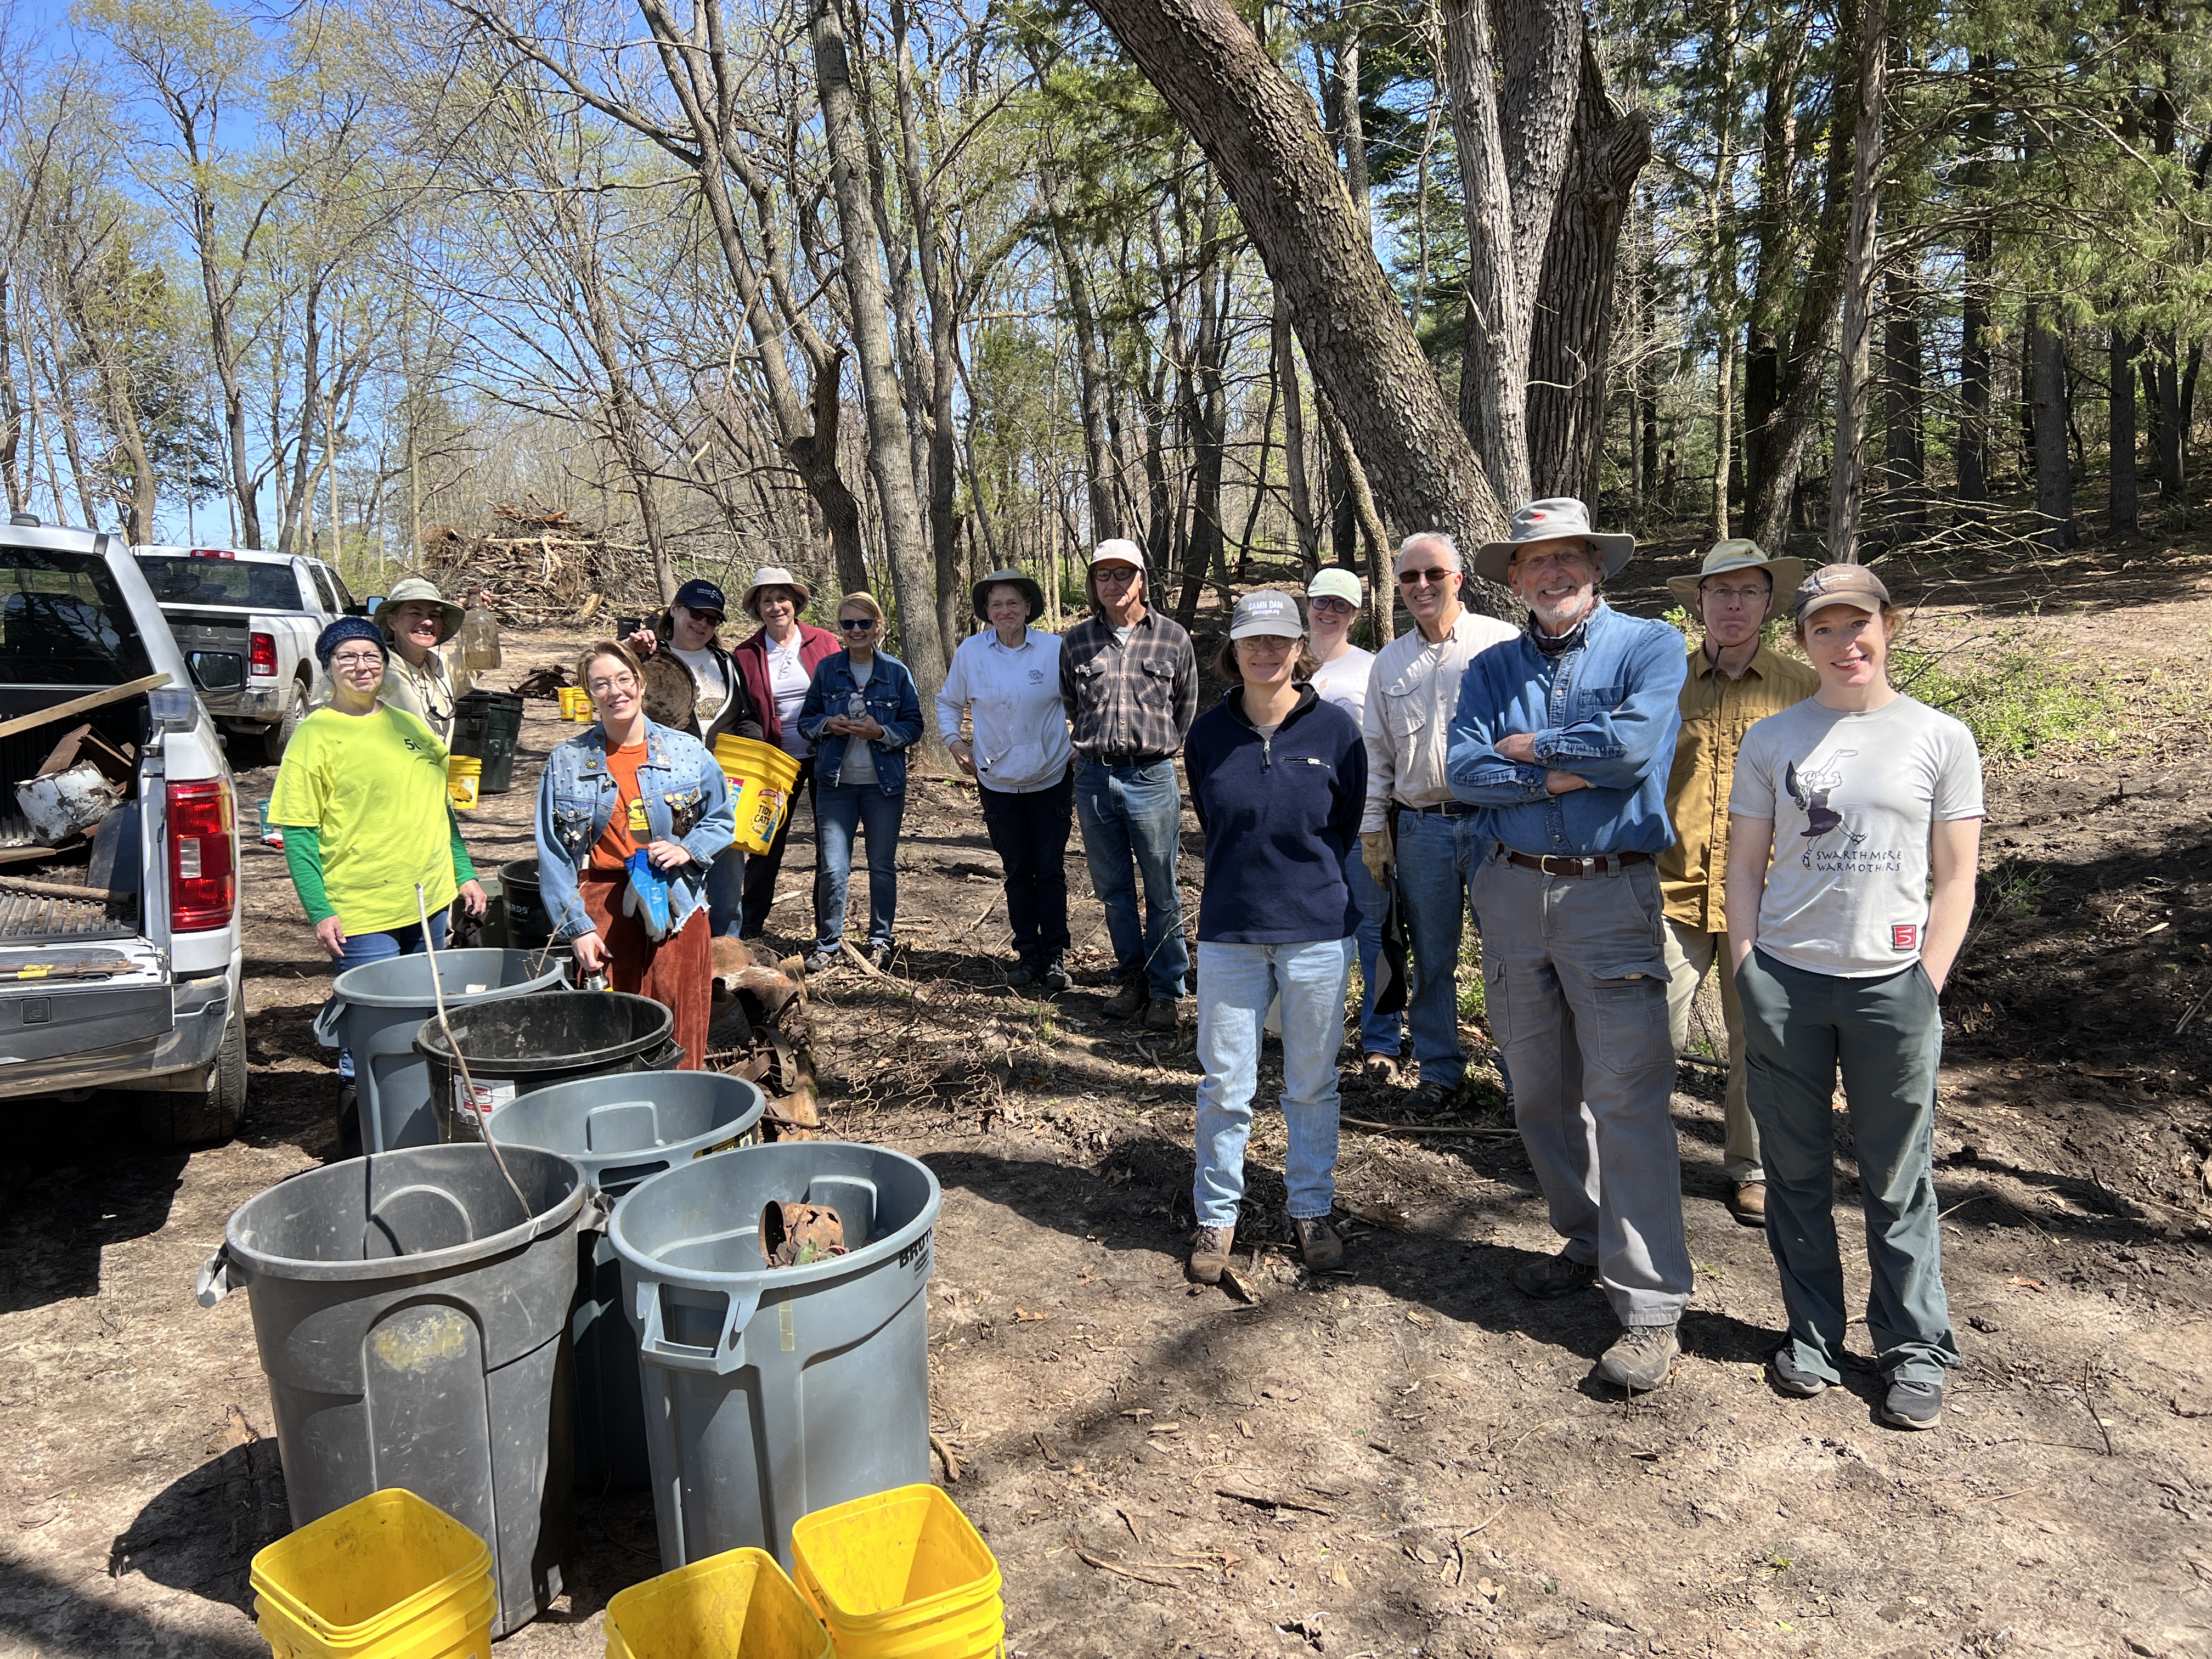
With the big stuff gone, we then had 15 volunteers come out and start picking up the little stuff. In two hours we filled up 30 large trash barrels of litter. Not the yellow 5 gallon buckets, but those big green barrels.
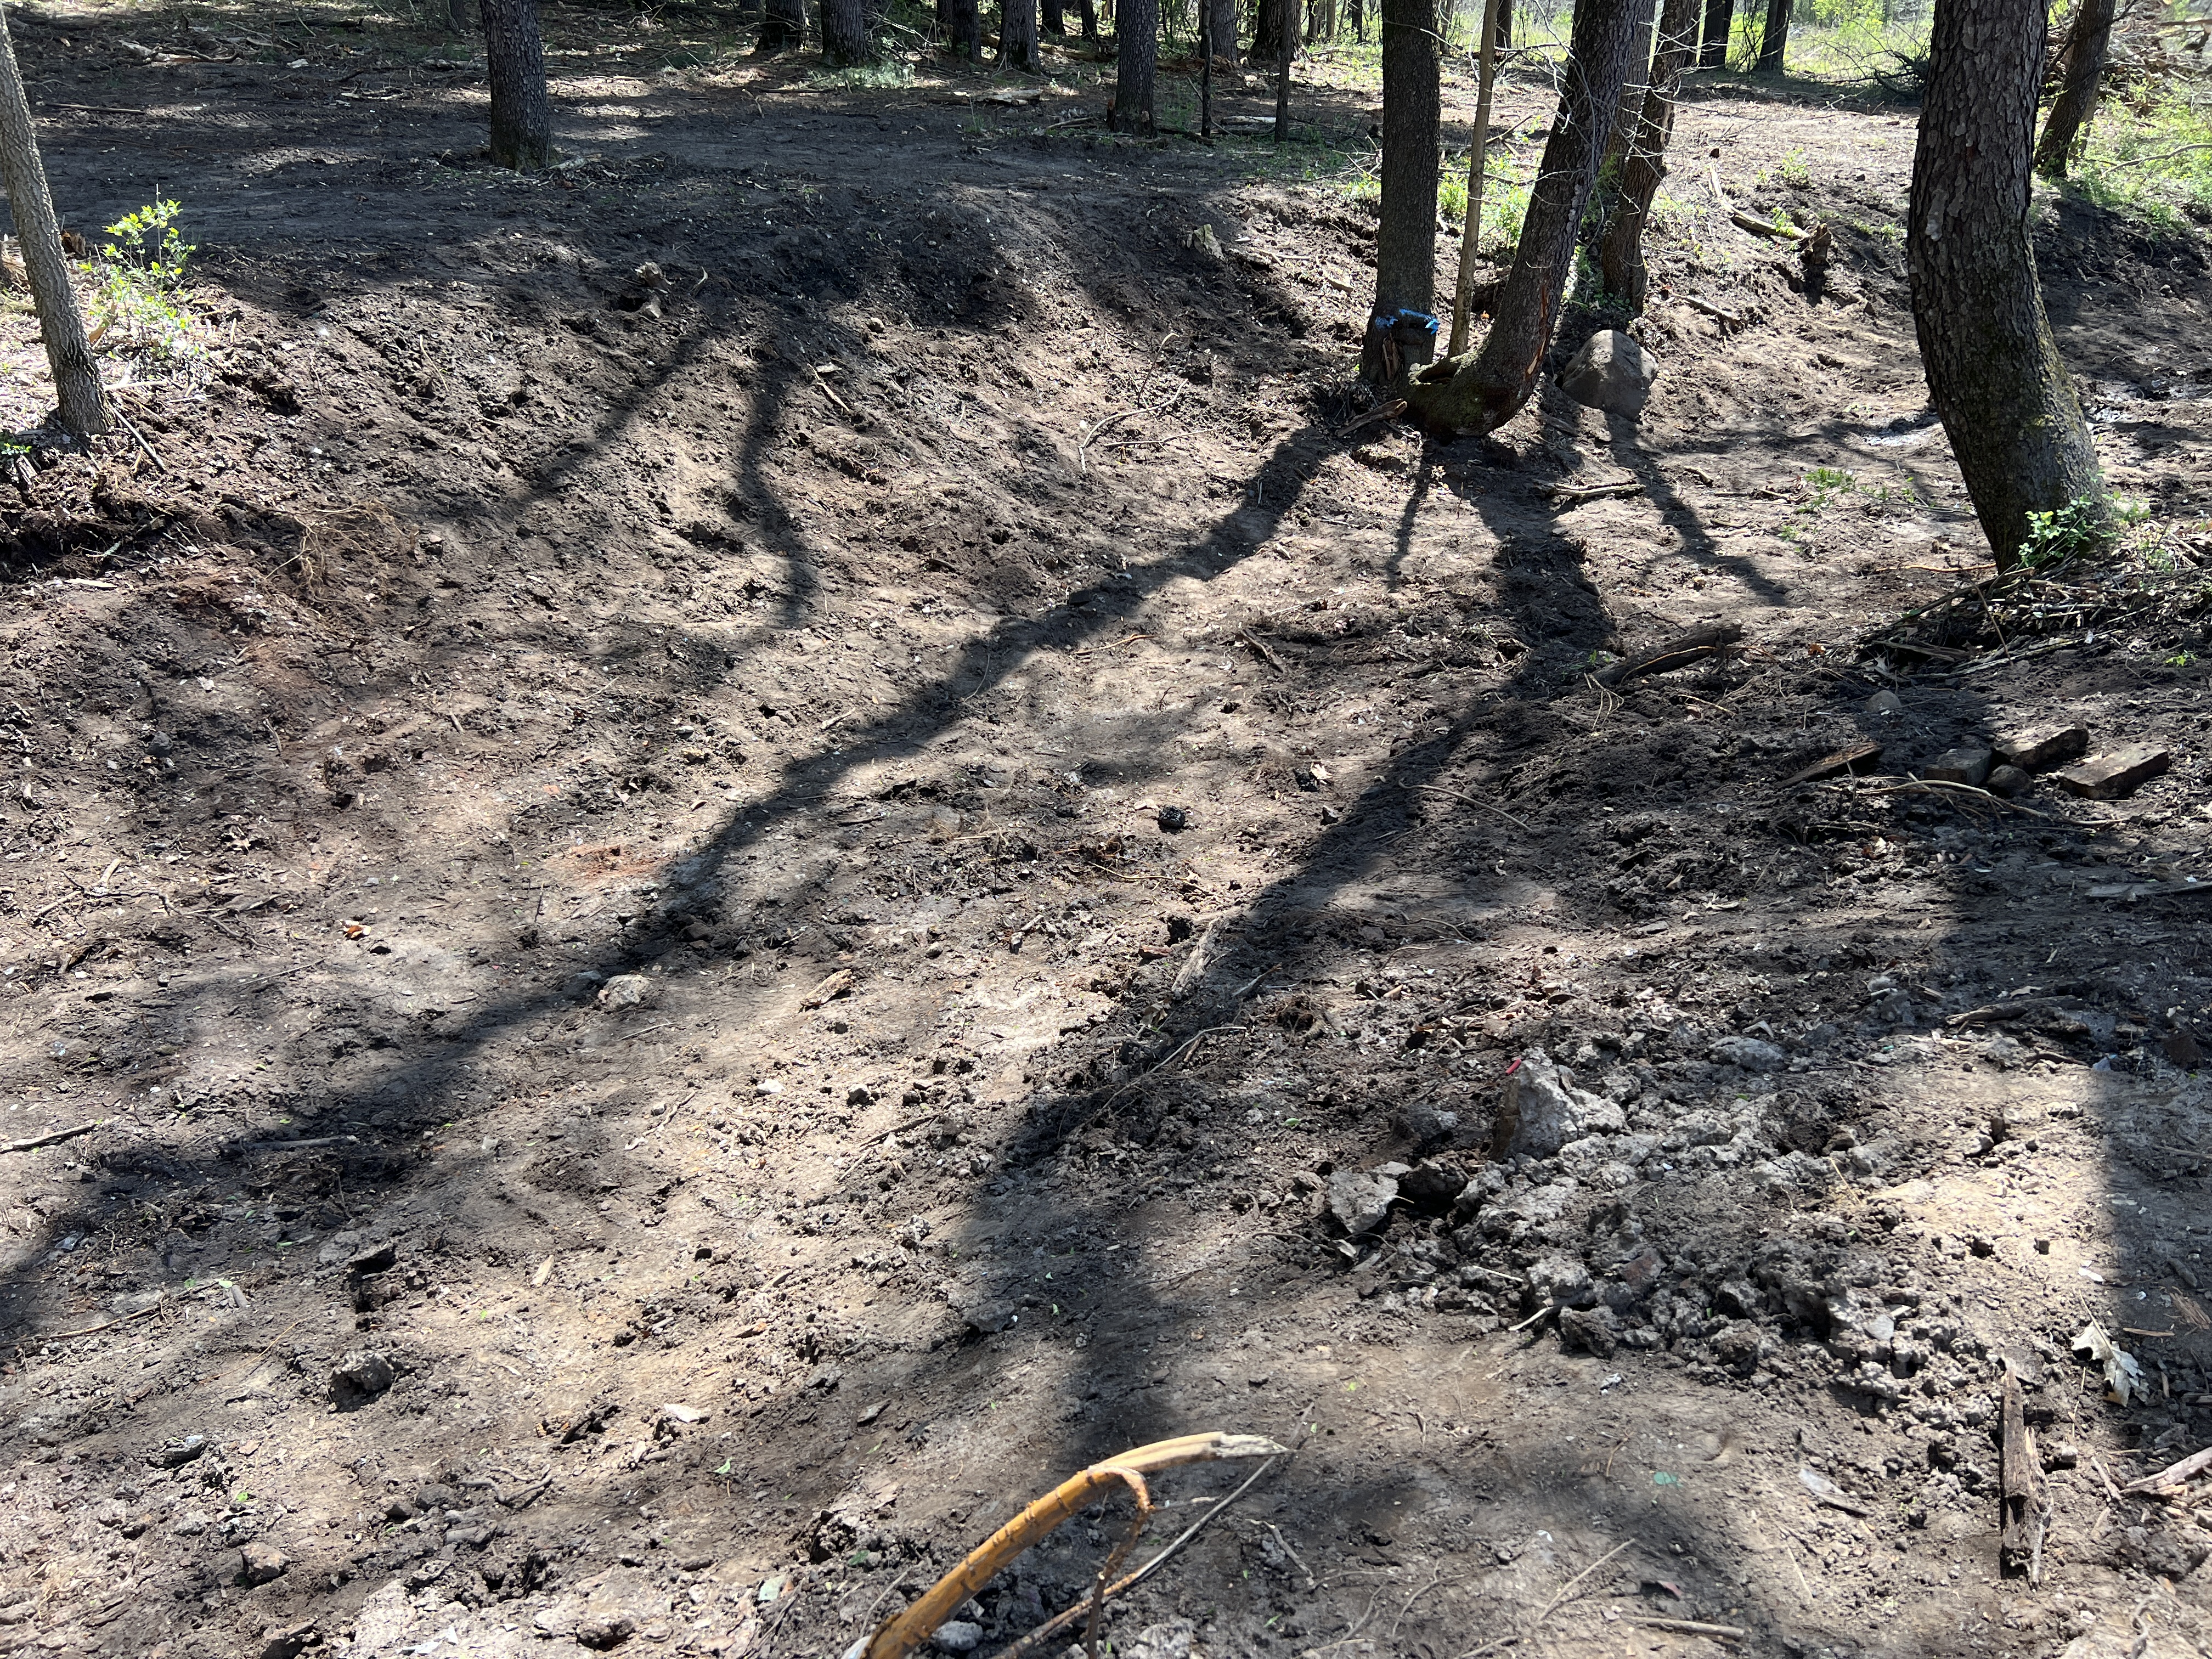
The ditch is now rather clean.
Birdsfoot trefoil is an invasive weed, also used as a pasture plant. Invasive weeds are a biological pollution. Their pollution stays a long time. Annually we search for the occurrences and treat the ones that emerged from the seed bank. For decades we track and treat this pollution. We keep after the weeds, we are happy weed warriors most of the time; but it is satisfying to just pick up some litter.
Burning hubris: It is as if fire gathers our small errors, our shortcuts, our complacencies; and gives us trouble for our hubris. Did we fill all the gas tanks on all our pumps? Did we check the water filters on the piston pumps this morning? Are the fire breaks well prepared? Is the layout of the burn unit too complicated?
Redundancy: We have multiple UTVs so any one UTV can go down. We have a support truck with various tools and a big tank of water to refill. We have a fire scout whose job is to help us watch the back lines. We build in redundancy to increase safety and get more fire on the ground.
We need more than fire: Degraded habitats that we burn, often need seed and brush management.
Holland Prairie burn March 12. 165-acres
The bottom line:
Number of burn days was 20, which is a limiting factor.
We burned 2,225-acres of Nachusa on 22 burn units
We assisted on 596-acres on 6 units.
Average size of a burn unit was 101-acres with a unit as small as 4-acres and big as 300.
Average crew size was 12.
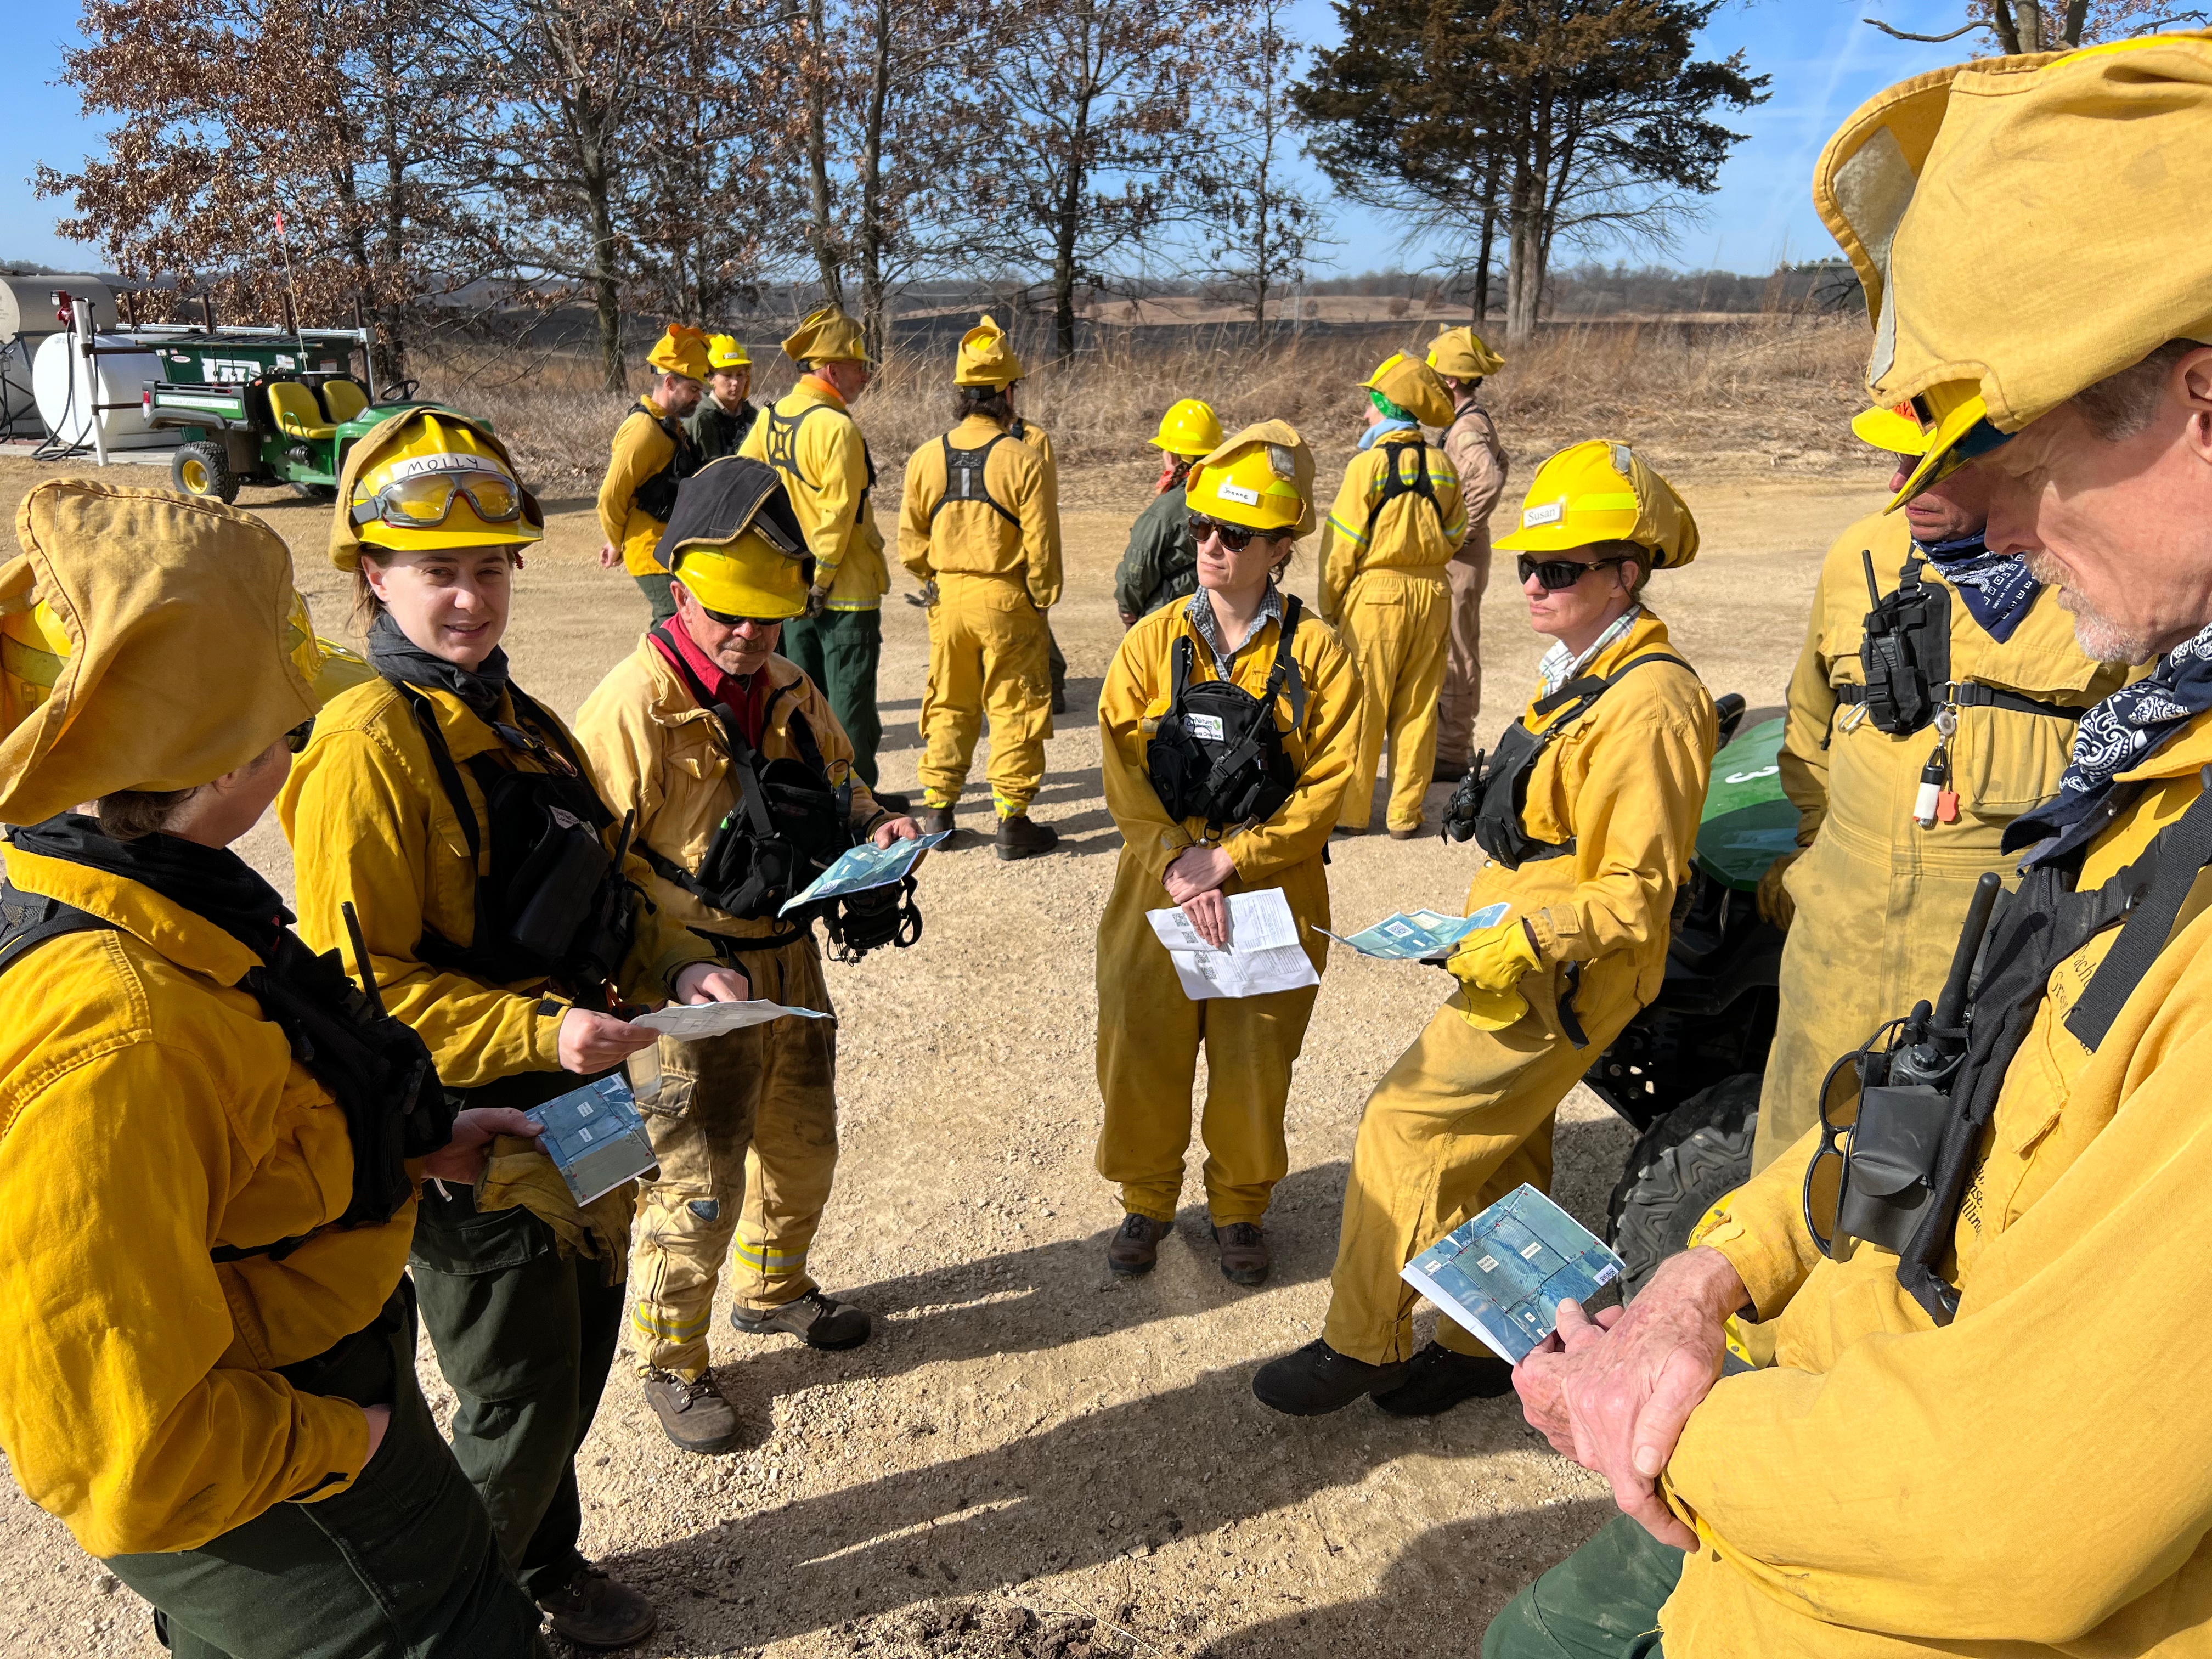
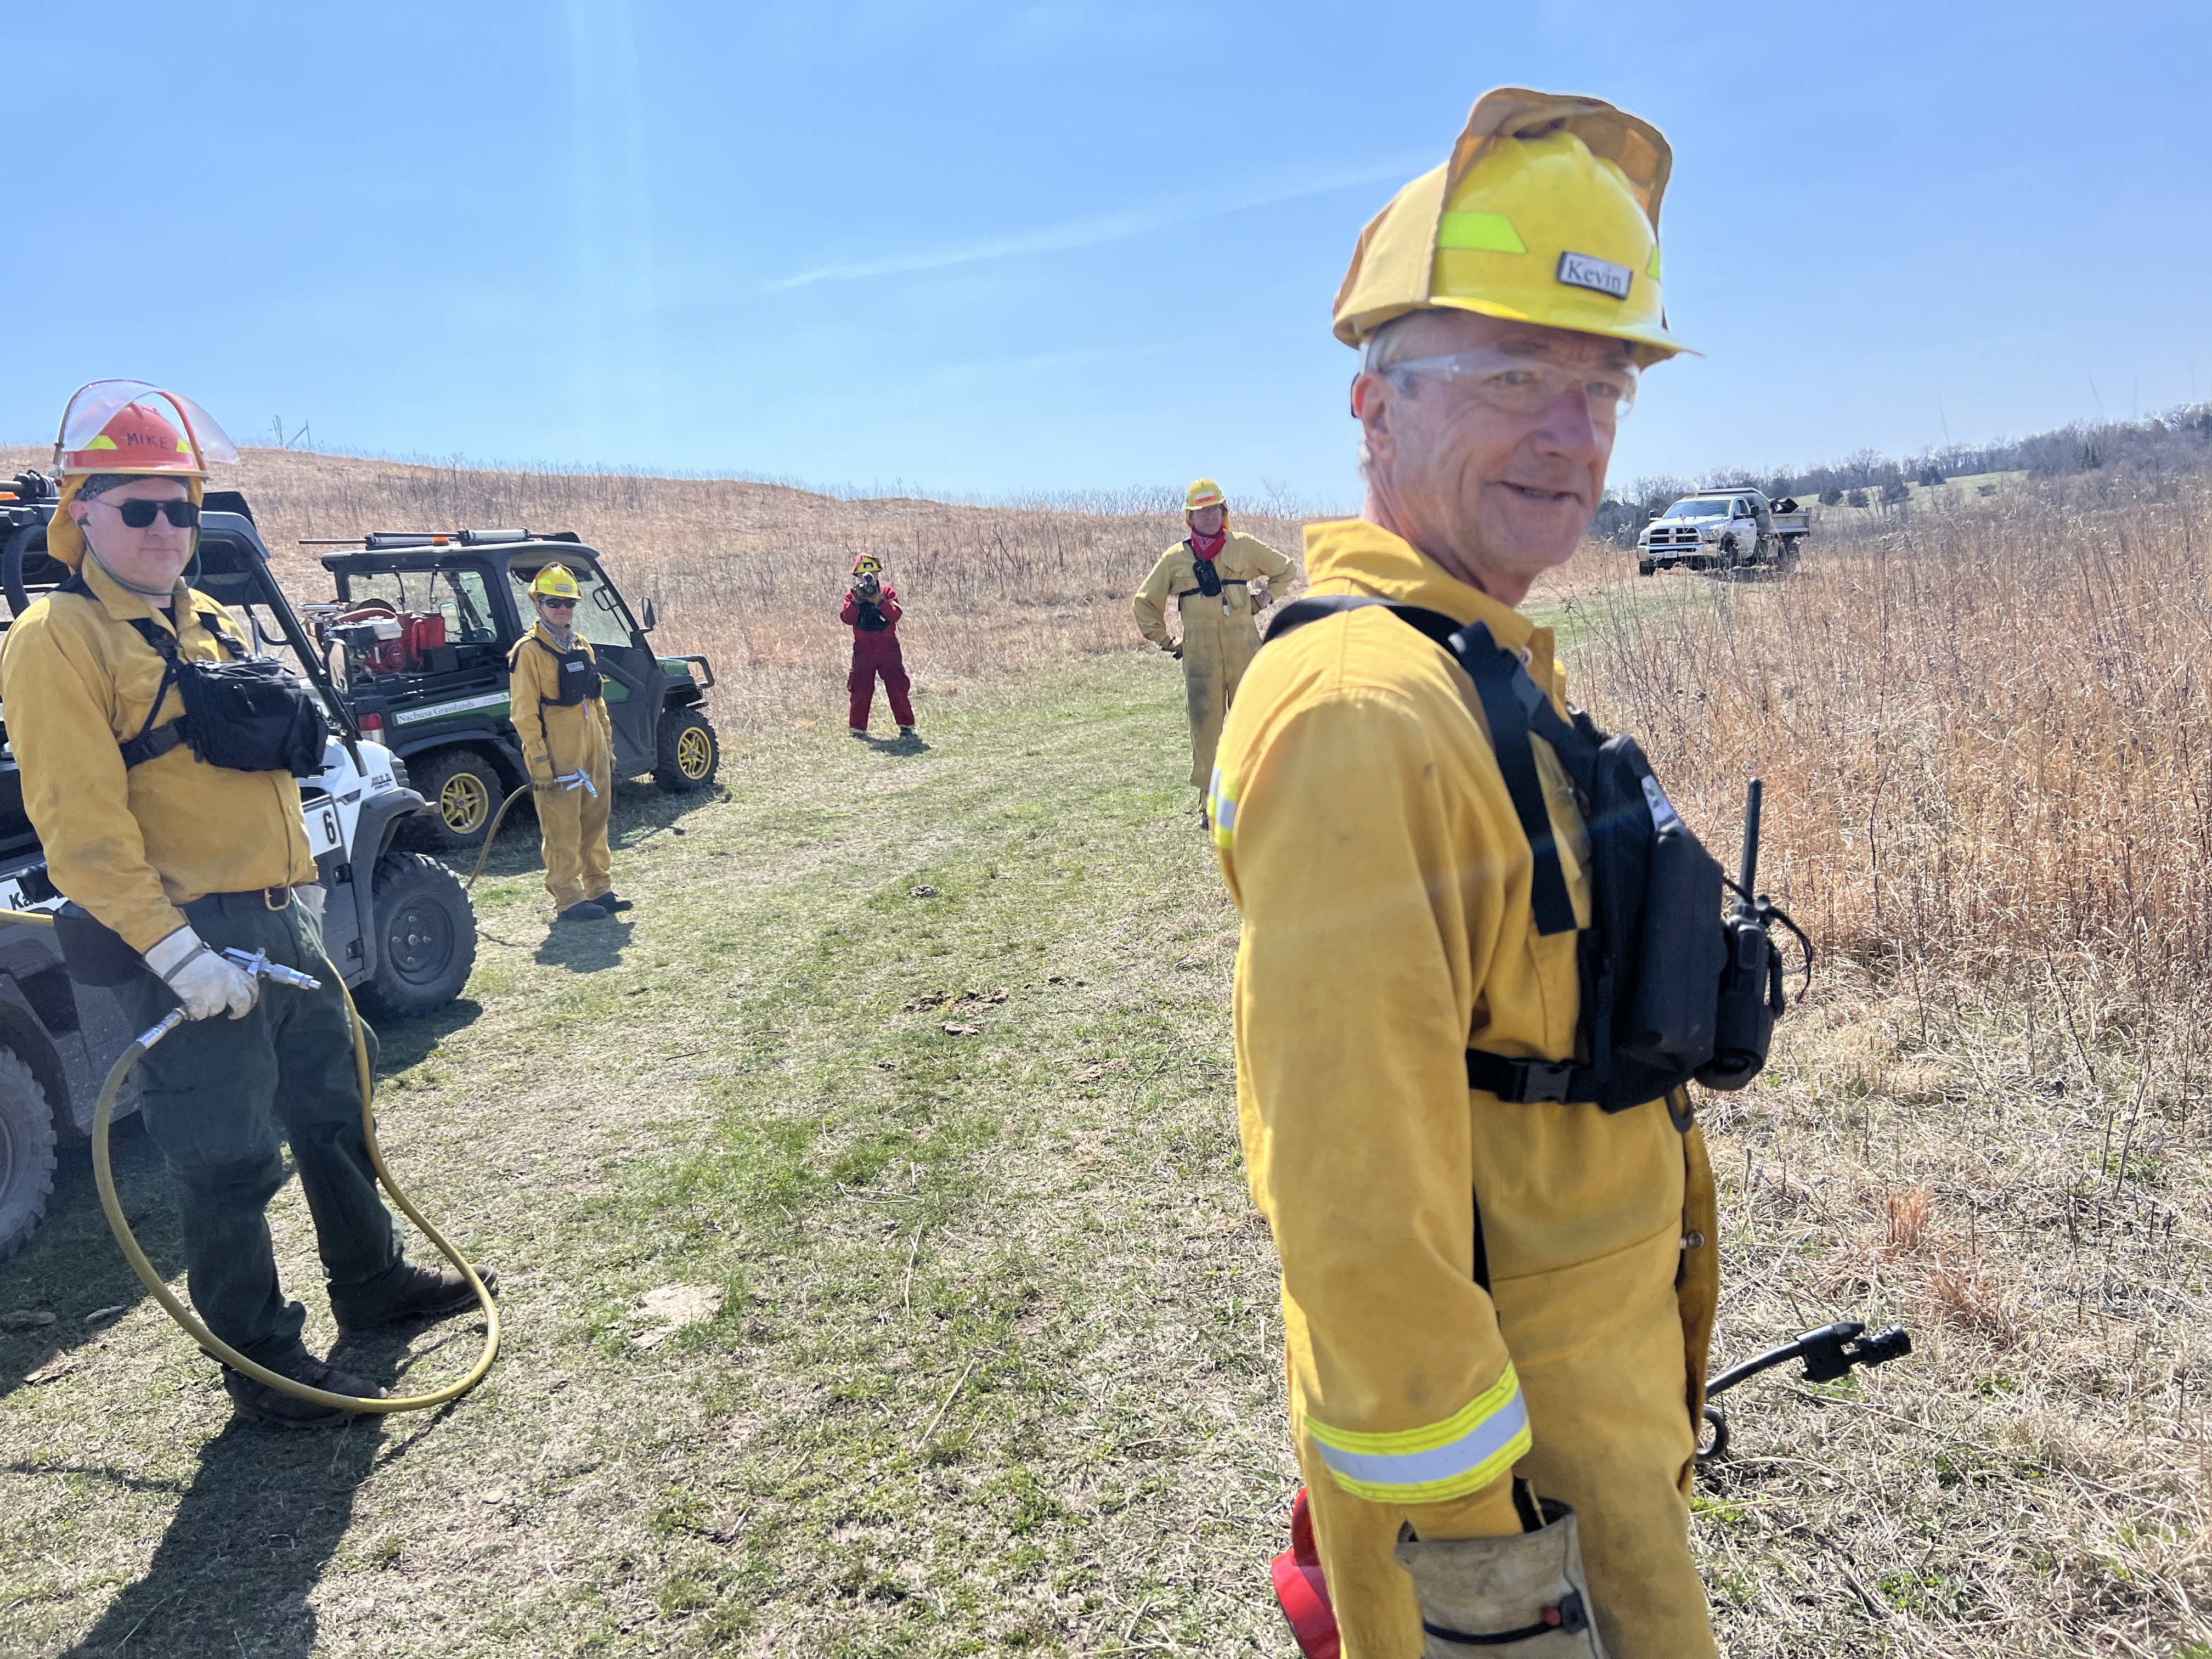
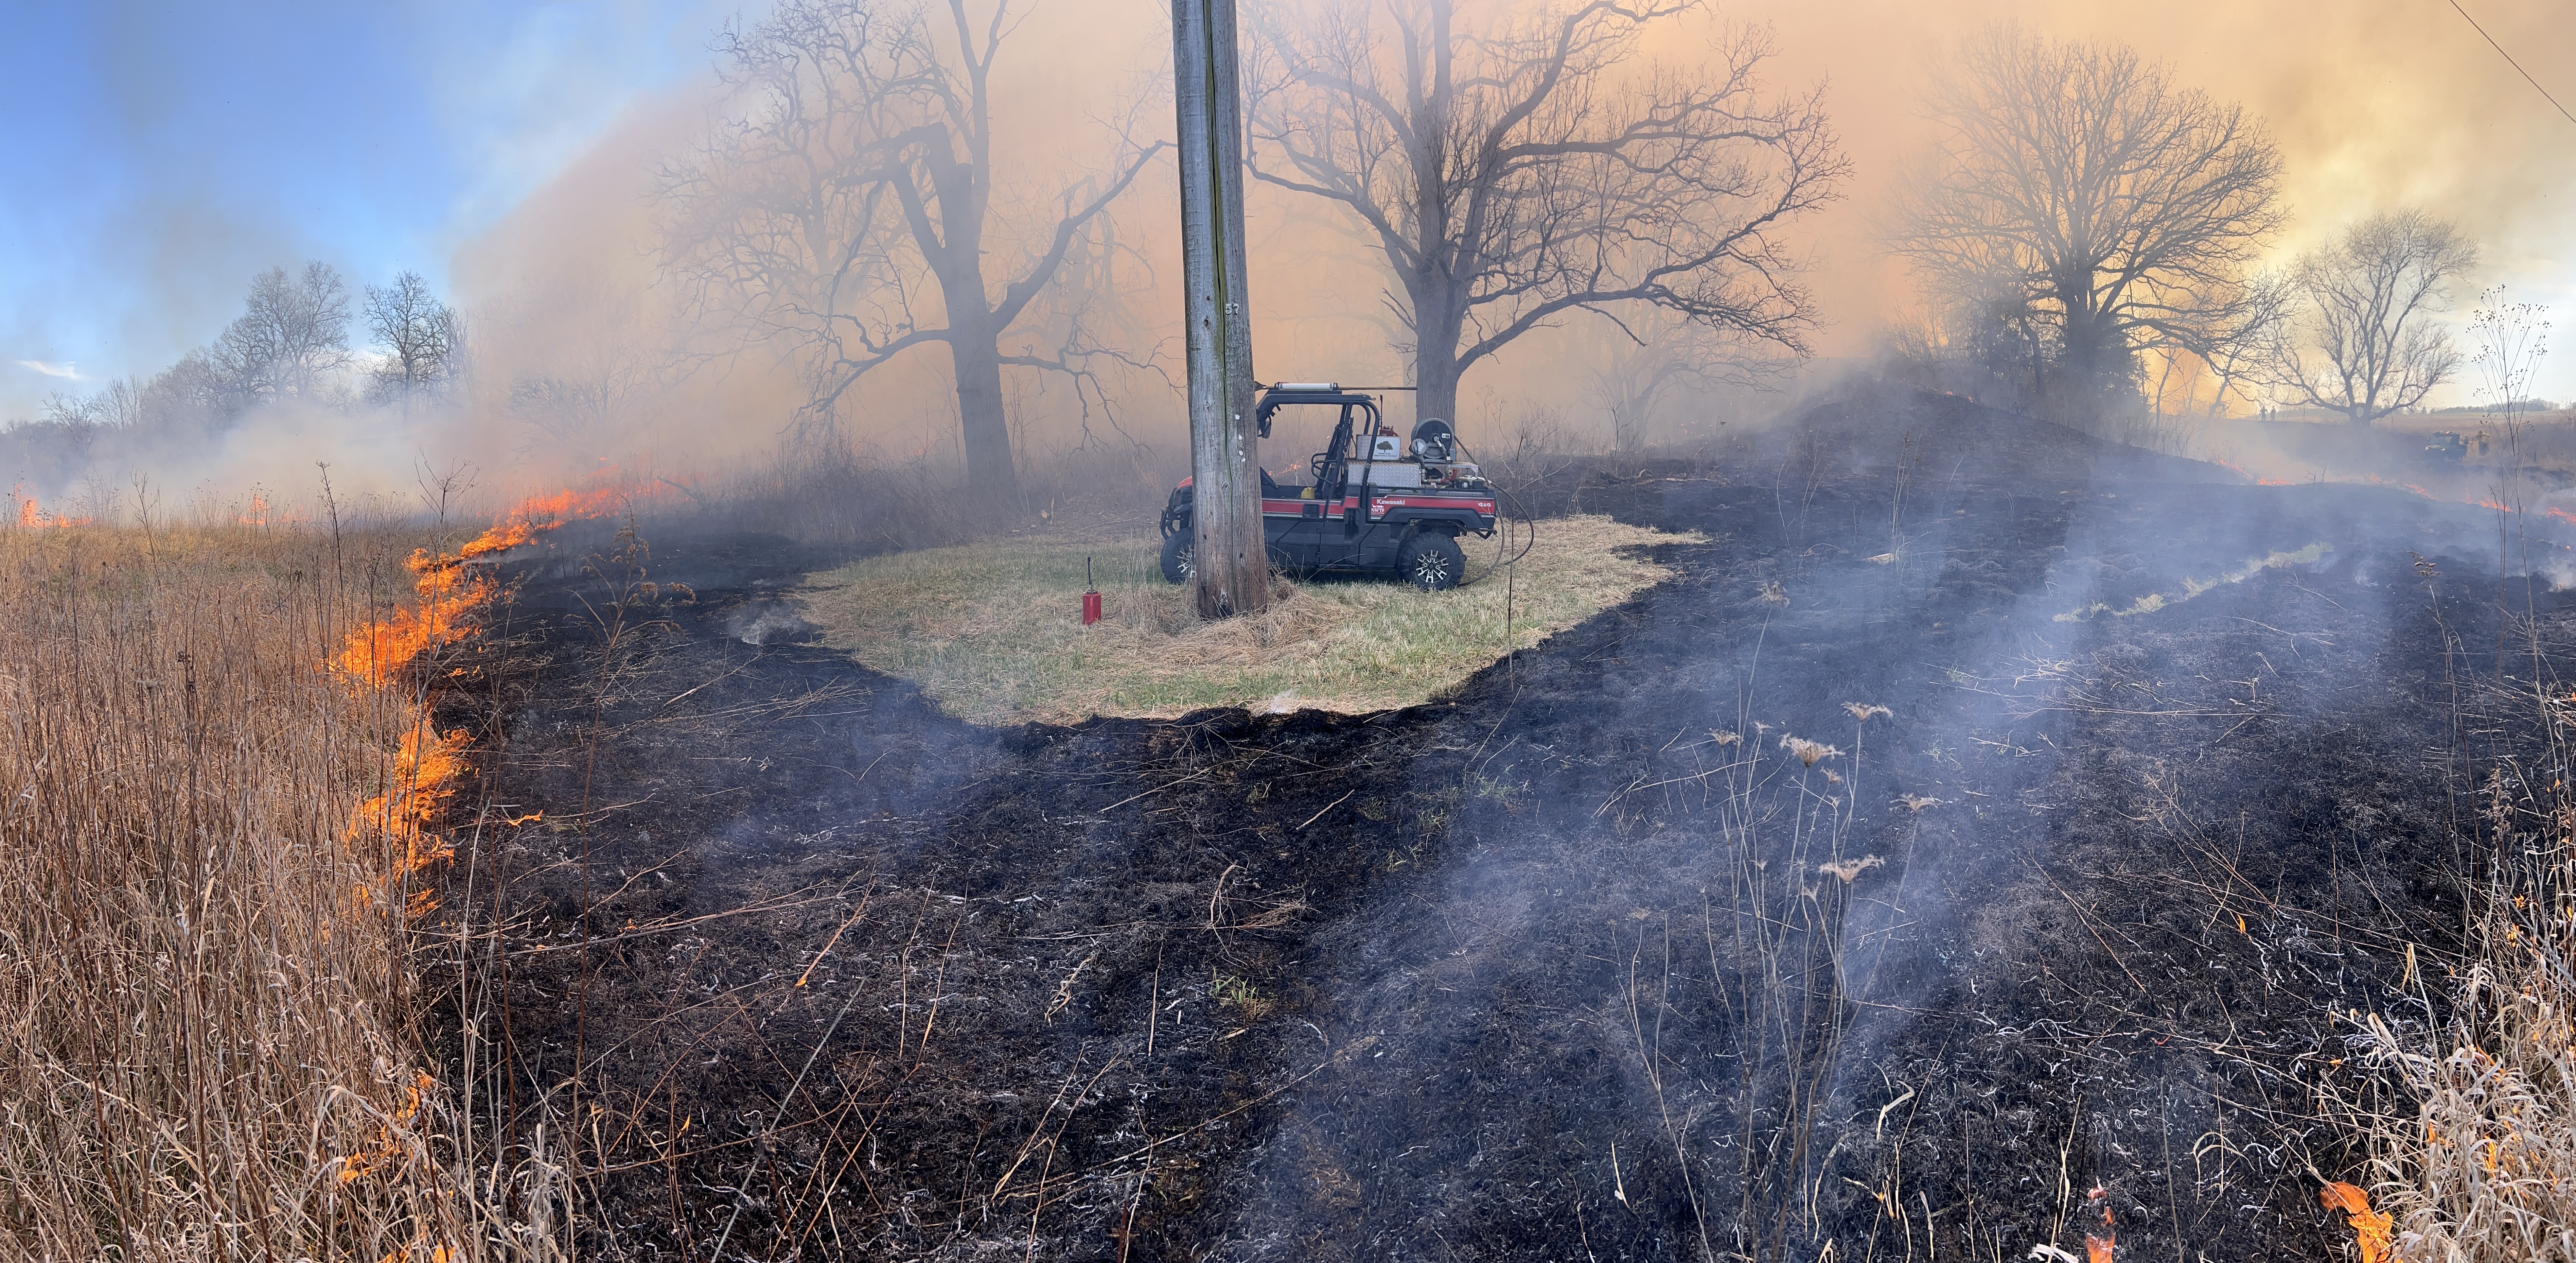
The Soderholm/Vassallo fire on March 13. Paul Soderholm delivers us an order of Esmeralda’s tacos. We burn for tacosAfter the burn boss gives the general briefing, each Line Boss meets with their crew to discuss logistics.Kevin has been a volunteer burn crew member, and land steward, at Nachusa for about 35 years. He knows prescribed fire.Community: A burger and fries at the end of a long day is more than a meal.Nachusa’s Tyler Pellegrini is our new Restoration Ecologist at Nachusa. Here with DNR’s Russ Blogg who was our burn boss on two days of fire at Franklin Creek Natural Area.This March it appears an arson started a wildfire at Green River Conservation Area, which is 25 minutes south of Nachusa. Bill and Molly responded to a request for help from DNR’s Russ Blogg. The winds were strong and dry, but we worked safely from interior lanes for several hours. This untouched photo is as the sun set and the glow of the fire dominated the lens.For dual wood power posts we often do something as above. We park between the posts and soak a circle of the grass. Then use a drip torch to slowly ignite a circle of fire, letting the fire move away from the circle.
I have been walking around units we have burned this year to see how effective the fires were. I assume you all do the same. Some areas blacken, the exotic shrubs will be set back, the floristic quality will improve a bit. And then you walk through some of our natural areas that are in very poor condition. Yesterday, I ran a brush mulcher through one such site and opened it up so easily, but there are so many such sights. Let us be bolstered by Aldo Leopold’s summary, “That the situation is hopeless should not prevent us from doing our best.”
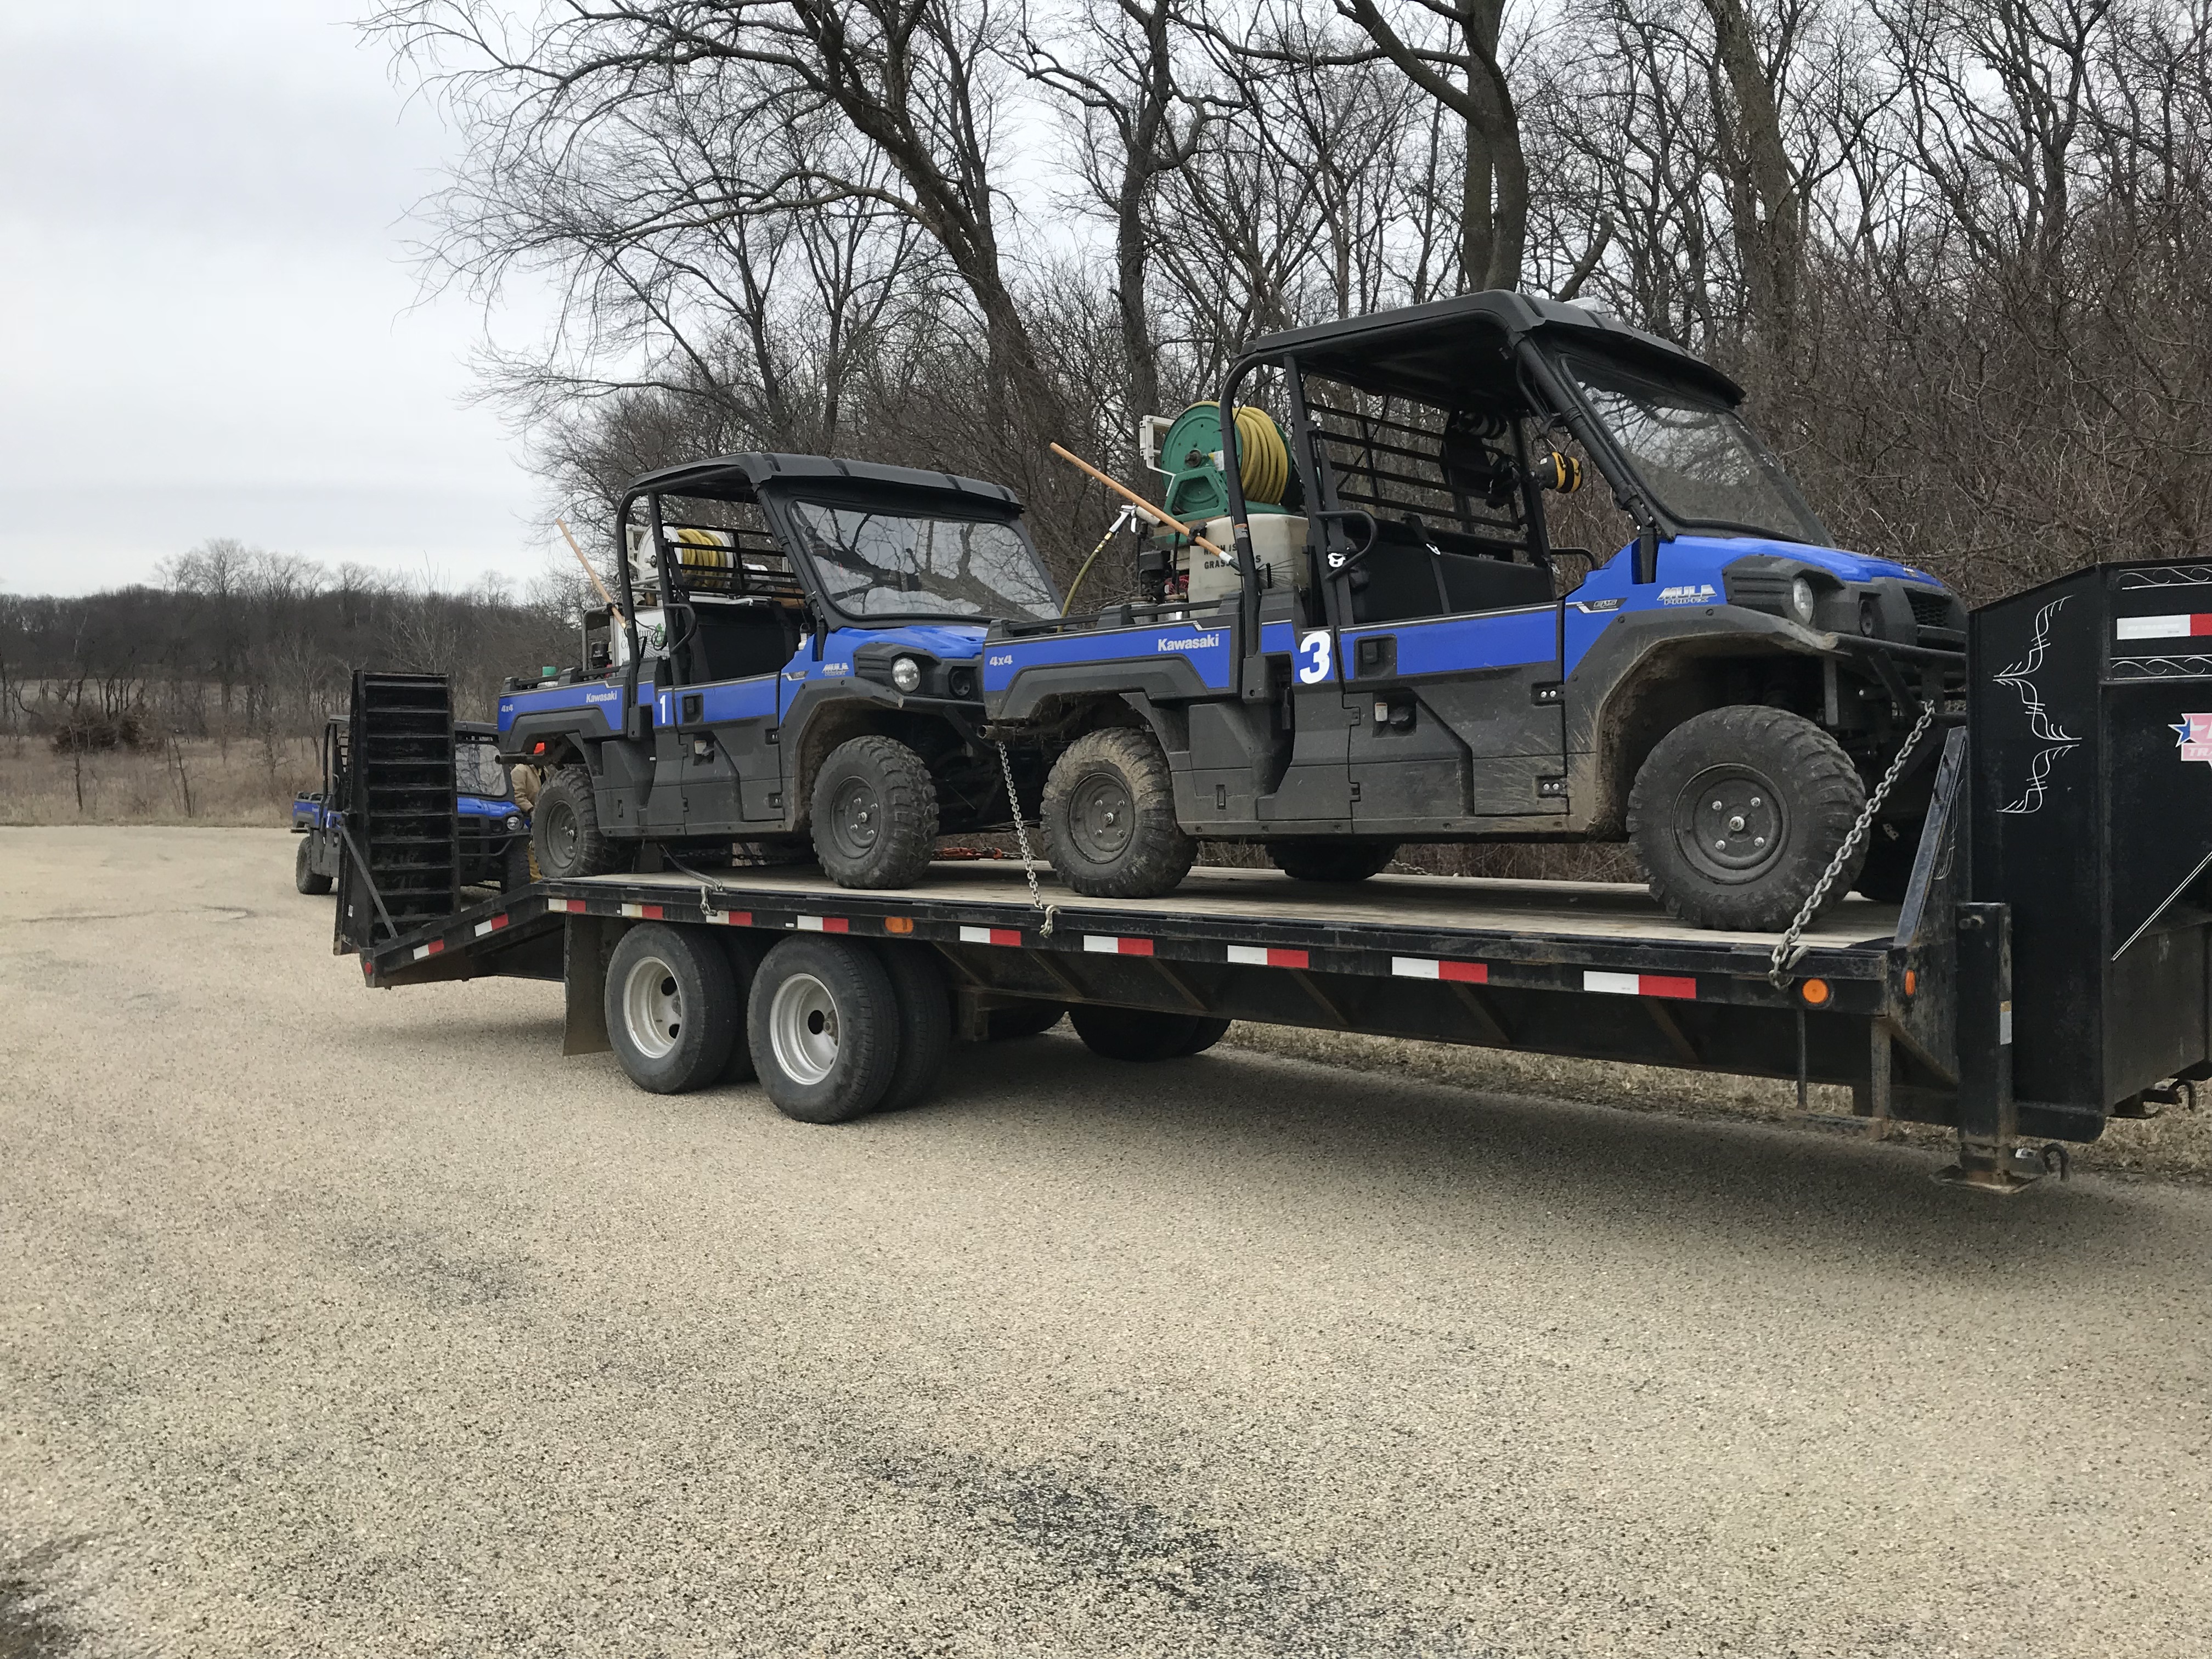
My daughter was telling me about how they need a Commercial Drivers License, CDL, to haul two UTVs on one trailer to their prescribed fires. I told her that there may be a way to not need a CDL, but they are likely using CDL sized trailers. This sent me down a rabbit hole of research and I thought I would write a post to summarize what I re-learned. This is a good post for those who tow things.
Why not get a Commercial Drivers License? Most people don’t want to be bothered with the book testing, driver test, and cost involved. If you have a CDL setup you limit who can drive, which can be a logistical bottleneck. If you are towing just UTVs to fires you can likely trailer one UTV at a time with a non CDL setup.
Yes, the trailer above is CDL because the manufacturer rates it with a big Gross Vehicle Weight Rating, GVWR. Even without seeing the sticker on the trailer that states its GVWR a police officer observes it has two axles and eight tires. This means it is rated for heavy loads. But you don’t go by whether it has dual tires or not, but look at the sticker on the trailer.
This trailer above you don’t need a CDL. So what is the difference?
The Gross Vehicle Weight Rating (GVWR) refers to the maximum weight while loaded at which a vehicle or trailer can safely operate, as determined by the manufacturer. When you add the truck GVWR and trailer GVWR together, if that weight is over 26,000 pounds then you need a Commercial Drivers License to operate it. If caught with a CDL setup on a standard drivers license you can get ticketed, and your trailer idled until a CDL driver shows up to drive it away.
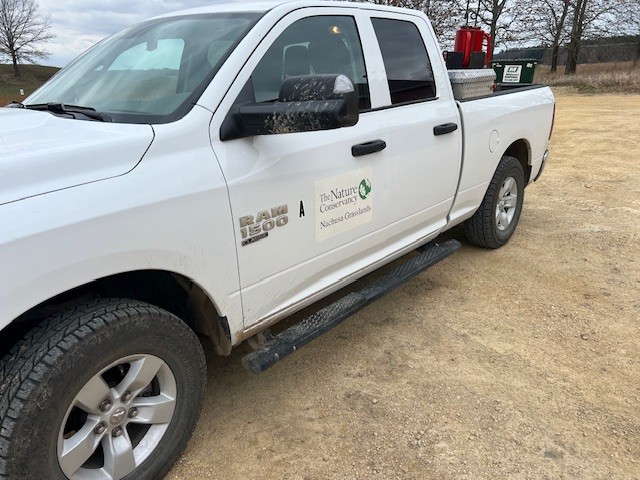
Above, this half ton 1500 Ram has a GVWR of 6,800 pounds, noted from a sticker inside the door. But this truck can only pull a total of 10,660 pounds reads the manual in the glove box. That 10,660 pounds includes the trailer weight empty and its payload. It can easily pull one UTV with a pump loaded with water. I will get back to this point later.
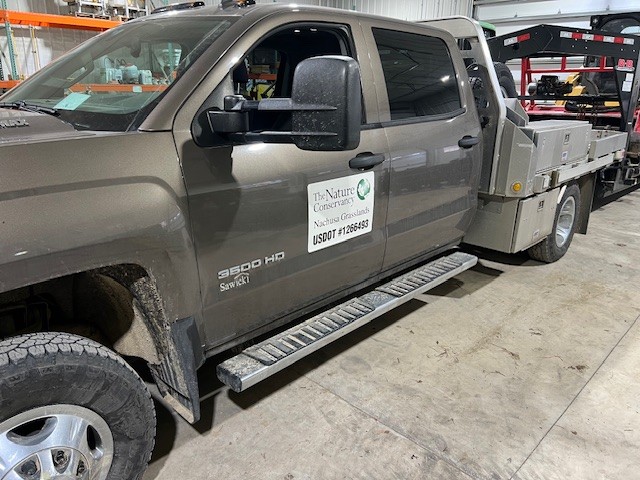
This much bigger 3500 truck with diesel motor, heavy duty towing package and heavy duty transmission, and dual rear wheels has the same GVWR of 6,800 pounds as the little 1500 Ram. But the owners manual states this truck can tow about twice as much weight at 22,600 pounds.
So if we are trying to stay under 26,000 pounds of GVWR: Notice the gooseneck trailer behind this brown truck above. That trailer has a GVWR of 20,000 pounds, the truck has a GVWR of 6,800 pounds So added together we are at 26,800 pounds. This is just into the weight of a CDL setup, which starts at 26,000 pounds GVWR.
That USDOT sticker on the door suggests this is likely a CDL setup. You can be driving this truck and trailer down the road with an empty trailer and you are still supposed to have a CDL. The CDL 26,000 pound limit is based on the GVWR, rather than what you have on the trailer. Now, I doubt you will have trouble from the police pulling an empty trailer or with something light weight like a UTV.
This trailer above we saw previously has a GVWR of 10,000 pounds. So you add that to the 6,800 pounds GVWR of either of the two trucks above and you are at 16,800 pounds. This is well under 26,000 so you don’t need a CDL. Remember the manufacturers decide the approximate GVWR of a truck and trailer.
This trailer comes in lengths up to 24 feet long which would fit two UTVs in length, and their weight of 1,500 pounds each, or 3,000 pounds for two, would not exceed the trailer’s 10,000 pound limit. Our 1500 Ram can pull 10,600 pounds. The two UTVs would weigh 3,000 and the trailer a few thousand pounds so the truck can pull them. You would still appreciate a bigger truck but the half ton can do it, but don’t push it. A half ton truck can pull one UTV easy. Two UTVs is asking for trouble.
Ok, so I covered the CDL and its relationship to the 26,000 pound limit for GVWR.
But there is more to this.
Don’t put a skid loader on a light weight trailer as in this example:
So you go to the dealer and buy a 10,000 pound GVWR trailer, hook it up to your 6,800 GVWR truck and then load it with your 12,000 pound skid loader. Is this legal? No, nor safe! A 10,000 GVWR is the trailer actual weight empty plus the load you put on it adding up to 10,000 pounds. Let’s say the trailer empty weighs 2,000 pounds so you have only 8,000 pounds you can haul on this 10,000 GVWR trailer. So your 12,000 pound skid loader is 4,000 pounds too heavy for this trailer. This is not safe or legal. Your trailer weight and cargo can not exceed the GVWR of the trailer.
Let’s say you have a CDL. So you think you are clever so you hook up your 1500 Ram to a heavy duty trailer with a 20,000 GVWR. Is this legal?. You are pulling a heavy duty trailer that is heavy empty and then you have two UTVs with water. And you only have a half ton, 1500 Ram. The manual in the glovebox says your 1500 can only pull 10,600 pounds. One UTV weights 1,500 pounds with pump loaded with water, so two UTVs weigh 3,000. The empty trailer may weigh 5,000 pounds. (I notice the trailer manufacturers do not give the empty weight of their trailers, so you can guess or go to a weigh station.). So 5,000 plus 3,000 is 8,000 pounds. So your half ton truck can pull this load. You are legal.. I would not pull two UTVs with a half-ton truck.
Now here is a nice trailer for a 1500 truck. The trailer is mostly light weight aluminum, aluminum deck, two axles, with trailer brakes, and a ramp. The GVWR is 7,000 pounds. The trailer weighs perhaps 1,500 pounds (the trailer sticker does not state the empty weight) so it can carry a load of 5,500 pounds (7,000 minus 1,500 pounds). The UTV with its pumper tank full of water weighs about 1,500 pounds, so you are way under the load limit of the trailer. (In fact a single axle trailer could carry this light load.) And as we saw above this 1500 Ram can pull a maximum of 10,600 pounds so you are also good on the total weight your truck can pull.
So a half ton truck can easily pull one UTV pumper unit.
Trailer axle capacities: This little trailer below is a nice setup because it is easy to tow. It is short at twenty feet long, and easy to load and unload and strap down. It is easy to store when you are not using it because it is not a long trailer. It is easier to drive in traffic.
This trailer has two 7,000 pound axles. Is this heavy duty enough for a 14,000 pound skid loader with mulcher head? Nope. If you have two 7,000 pound axles you add them to get 14,000 pounds and subtract about 5,000 pounds for the weight of the empty trailer. So this trailer’s axles can only carry an additional 9,000 pounds. The big skid loaders with no tool weight about 12,000 so the trailer axles of this trailer are taking way too much weight. We currently have retired this trailer from skid loader hauling. We will trade it in for a trailer that will have the heavy duty axles, perhaps two 12,000 pound axles, which is a 24,000 pound trailer. The trailer will otherwise be the same.
So this has been a long article. A few summary points.
Towing a single UTV on a proper size class of trailer can be done with a half ton truck.
Don’t let newbies tow anything without instructions.
Walk around the truck and trailer to look for mistakes. Check lights, trailer brakes, safety chains, and tire pressures.
Towing Skid Loaders typically requires a CDL and CDL sized equipment. Don’t let novices tow such heavy equipment.
Skid loaders have become bigger and heavier with more horsepower to run brush mowers and such. A skid loader with a brush mower attachment might weigh 12,000 to 15,000 pounds! Your trailer needs to be rated to hold this weight. Your truck needs to be rated to pull this weight plus the weight of the trailer.
Towing is challenging. Read your manual. Poke around for good tutorials on the internet. Leave me comments to improve this post.
Mike Saxton – Manager of Ecological Restoration and Land Stewardship – Shaw Nature Reserve – Gray Summit, MO
Over the course of ecological time, large portions of the Midwest have been a shifting mosaic of prairie, savanna and open woodlands. 500 wet years might have meant less fire on the landscape, which allowed trees to establish in new places and in greater abundance. 500 dry years might have pushed the gradient in the other direction with more intensive fire limiting the establishment and persistence of trees in a prevailingly grass dominated ecotone.
In their seminal paper The Demise of Fire and “Mesophication” of Forests in the Eastern United States, Nowacki and Abrams described how the demise of fire has led to “a cascade of compositional and structural changes whereby open lands (grasslands, savannas, and woodlands) succeeded to closed-canopy forests, followed by the eventual replacement of fire-dependent plants by shade-tolerant, fire-sensitive vegetation.”
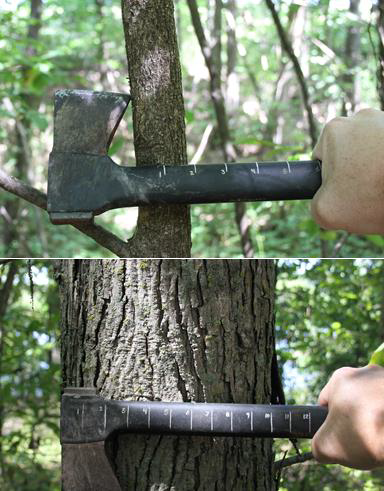
We can’t burn our way out of a century of tree establishment in our formerly open and sun-lit natural communities. This is where hack and squirt can be a fast and effective treatment. In areas where you have large diameter oaks and hickories, thousands of small maples, virtually no oak-recruitment, and a bare, sun-starved woodland floor, this can be a great approach.
We like to use the Fiskars hatchet with the fiberglass handle. The 2-liter Solo hand sprayer works well. The smaller squeeze bottle runs out of herbicide too soon. We do our treatments in the dormant season, usually starting in November and going until February. We use JLB basal oil and triclopyr ester (Garlon 4, Remedy, Element). Typically, we mix in bulk with 12.5G of oil mixed with 2.5G of herbicide.
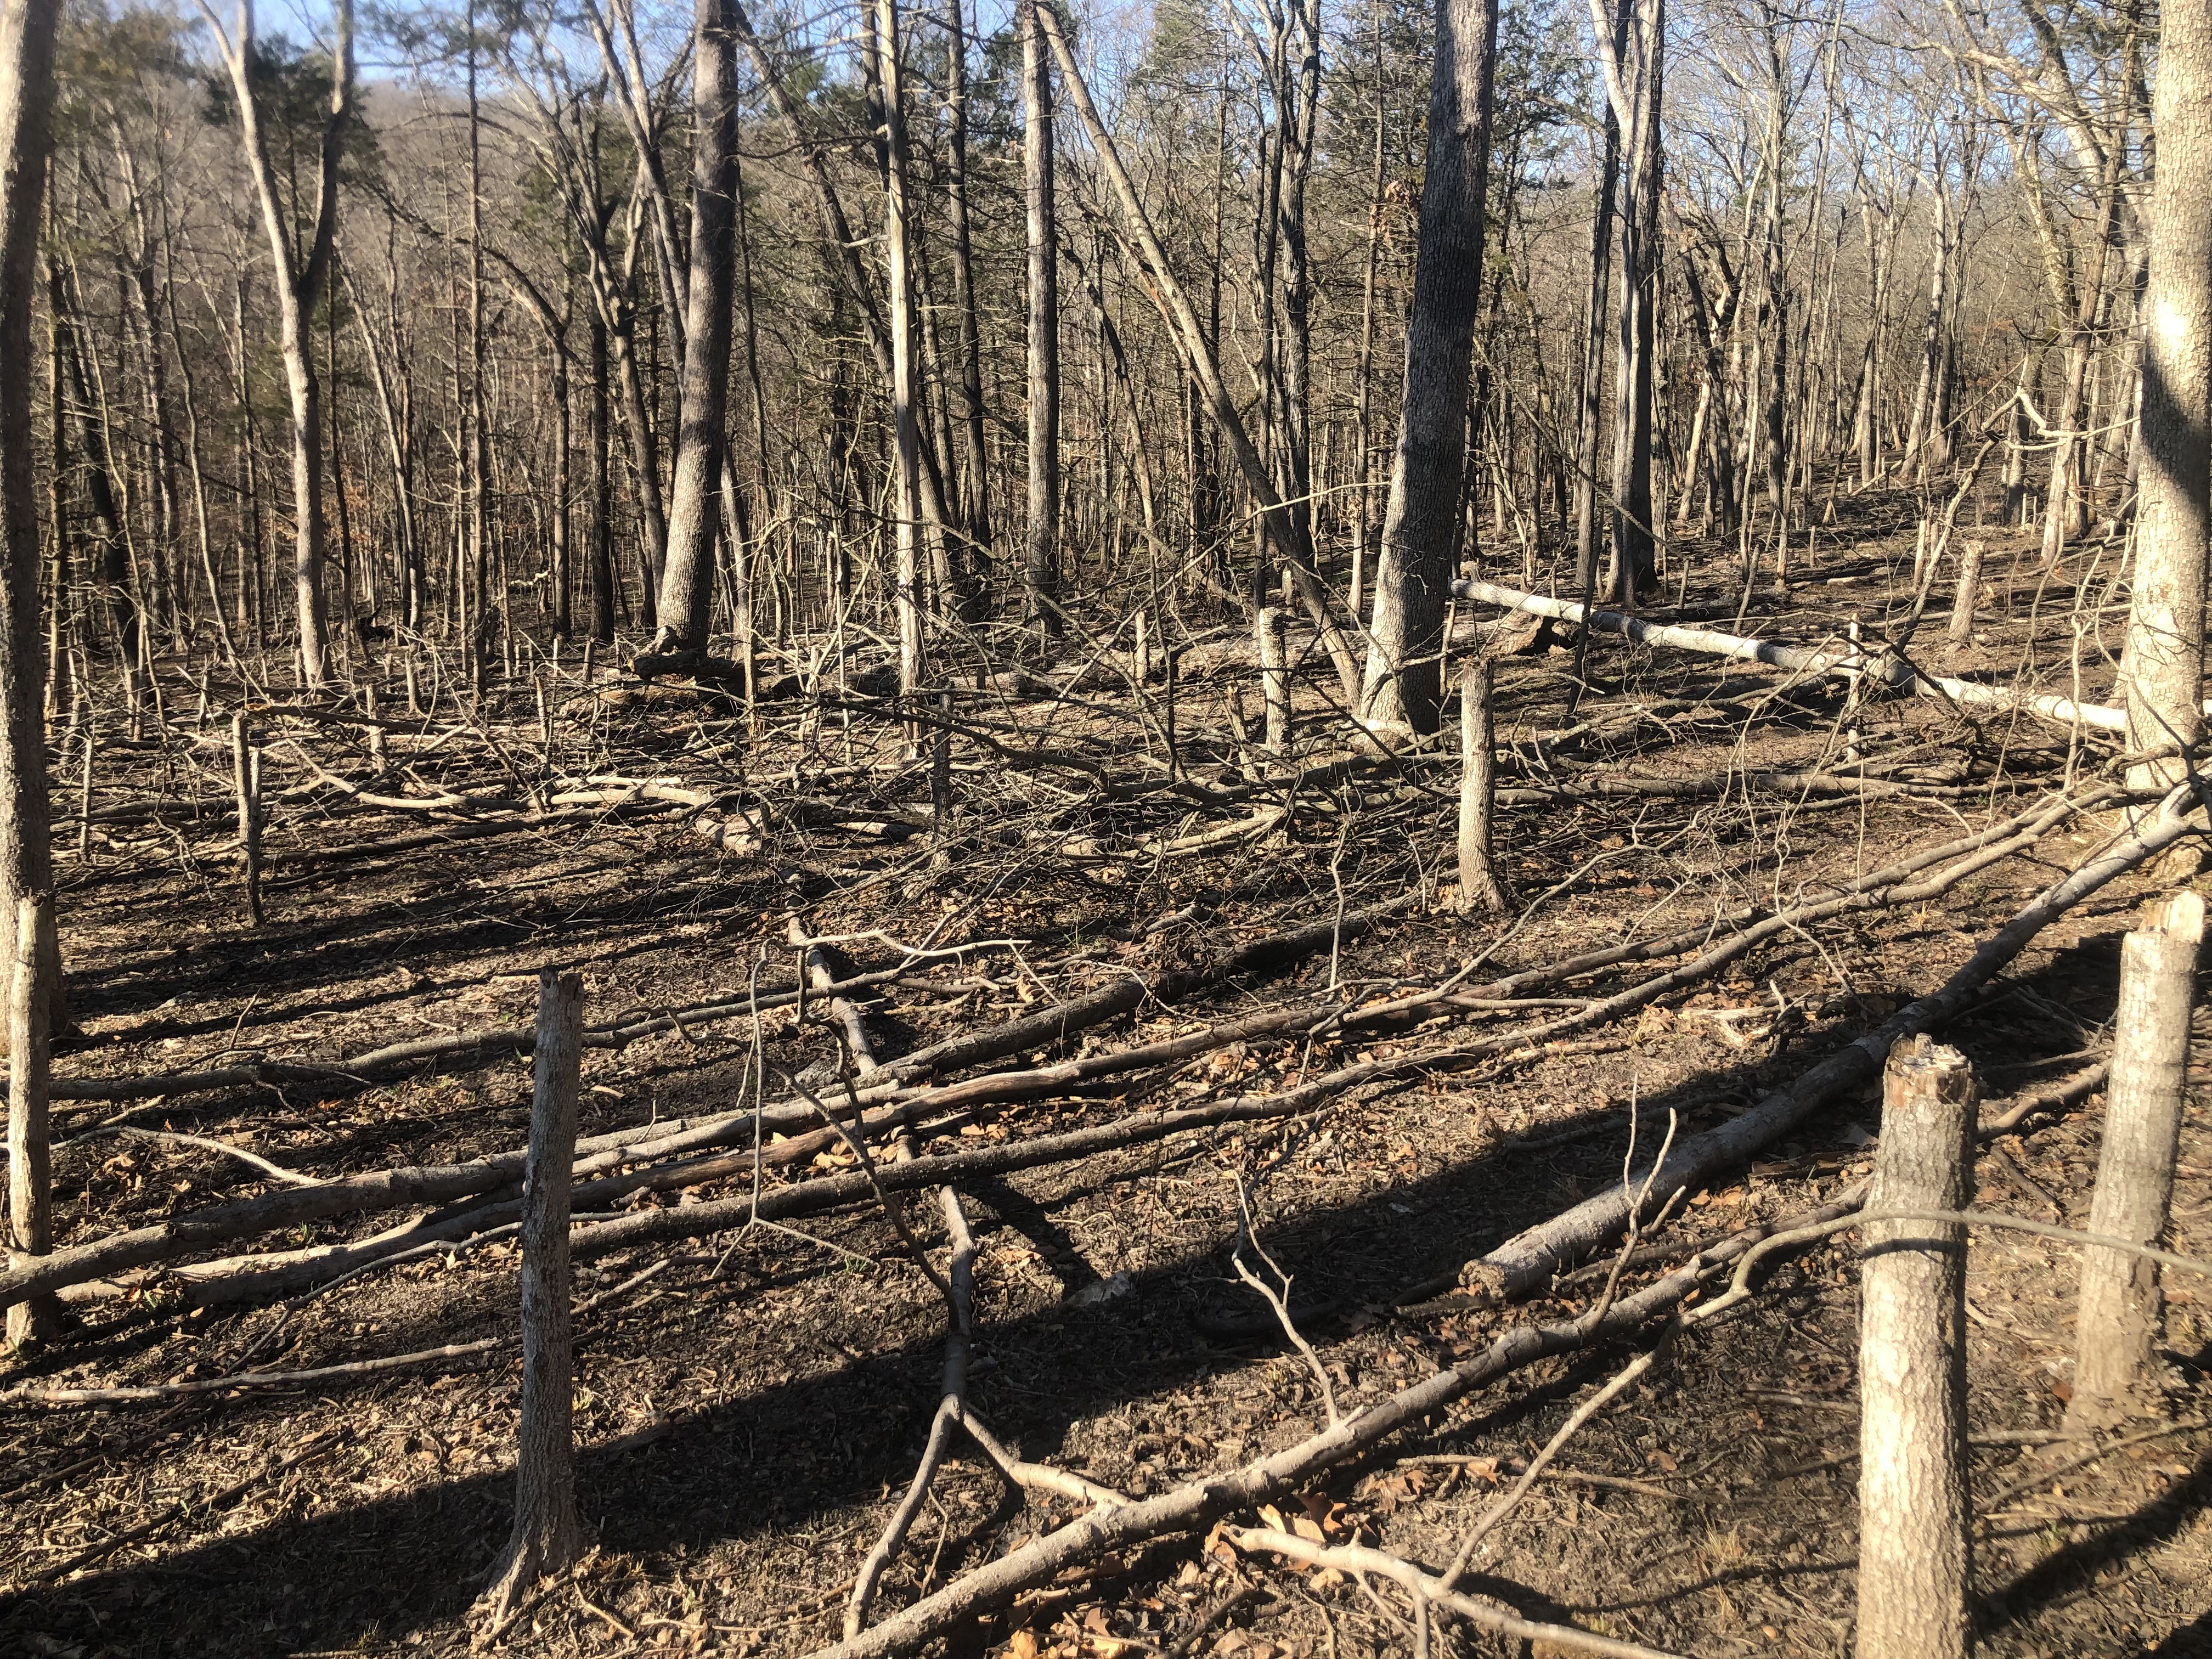
The area pictured above (with glade in the background) was treated in December of 2020. Small trees might require 6 or 7 hatchet strikes. The more thoroughly the tree is frilled, the higher chance the tree dies.
Photo credit to Matt Arndt for the above picture. Matt (contractor here in Missouri – Matt’s Healthy Woods & Wildlife) recommends 1 hatchet strike for each 1 inch in diamter.
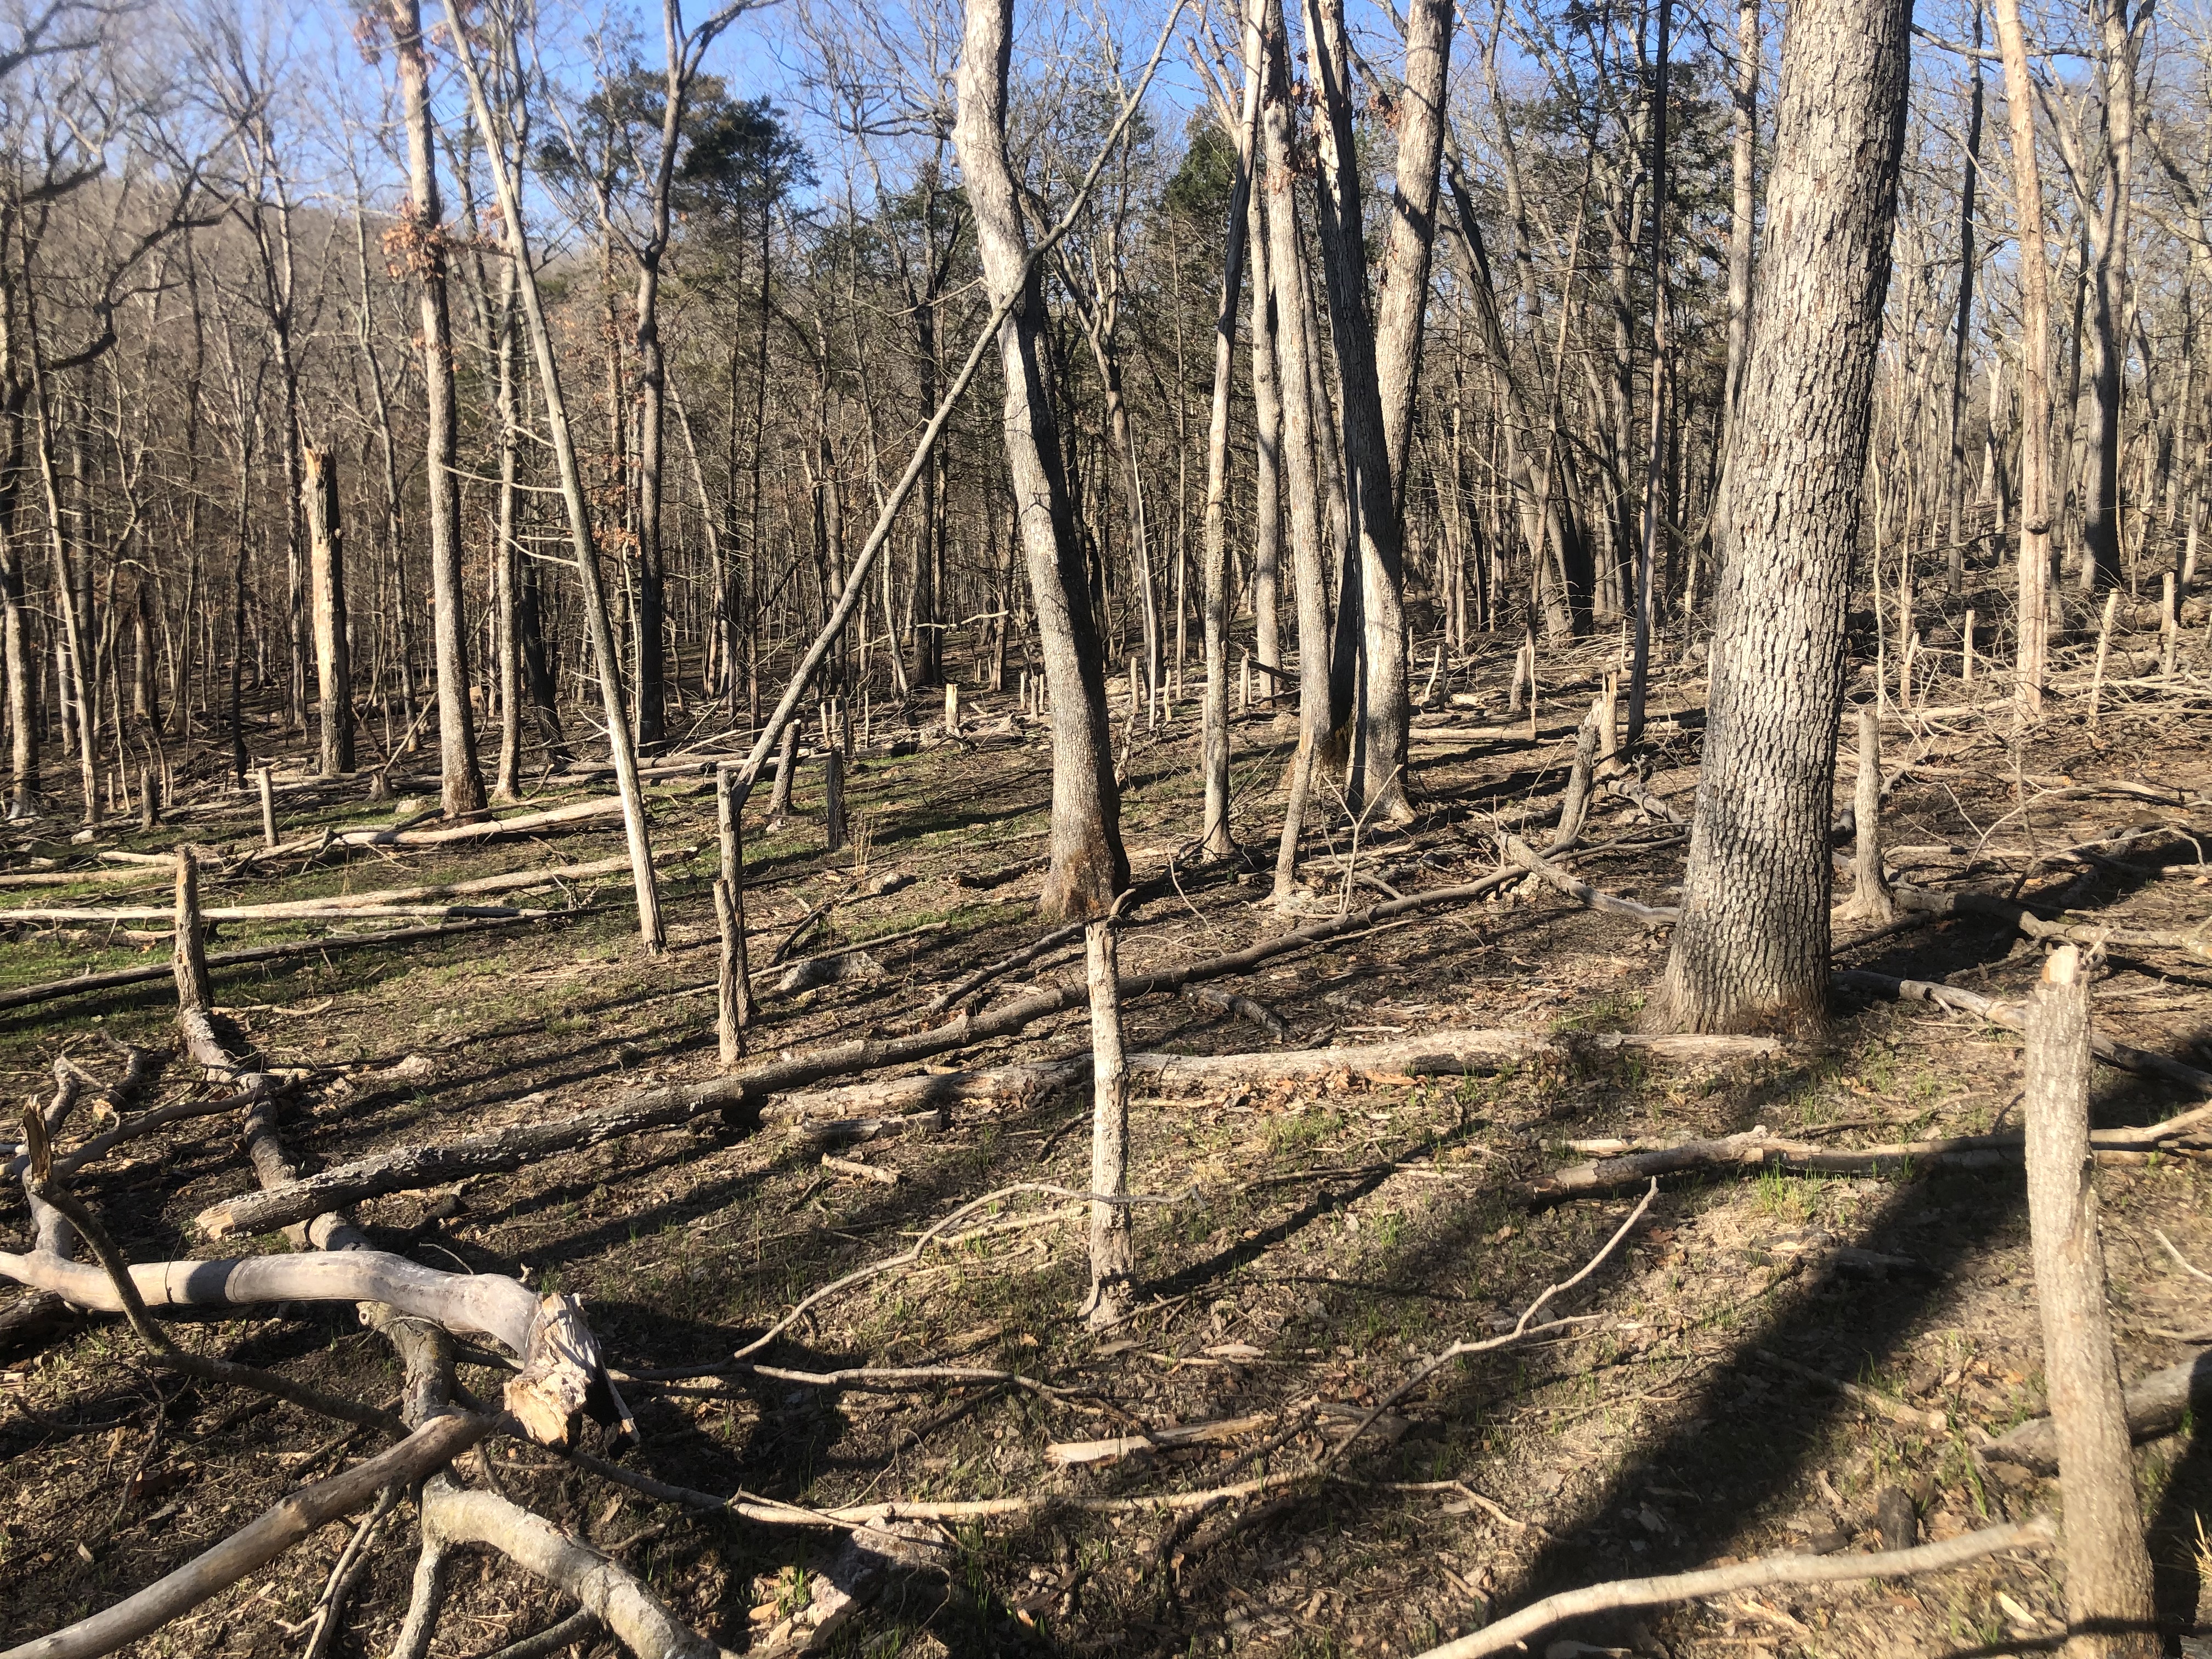
Above – treated in December 2020. Typically, the tree will leaf out poorly the first growing season. It usually won’t leaf out the second growing season. By the third growing season, fine twigs and branches drop. And by the forth growing season, the trees break off at the hatchet marks. In the picture, you can see that fire carried thoroughly through the area. Small diameter trees crumbling over a few years has not led to major fuel loading.
Large diameter trees are tougher to kill and take longer to crumble, but hack and squirt can be effective even in this large size class.
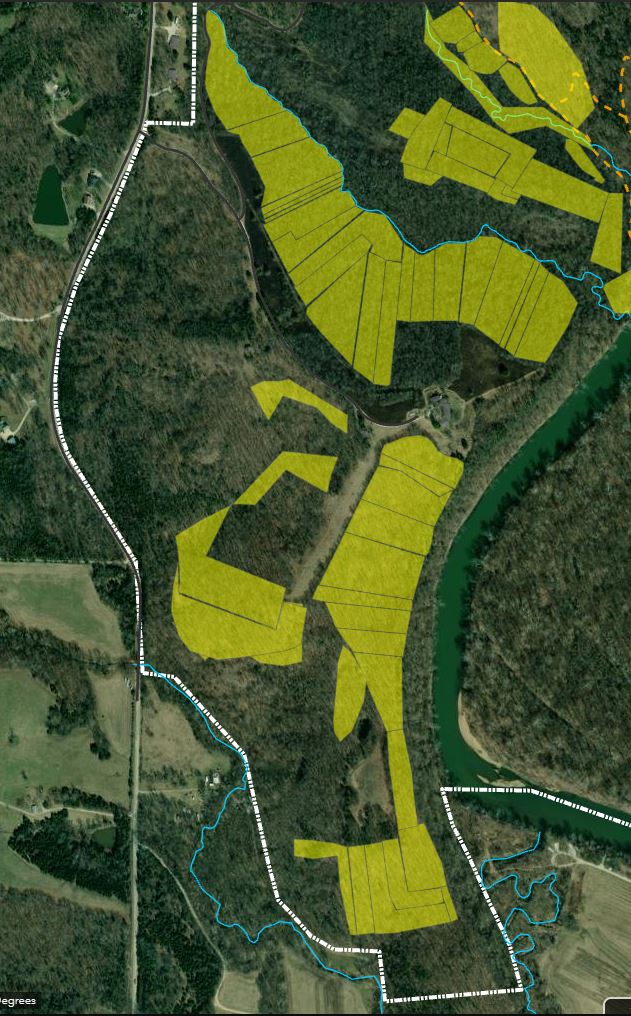
Yellow polygons represent 100 acres of treated acres with 240 staff hours. We targeted , perhaps, 70% of the maples.
This treatment is fast and effective. I like that the trees slowly crumble. I also like that you can make return trips in subsequent years and thin more until you reach your desired outcomes.
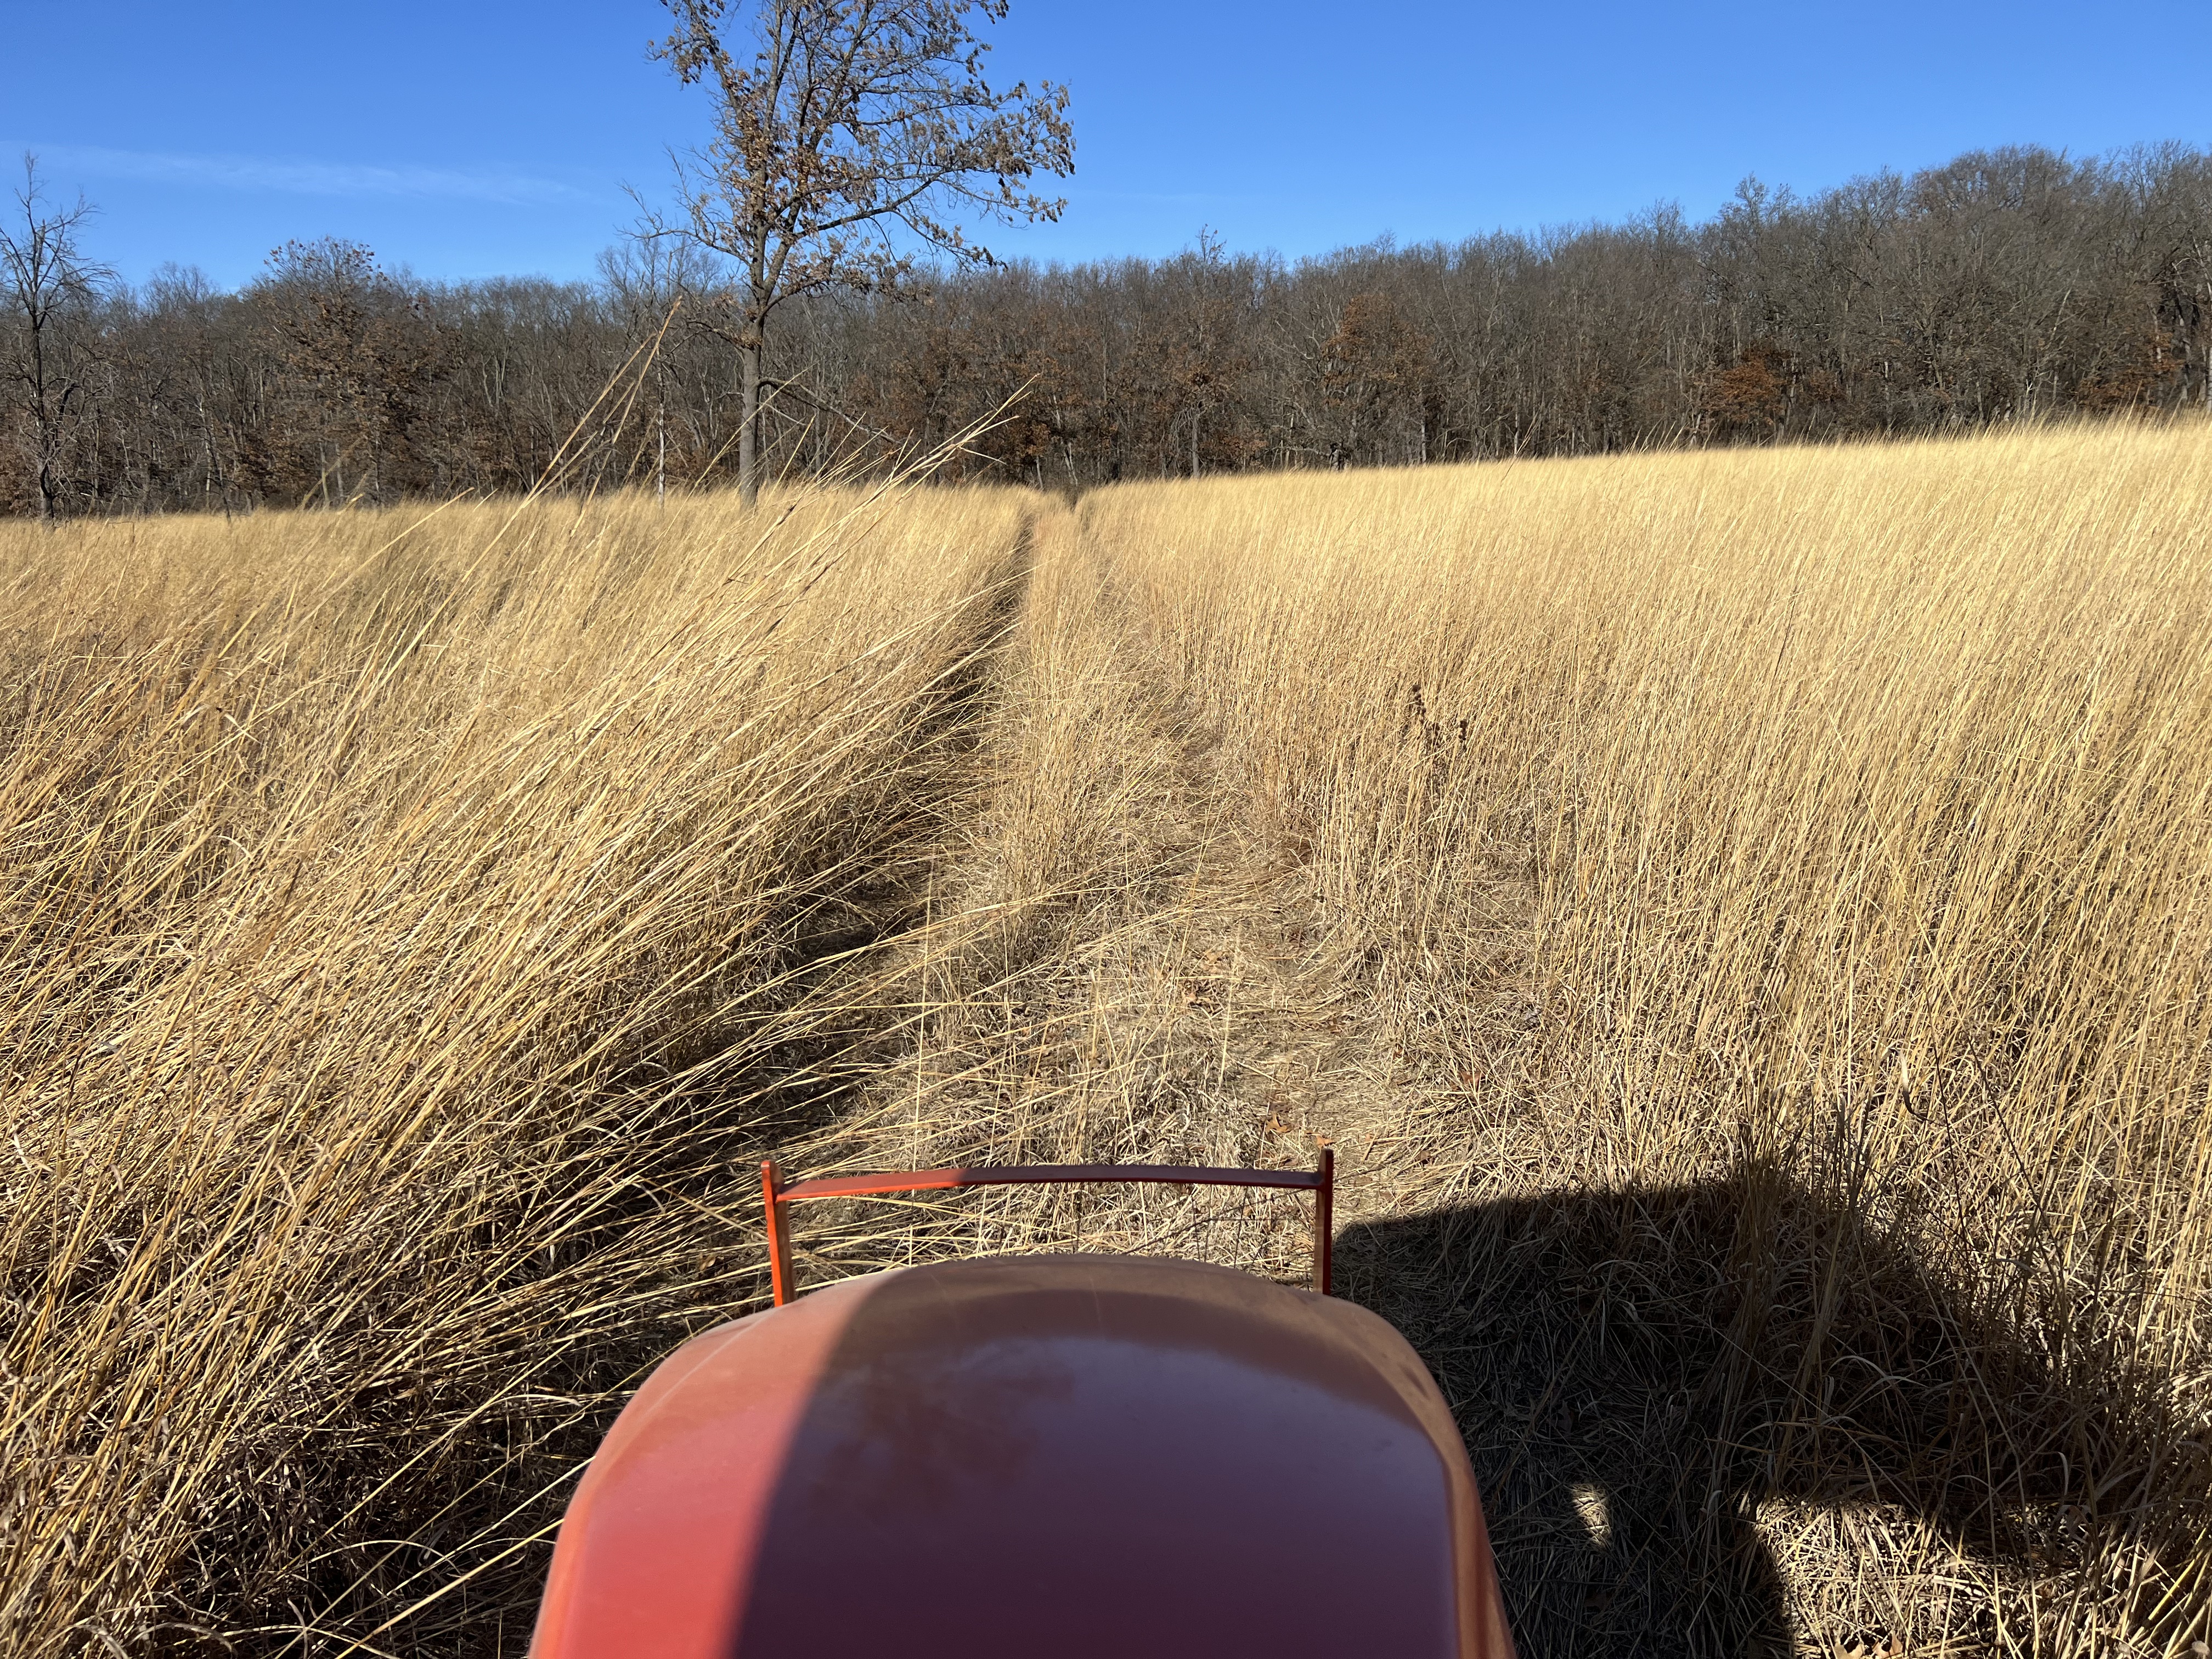
February is not the ideal time for us to prepare fire breaks. Frozen ant mounds are hard to mow. The mowed vegetation does not dry well if you want to rake and blow it. A tractor with no cab makes you shiver. But we were short handed this fall and [insert various excuses]. We try to finish fire break preparation before winter.
Does anyone want to call this a good fire break?
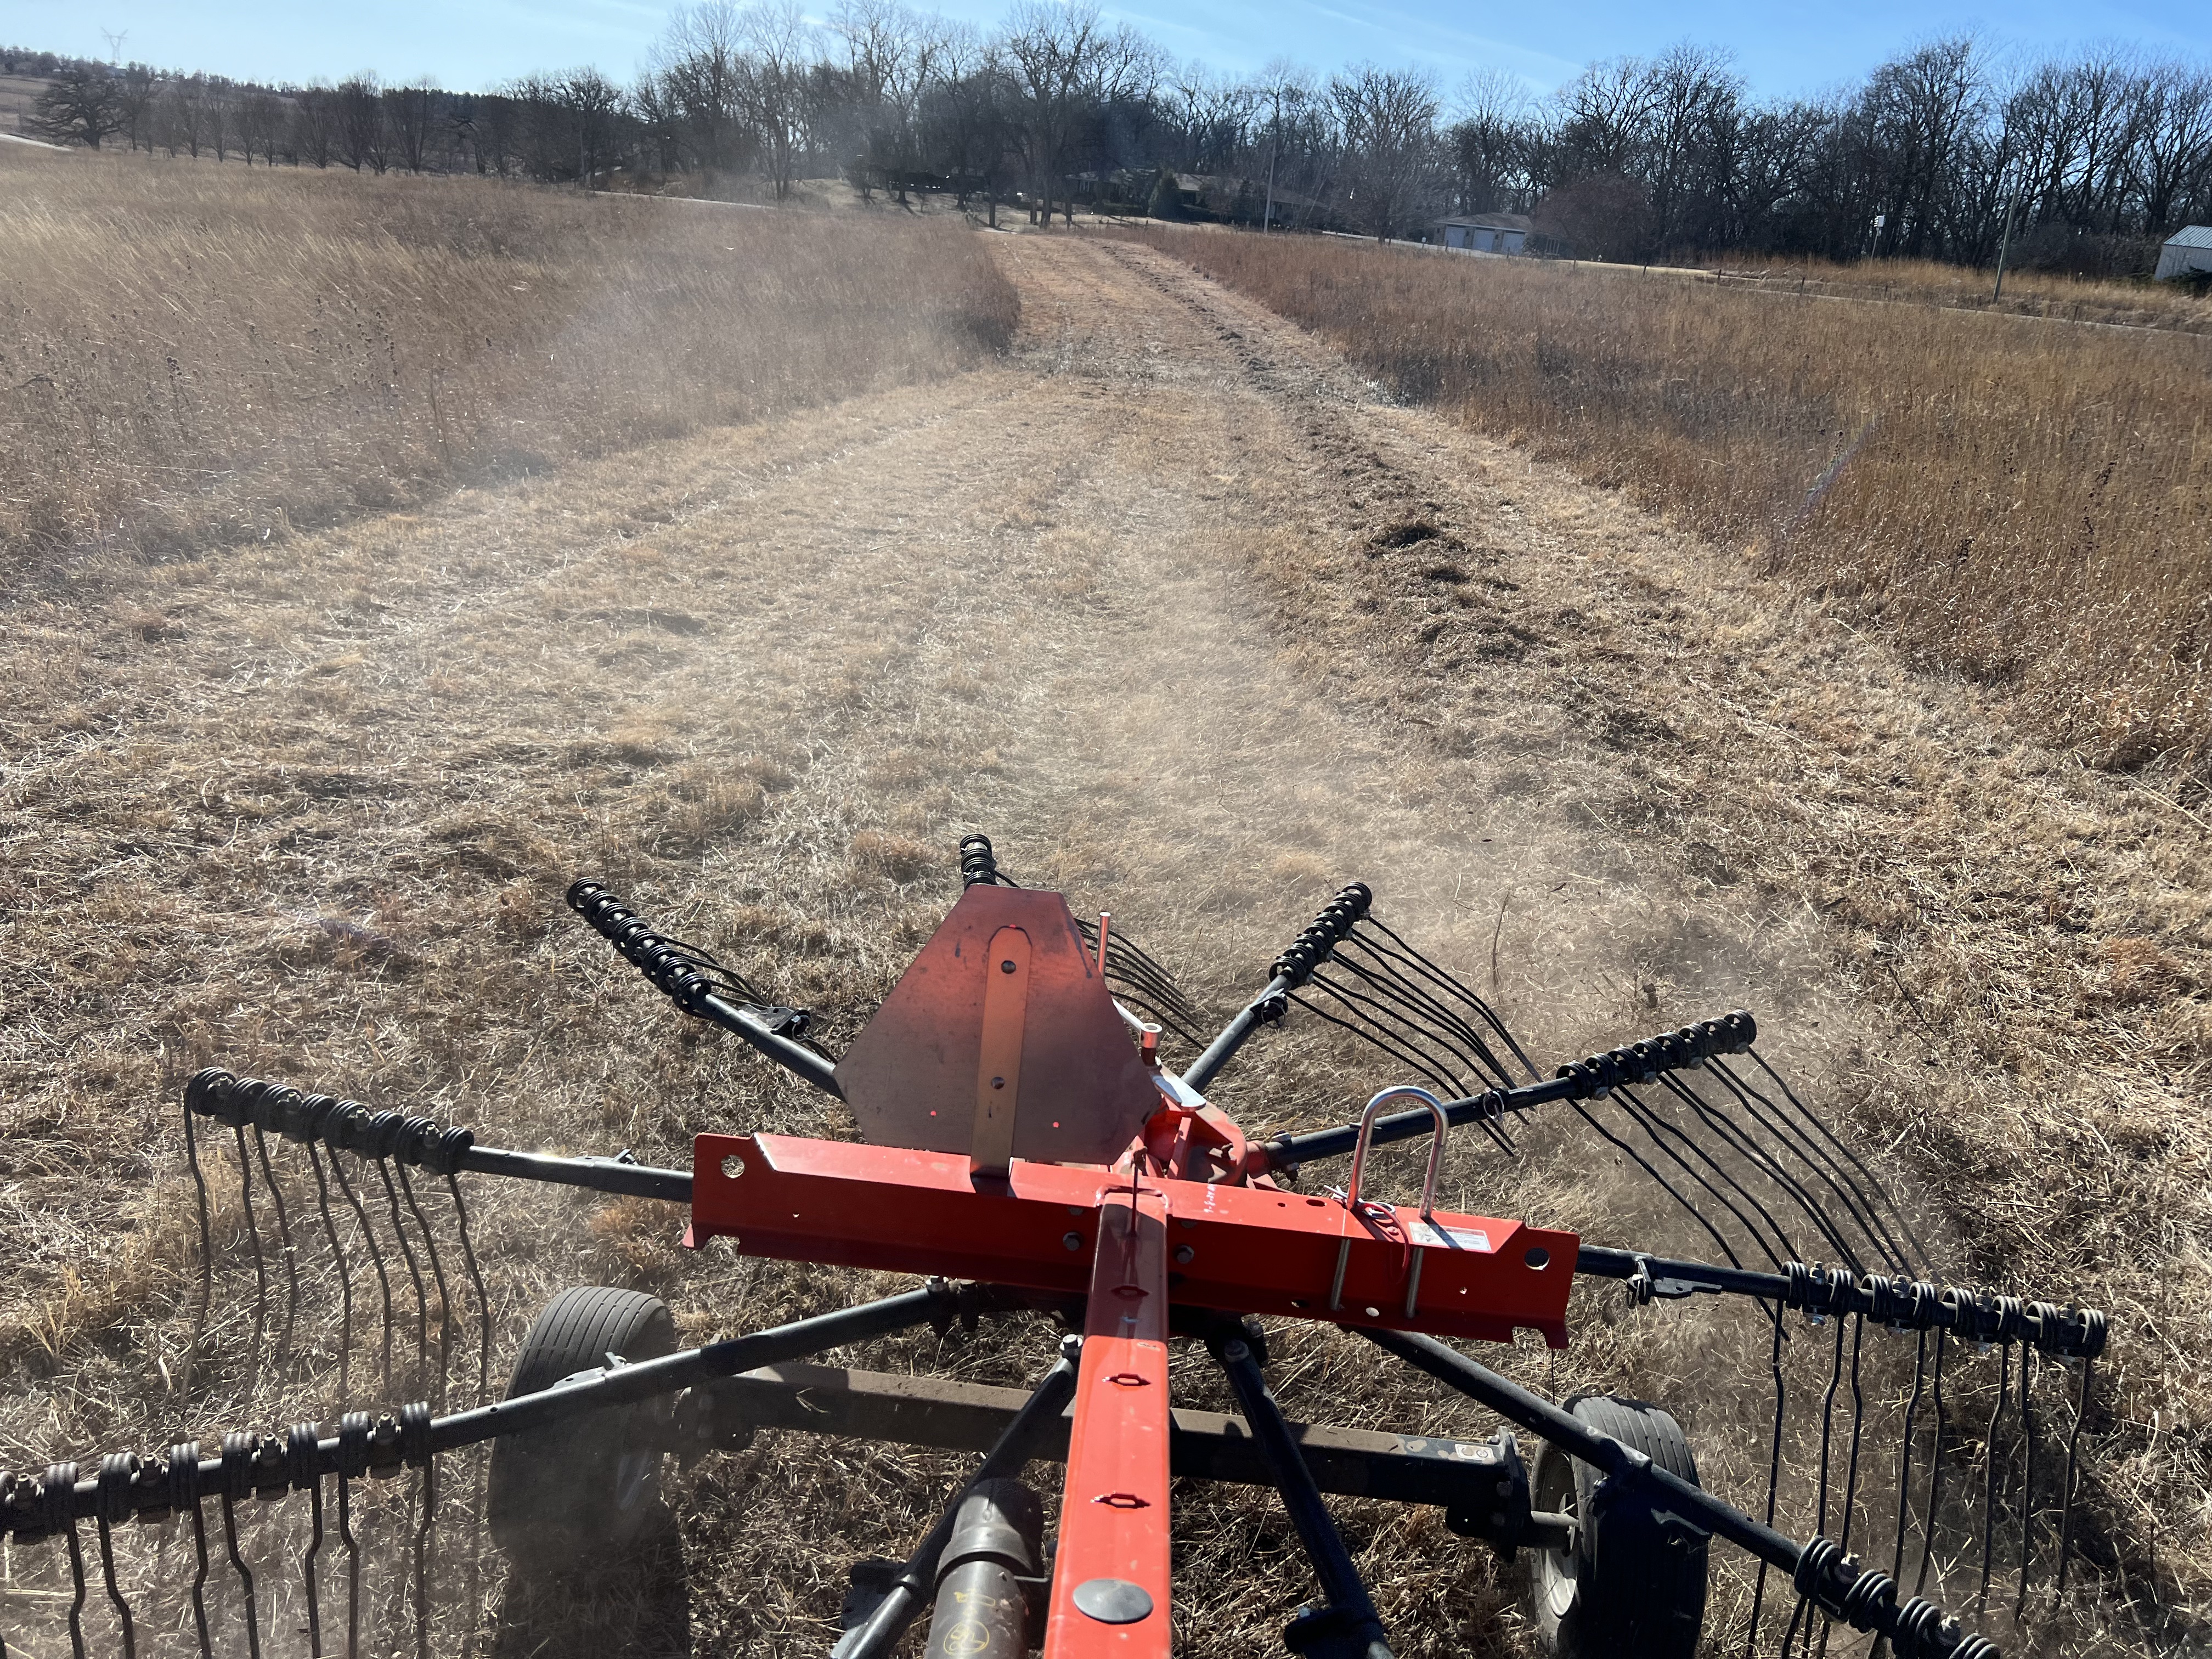
Now that is a fire break. These wide fire breaks look about right when they have fire on one side, smoke streaming across, and your eyes are watering.
Followers of this blog will have seen that Nachusa uses a hay rake to move the mowed veg to one side. Then we use a tractor powered leaf blower to blow the windrows 5 to 10 yards out.
Above is a fire break mowed once there and once back. This section of line is the downwind fire break and there is a meadow adjacent and then further down wind a big oak woods. I want to keep the fire inside the box. So…
I tracked back with a skid loader and made three more passes and had it wide enough. Then I drove the hay rake to this back 40 section and raked the veg to the left side. I can see the windrow there. That day Molly drove by with the leaf blower and the windrows were flying.
These efforts will make the fire day go better. We have tens of miles of fire breaks so we have to use tractors to get the job done. Whatever tools you got, fire breaks make or break you.